Growing onions in containers is a great way to enjoy fresh harvests without digging up your yard. It’s easy, fun, and perfect for urban gardeners. Read on to find out how.
Table of Contents
Best Onion Types for Containers
Some onions thrive in limited space and smaller soil volumes. Choosing the right type helps you get a better harvest and healthier growth in containers.
Bulb, Bunching, and Green Onions
Bulb onions produce a single, large, rounded bulb. These do best when the container is deep and provides room for bulbs to expand.
Bunching onions, also called spring or scallion onions, do not form large bulbs. These grow in clumps with slender stems and can be spaced closely together. Because they mature quickly and tolerate crowding, they fit well into small containers.
Green onions refer to both young bulb onions and true bunching onions. They require less space for root development. If you want consistent harvests and limited fuss, green onions are often the most reliable option for containers.
Short-Day vs. Long-Day Varieties
Onion varieties fall into two groups: short-day and long-day. Short-day onions need about 10-12 hours of daylight to form bulbs. They fit best in southern regions or for those with lower light conditions indoors.
Long-day onions require 14-16 hours of daylight for bulb formation. These suit northern climates with extended summer days. For containers, you can manage the choice based on your local sunlight.
If you only want green onions or scallions, you don’t need to match daylight hours exactly. Daylight length mainly matters if your goal is forming full-size bulbs.
Recommended Varieties for Pots
You should look for compact, early-maturing varieties that adapt well to crowded roots. ‘White Lisbon’ and ‘Evergreen Bunching’ are excellent for green onion harvests.
‘Red Baron’ and ‘Crystal Wax’ do well in smaller containers for bulbs. Many container gardeners pick these for their reliable size and shape.
Choose disease-resistant strains when possible. Healthy varieties reduce risks of failure and allow for dense plantings in limited space. Smaller varieties offer more consistent results in pots than large, late-maturing types.
How to Choose the Right Container
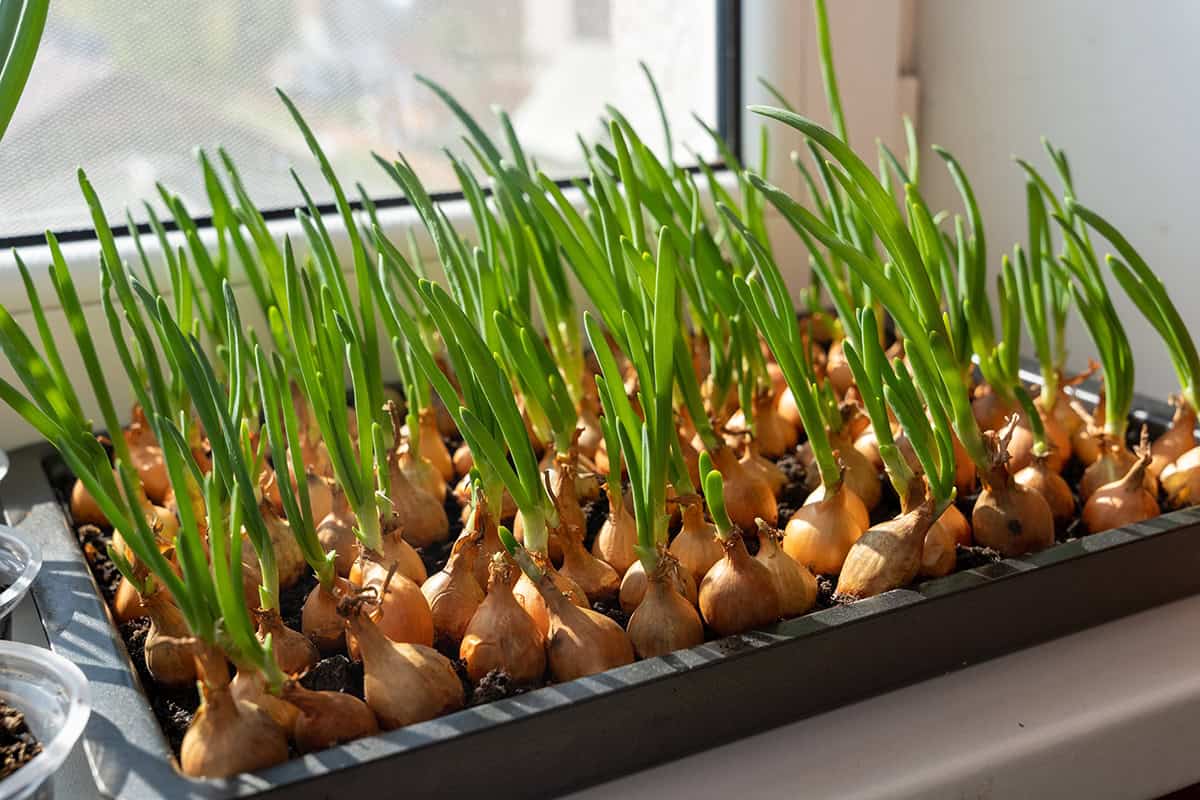
For growing onions in containers, your choice of size and material matters. Onions do best in containers at least 6 inches deep. This gives their shallow roots enough room to spread and take up moisture.
A container with drainage holes prevents water from collecting at the bottom. Too much water around onion roots can lead to rot. Plastic and glazed pots help retain moisture, which is useful if you live in a dry area.
The width of your container depends on how many onions you want to grow. You should allow enough space for each plant to develop bulbs. Spacing onions 2 to 4 inches apart is usually enough for bunching varieties.
Avoid using containers that are too small or shallow. Limited space restricts root growth. Healthy onions need steady access to nutrients and room for roots to move.
Choose a spot with good sunlight for your container. Onions need at least half a day of sun. Indoors, place the container near a sunny window to help your plants grow.
Soil and Fertilizer Needs

You need loose, fertile soil and the right nutrients for healthy onion growth. Container-grown onions require regular care to keep the soil productive.
Best Potting Mix for Onions
Choose a well-draining potting mix with a high content of organic matter. Onions do not tolerate waterlogged roots. The mix should hold moisture but not stay soggy.
Look for a blend that contains compost or peat moss with some perlite or coarse sand. This creates air gaps that benefit onion roots. Avoid garden soil because it compacts too easily in containers.
If possible, pick a sterile commercial mix designed for vegetables. That limits the risk of disease and weeds. You can add extra compost before planting onions for more nutrients.
How to Enrich Soil for Strong Growth
Add slow-release fertilizer to your mix before planting. Onions need both nitrogen and phosphorus to grow large bulbs and thick green tops.
Mix a balanced fertilizer such as 10-10-10 or 8-8-8 into the top few inches of your container soil. A starter solution works well if transplanting. Repeat light feeding every few weeks, especially once bulbs begin forming.
Work aged manure or extra compost into the soil in early spring for a nutrient boost if you prefer organic methods. Avoid fresh manure, which can burn the roots. Keep the soil evenly moist, as onion roots are shallow and sensitive to drying out.
How to Plant Onions in Containers
Growing onions in containers requires the right type of onion, proper spacing, correct planting depth, and thorough watering. Each step plays a crucial role in ensuring healthy growth and a good harvest.
Planting Seeds vs. Sets vs. Transplants
You can plant onions using seeds, sets, or transplants. Each option comes with distinct benefits and drawbacks. Onion seeds offer the widest range of varieties and allow you to control all stages of growth. However, they need a longer time to establish.
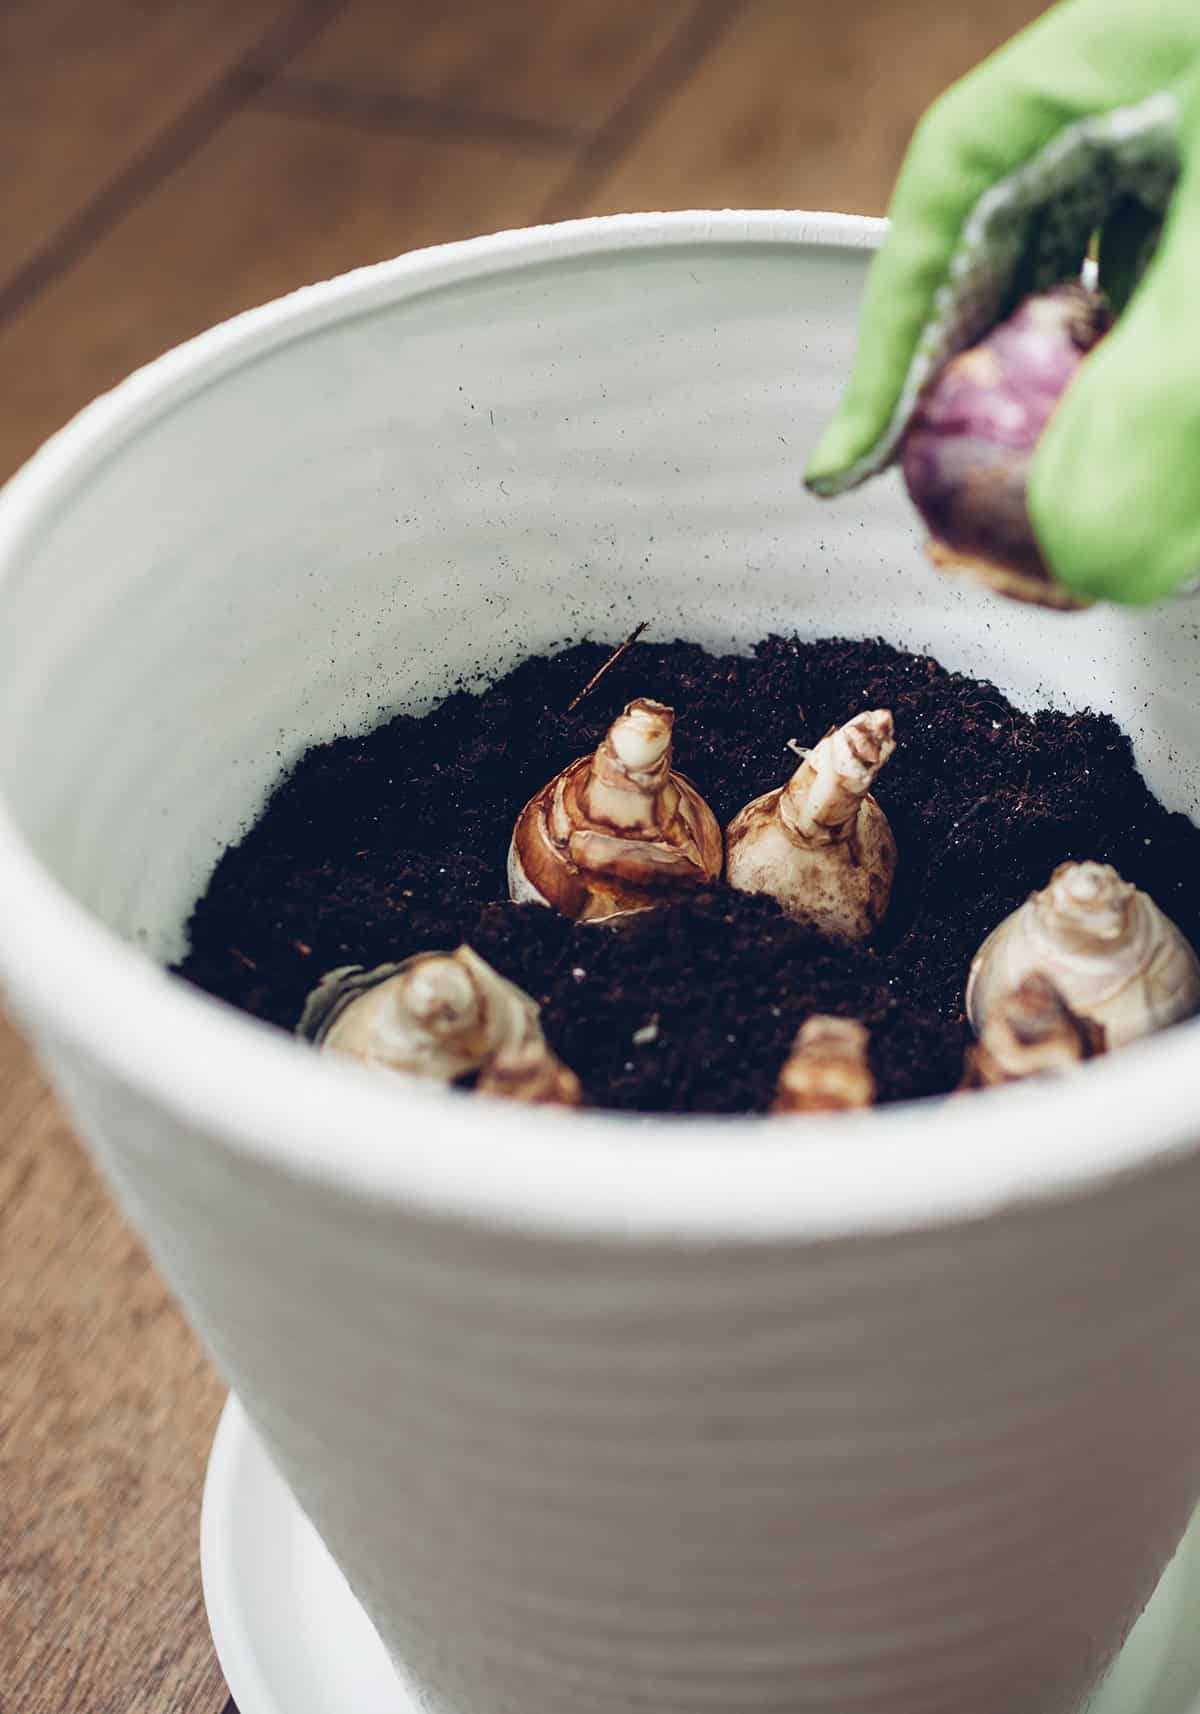
Onion sets are small, immature bulbs. They are easier for beginners and sprout quickly in containers. They shorten the time to harvest, but are often limited in variety and may bolt sooner.
Transplants sit between seeds and sets. They are young onion plants started elsewhere and then moved to your container. Transplants adapt well and offer a balance between time and choice of variety.
Choose seeds for more variety and a longer season. Sets work best for quick results. Transplants offer a happy medium. Base your decision on local climate and growing goals.
Spacing and Planting Depth
Proper spacing matters when you plant onions in containers. Place each seed, set, or transplant 2 to 4 inches apart. This gives bulbs enough room to expand without competition.
Seeds should be placed about 1/4 inch deep. If using sets, plant them with the pointed tip just below the soil, about 1 inch deep. Transplants should be set at the same depth as their root ball or slightly deeper.
A container should be at least 6 inches deep. This allows for strong root growth. Deeper containers also help keep onions from drying out and ensure healthy bulbs form. Firm the soil gently around each onion.
Watering After Planting
After planting, you need to water thoroughly. This helps settle the soil around onion roots and removes air pockets. It gives your onions a good start.
Keep the soil evenly moist but not waterlogged. Onions have shallow roots, so the top few inches of soil should never dry out. Check moisture often because containers lose water faster than garden beds.
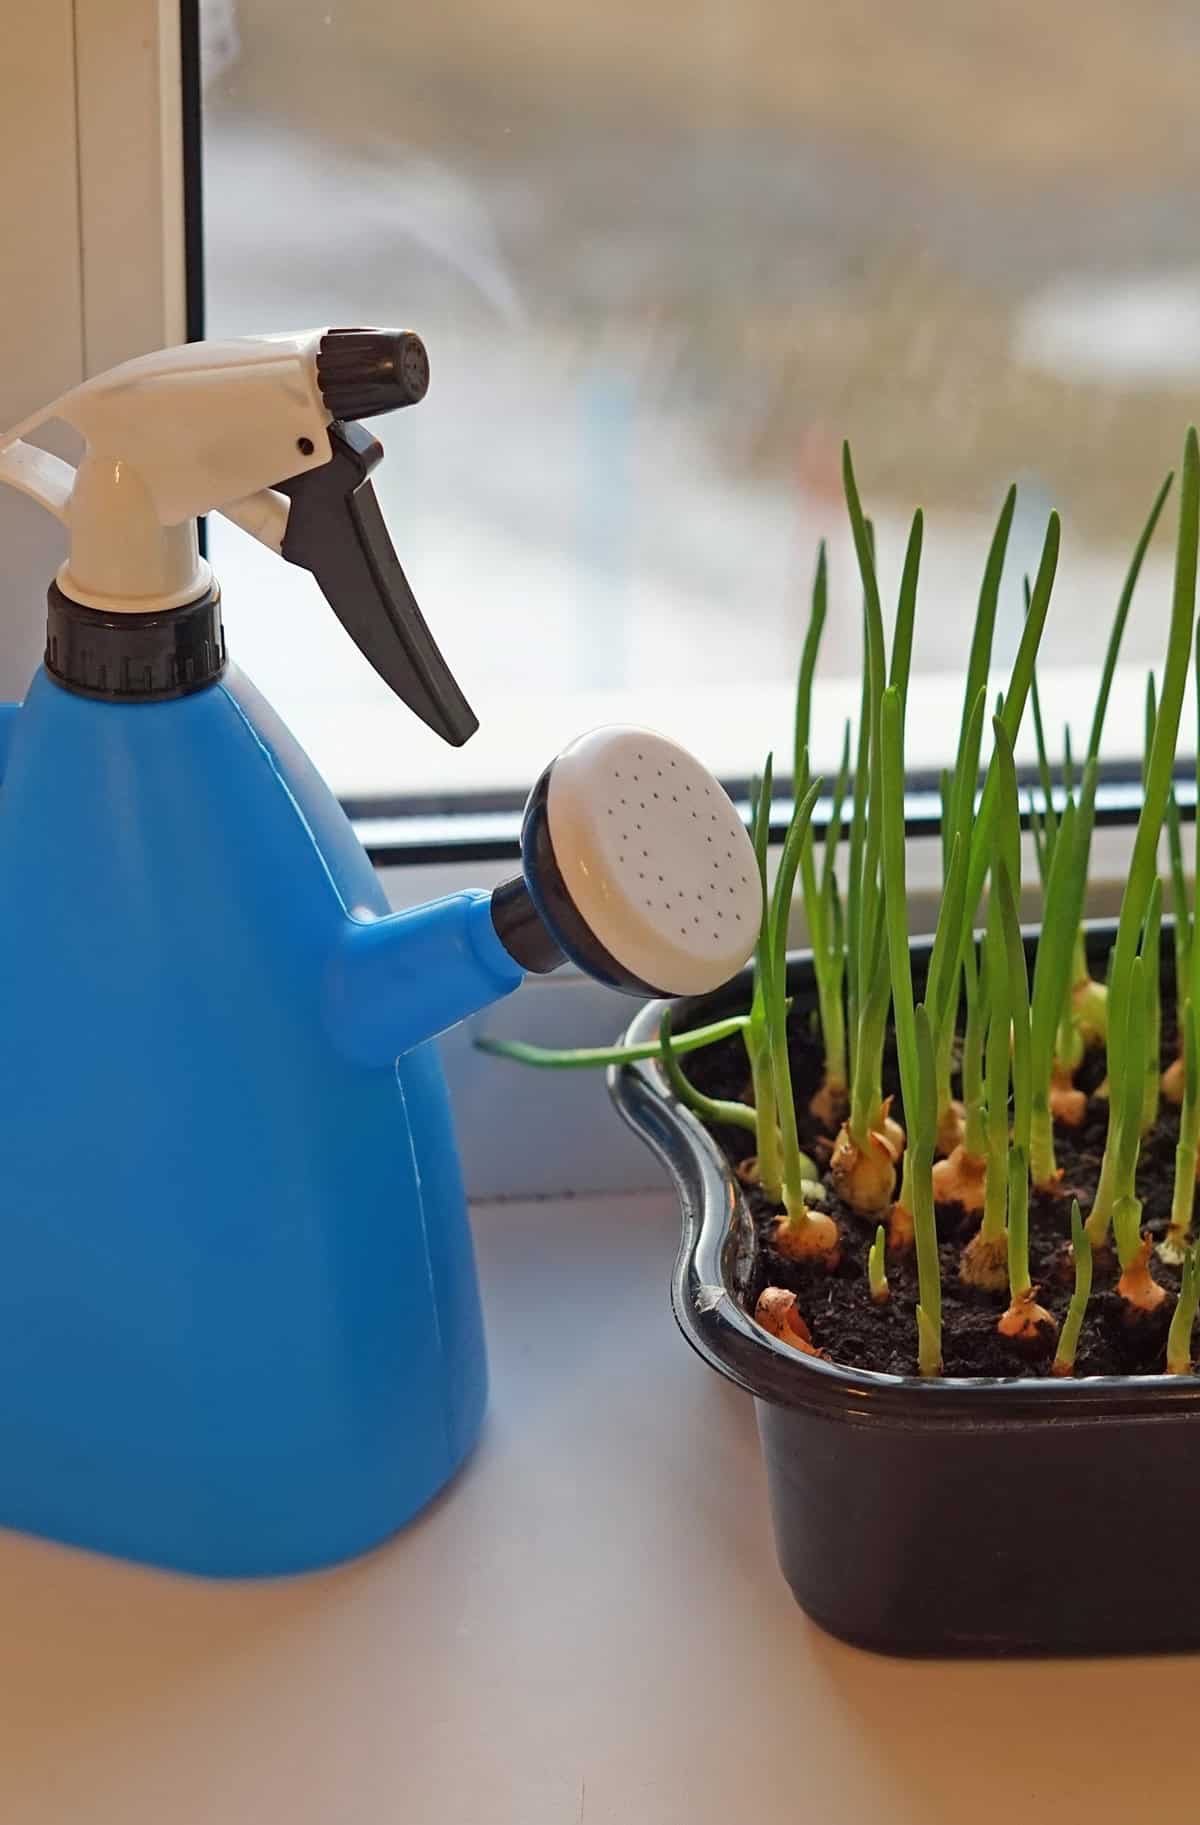
Water at the base of your onions rather than overhead. This reduces the chance of fungal diseases and helps the roots absorb moisture best. If you grow onions indoors, monitor humidity and drying carefully. Regular, consistent watering leads to healthy growth.
Caring for Container-Grown Onions
Container onions need steady attention to water, nutrients, and light. The right care helps bulbs develop well and reduces common setbacks like slow growth or disease.
Watering Schedule and Moisture Control
You must keep the soil moist but not soggy. Onion roots stay shallow and dry out fast, especially in containers. Water deeply whenever the top inch feels dry.
Onions grown in pots need more regular watering than those in garden beds. Heat and wind can dry out container soil quickly. Use your finger to check the moisture often.
Too much water can cause rot, but not enough leads to thin bulbs. Make sure the pot has drainage holes. Self-watering containers can help maintain steady soil moisture.
Try not to splash water on the leaves. Wet foliage increases the risk of fungal diseases. Water at the base only.
Feeding During Growth
Onions benefit from extra feeding throughout the growing season. They need nitrogen-rich fertilizer during early leaf growth. Spread a balanced liquid fertilizer every two weeks. Stop adding nitrogen once bulbs begin swelling to encourage bulb formation over leaf growth.
If leaves turn pale or stop growing, consider feeding more. Use a fertilizer designed for vegetables to supply all the required nutrients. Always follow the product instructions to avoid burning young roots.
Don’t apply fertilizer onto dry soil. Water first to reduce stress on the plants. Compost can be mixed into the top layer of soil for slow release of nutrients.
Sunlight and Temperature Needs
Expose onion containers to full sun for six or more hours daily. Lack of light will slow bulb development and produce weak stems. If growing indoors, use a bright south-facing window or supplement with a grow light.
Onions prefer cooler temperatures to start. Young plants thrive when daytime temperatures range from 55°F to 75°F. In extreme heat, consider moving containers to light shade during peak afternoon hours.
Avoid cold drafts and rapidly shifting temperatures, which can damage seedlings. Stable conditions support even and healthy growth, giving you sturdy bulbs by harvest.
Common Problems to Watch For
Growing onions in containers brings several challenges. You can avoid poor harvests by paying attention to water habits, checking for pests and diseases, and noticing leaf color or growth changes.
Overwatering and Rot
Waterlogged soil harms container onions. Onion roots need oxygen, so soggy conditions cause rot. You might notice soft bulbs or a foul smell developing in wet soil.
Allow the soil to dry slightly between watering. Make sure your container drains well. Water only when the top inch of soil feels dry.
Yellow, wilted foliage often means too much moisture. Remove affected onions promptly. Mulch can help retain moisture but never use too much. Avoid letting containers sit in saucers filled with water.
Check soil moisture by sticking your finger into the soil. Avoid automatic watering without checking first. Onions cannot recover from severe rot, but catching the issue early limits loss.
Pests and Fungal Issues
In containers, pests like thrips and onion maggots can appear. Thrips cause silvery streaks on onion leaves and sap the plant’s strength. You may find maggots tunneling inside bulbs, leading to decay.
Fungal diseases like downy mildew or neck rot show as fuzzy coatings or sunken, dark areas. These problems spread fast in humid conditions or when containers get crowded.
Keep plants spaced apart. Remove weeds, as they often shelter pests. If you see signs of a problem, remove affected leaves and use insecticidal soap for minor pests. Avoid watering from above to limit fungal issues.
Monitor plants weekly. Damaged plants show slowed growth, twisted leaves, or mushy spots. Catching symptoms early makes treatment easier.
Signs of Nutrient Deficiency
Onions in containers use up nutrients quickly. You will notice pale leaves, sluggish growth, or tip burn if soil lacks nitrogen or potassium. Poor soil or skipped feeding can cause these symptoms.
Leaf tips may turn yellow or brown. Sometimes bulbs stay small despite good care. Use a balanced fertilizer every few weeks, especially in lightweight potting mixes.
If color fades or leaves narrow, try a half-strength liquid feed. Avoid overfeeding, as onions dislike excess salts. Regular but gentle feeding encourages bigger bulbs and steady, green leaf growth.
Test your soil or replace the mix each season to prevent ongoing issues. Watch for improvement within a week of correcting deficiencies.
When and How to Harvest Onions
You want healthy, flavorful onions at their peak. Knowing when to pick and the best way to handle them helps you store them longer and get the best taste.
Signs They’re Ready to Pick
Onion bulbs show clear signs as harvest time approaches. The most reliable sign is when half or more of the green tops turn yellow or fall over. This means the plants stop growing and focus all energy into the bulbs.
A dried “neck” where the top attaches to the bulb is also an important clue. That part needs to be papery and limp, not thick or juicy. The coats around the bulbs should take on a dry, papery texture. Leaving them for a couple of extra days after the tops fall can help with curing, but do not wait too long. Too much delay can lead to rot or pest issues.
Harvesting Green vs. Bulb Onions
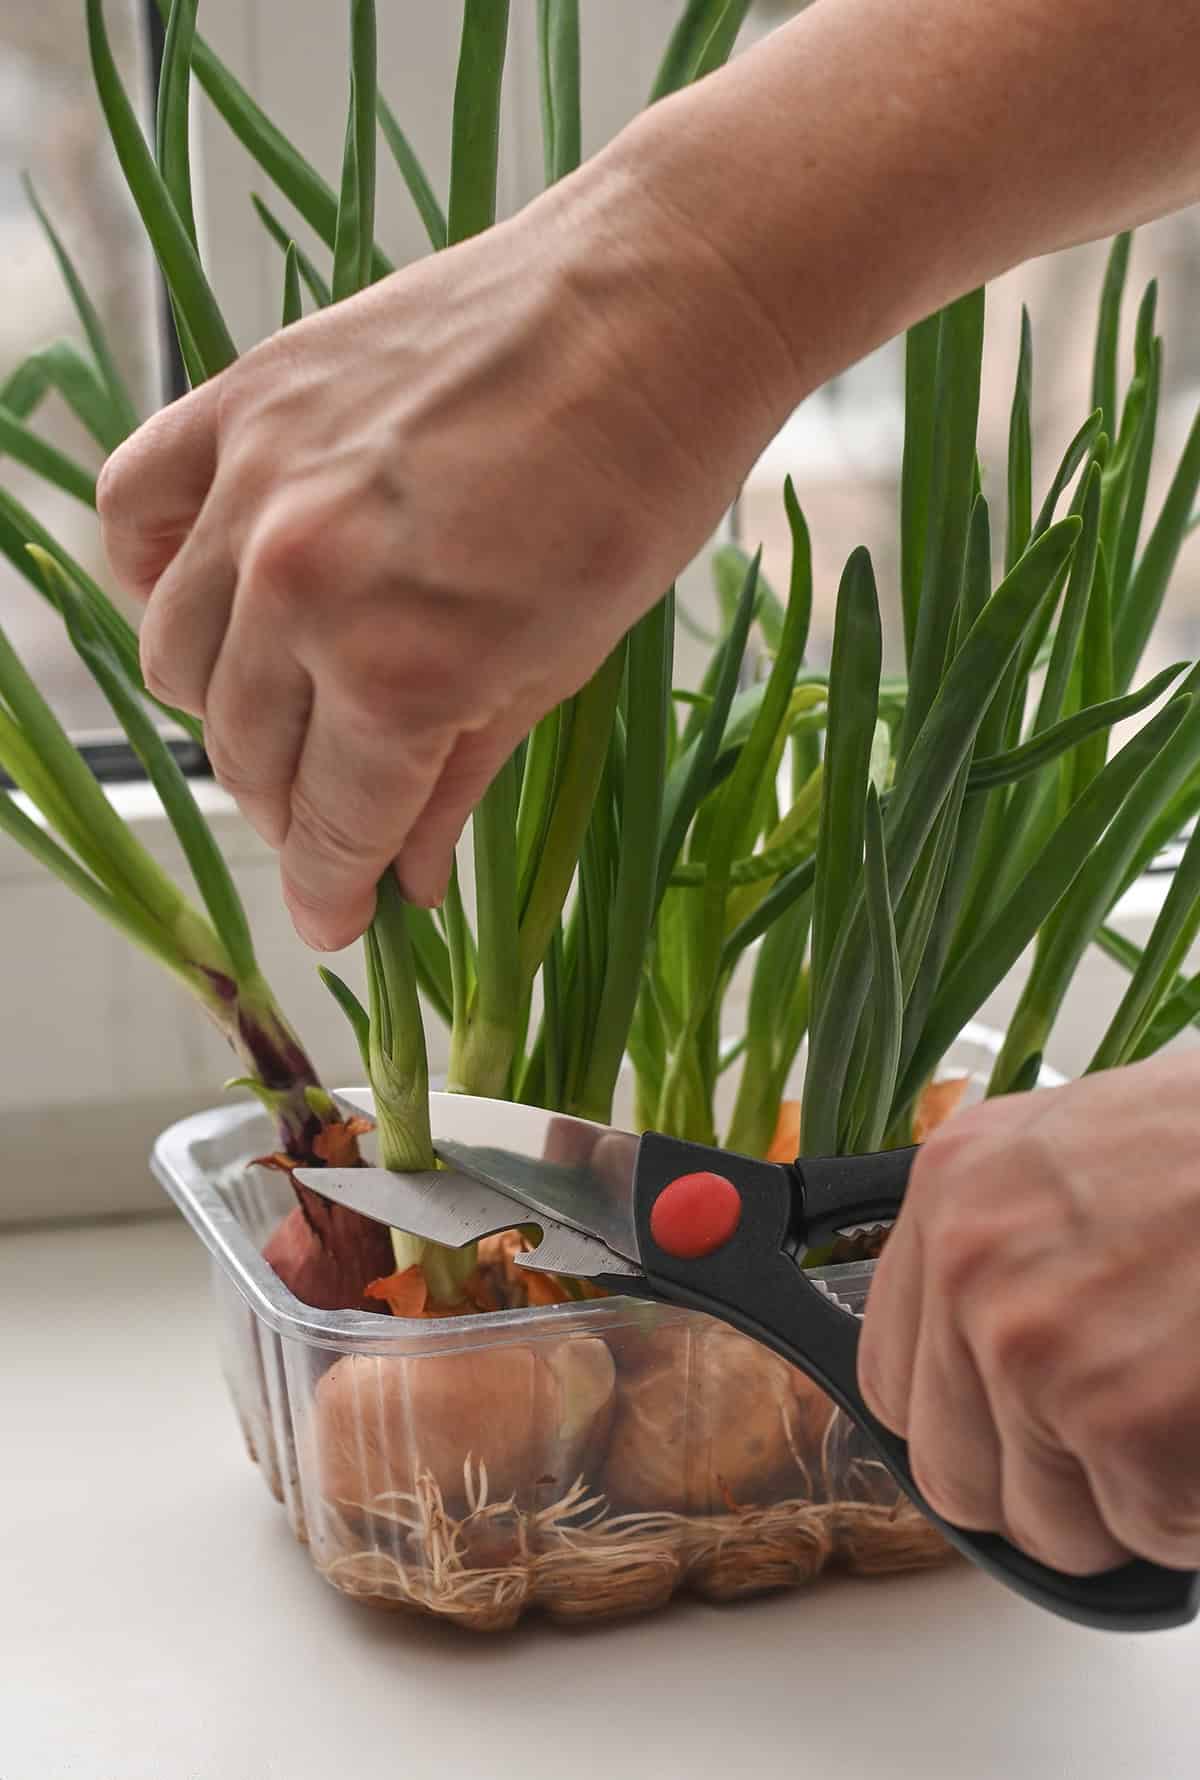
Green onions, also called scallions, are ready sooner. You can pull them when they reach about six to eight inches tall and are pencil-thick. These need no special timing with the tops.
With bulb onions, wait for the tops to fall as described above. Use a hand fork or trowel to loosen the soil, then gently pull the bulbs. Avoid injuring the skins. Place them out of direct sun after picking to prevent sunscald.
If rain is coming, move onions indoors to avoid wet bulbs, as excess moisture causes rot. Only harvest dry bulbs for the best storage results. Handle your onions with care to prevent bruising.
Curing and Storage Tips
Curing onions extends their storage life and improves flavor. Lay bulbs in a single layer on a dry surface in a space with good ventilation. A shed, garage, or covered porch works well. Keep the bulbs out of bright sunlight.
Curing takes two to three weeks. The skins must dry fully, and the necks should shrink and feel crisp. When cured, trim the roots and tops to about an inch above the bulb. Store your onions in a cool, dry, and well-ventilated area. Mesh bags, crates, or slatted boxes keep air moving and prevent mold. Avoid storing onions near potatoes because this can lower quality.