
You’re walking through your garden and spot your favorite hydrangea in full bloom, wishing you could have more of these gorgeous flowers around your yard. Propagating hydrangeas from cuttings is a simple and rewarding way to multiply your plants without any extra cost. Here are a few easy steps to propagate hydrangeas to fill your garden with vibrant hydrangeas.
Table of Contents
Best Time for Propagating Hydrangeas
The best time for propagating hydrangeas depends on the type of hydrangea and the method you choose.
For most hydrangeas, early summer is ideal for propagation by cuttings. Hydrangeas are actively growing during this period, which helps the cuttings root successfully. You should avoid late summer or fall since new roots might not be established before the frost.
If you are layering hydrangeas, the timing can be slightly different. Late spring to early summer works well for this method. This gives the layered branches enough time to root and establish before the colder months set in.
Hydrangeas that bloom on old wood, such as some spring-flowering varieties, should be propagated earlier in the season. This ensures that new plants have enough time to develop before the blooming period.
The table below outlines the best times for different methods:
| Propagation Method | Best Time |
|---|---|
| Cuttings | Early summer |
| Layering | Late spring to early summer |
| Old wood bloomers | Early in the growing season |
Preparing for Propagation
Proper preparation is key to successfully propagating hydrangeas. This method involves selecting a healthy mother plant and gathering essential supplies.
Selecting a Mother Plant
Choose a healthy and mature hydrangea for propagation. Ensure it has vibrant, disease-free foliage and robust branches. Avoid plants that appear weak or stressed, as they may not root well.
Inspect the plant for any signs of pests or diseases. Healthy plants show no signs of wilting or discoloration and have strong stems. Select a hydrangea that has produced blooms in the past, indicating its viability.
You can choose different hydrangea varieties like bigleaf or panicle, depending on your preference. Each variety offers unique benefits and challenges. For example, French Hydrangeas are popular for their large blooms and mounding shape.
Gathering Supplies
Gather the necessary supplies to ensure a smooth propagation process. You will need clean, sharp pruning shears to take cuttings from the mother plant. This reduces the risk of damaging the plant or spreading diseases.
Prepare a clean pot or container filled with a mix of peat moss and perlite. This ensures good drainage and aeration for the cuttings. You may also need rooting hormone to encourage faster root development. Follow the instructions on the product for best results.
Keep a misting bottle handy to keep the cuttings moist during the rooting process. You’ll also need plastic bags or domes to create a humid environment that promotes rooting. Ensure all tools are sanitized to prevent contamination.
Propagation Techniques
Propagating hydrangeas can be achieved through several methods, each with its own steps and advantages.
Layering Method
Layering involves bending a low branch of the hydrangea plant to the ground and covering it with soil. This method encourages root development at the point where the branch is buried. Ensure the branch remains stable in the soil. Use a small rock or peg to hold it in place. Water the buried section regularly to keep the soil moist.
Roots will typically form in a few months. Once a strong root system has developed, the newly rooted section can be cut from the original plant and transplanted. Layering offers the advantage of growing a new plant that is already partially established, reducing transplant shock.
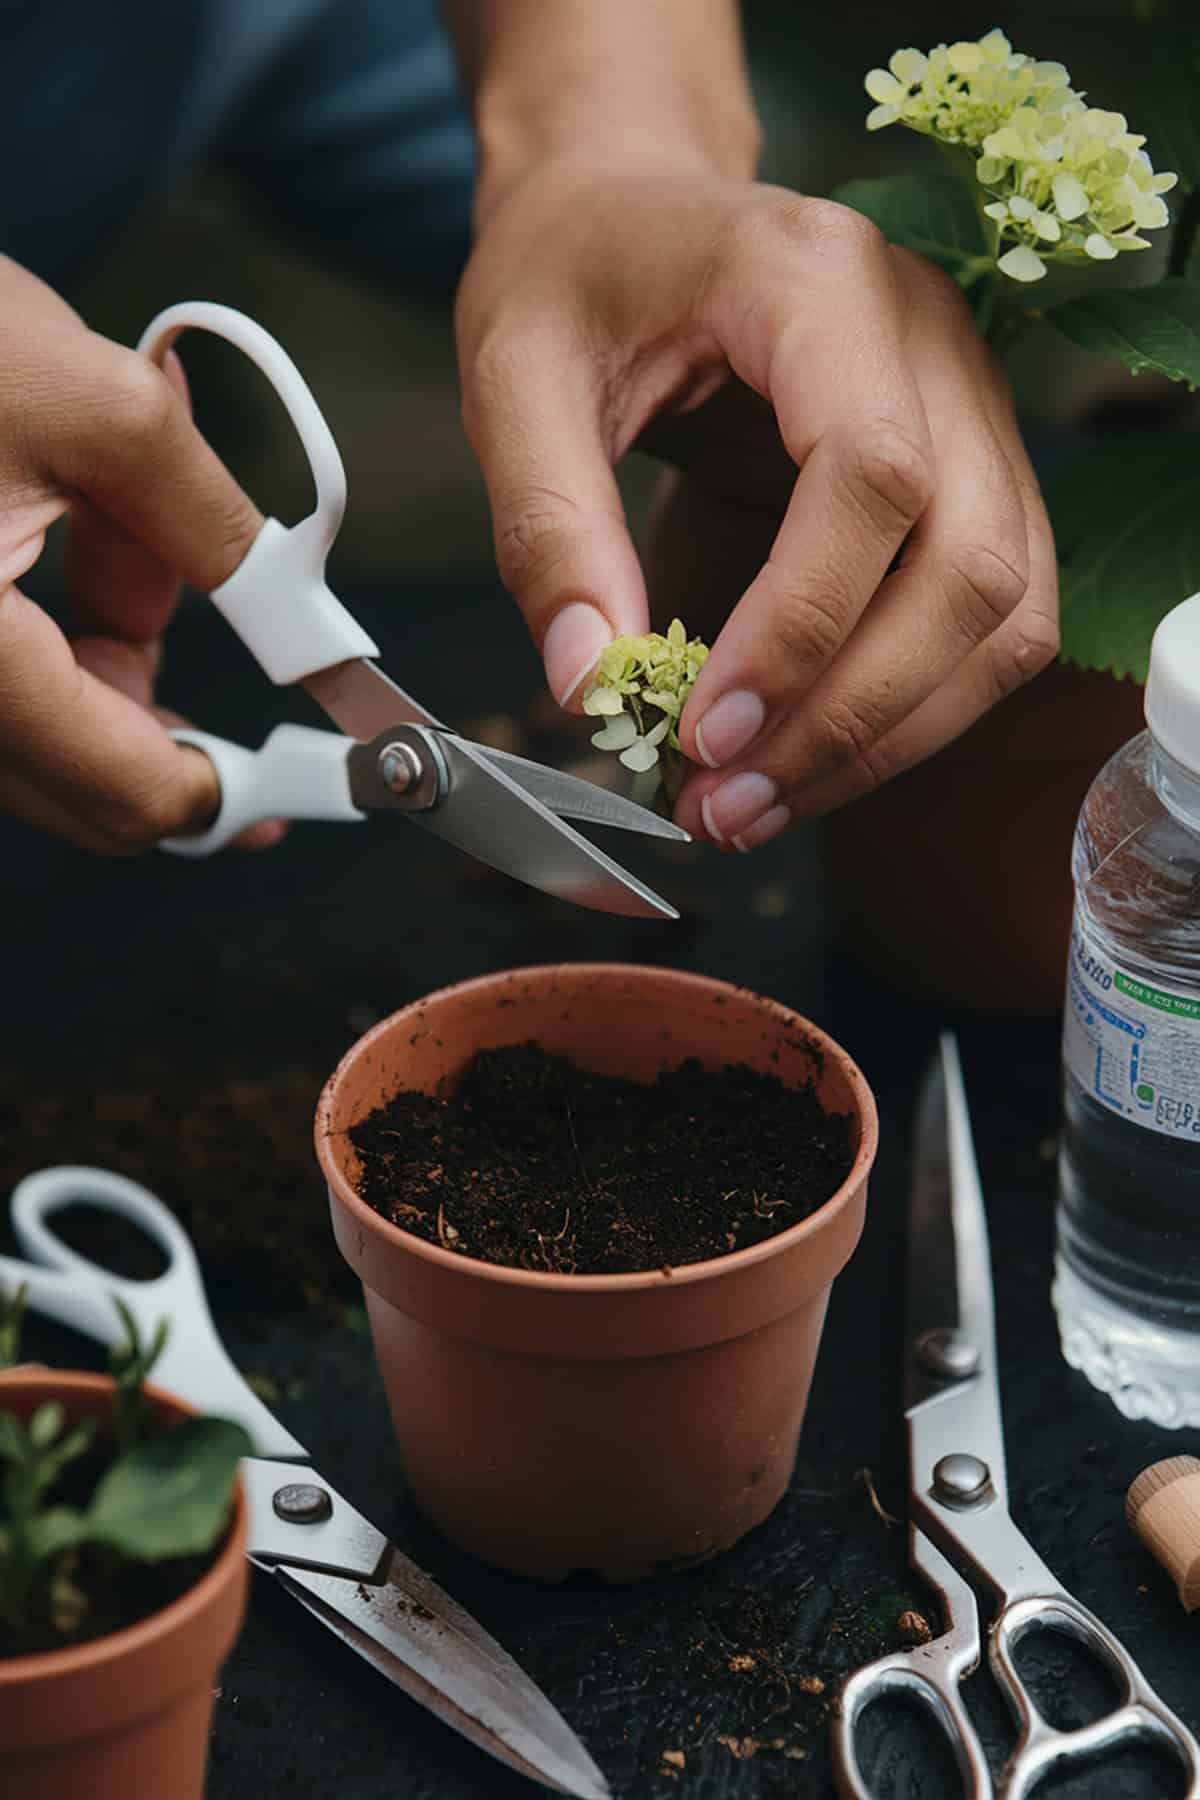
Cuttings Method
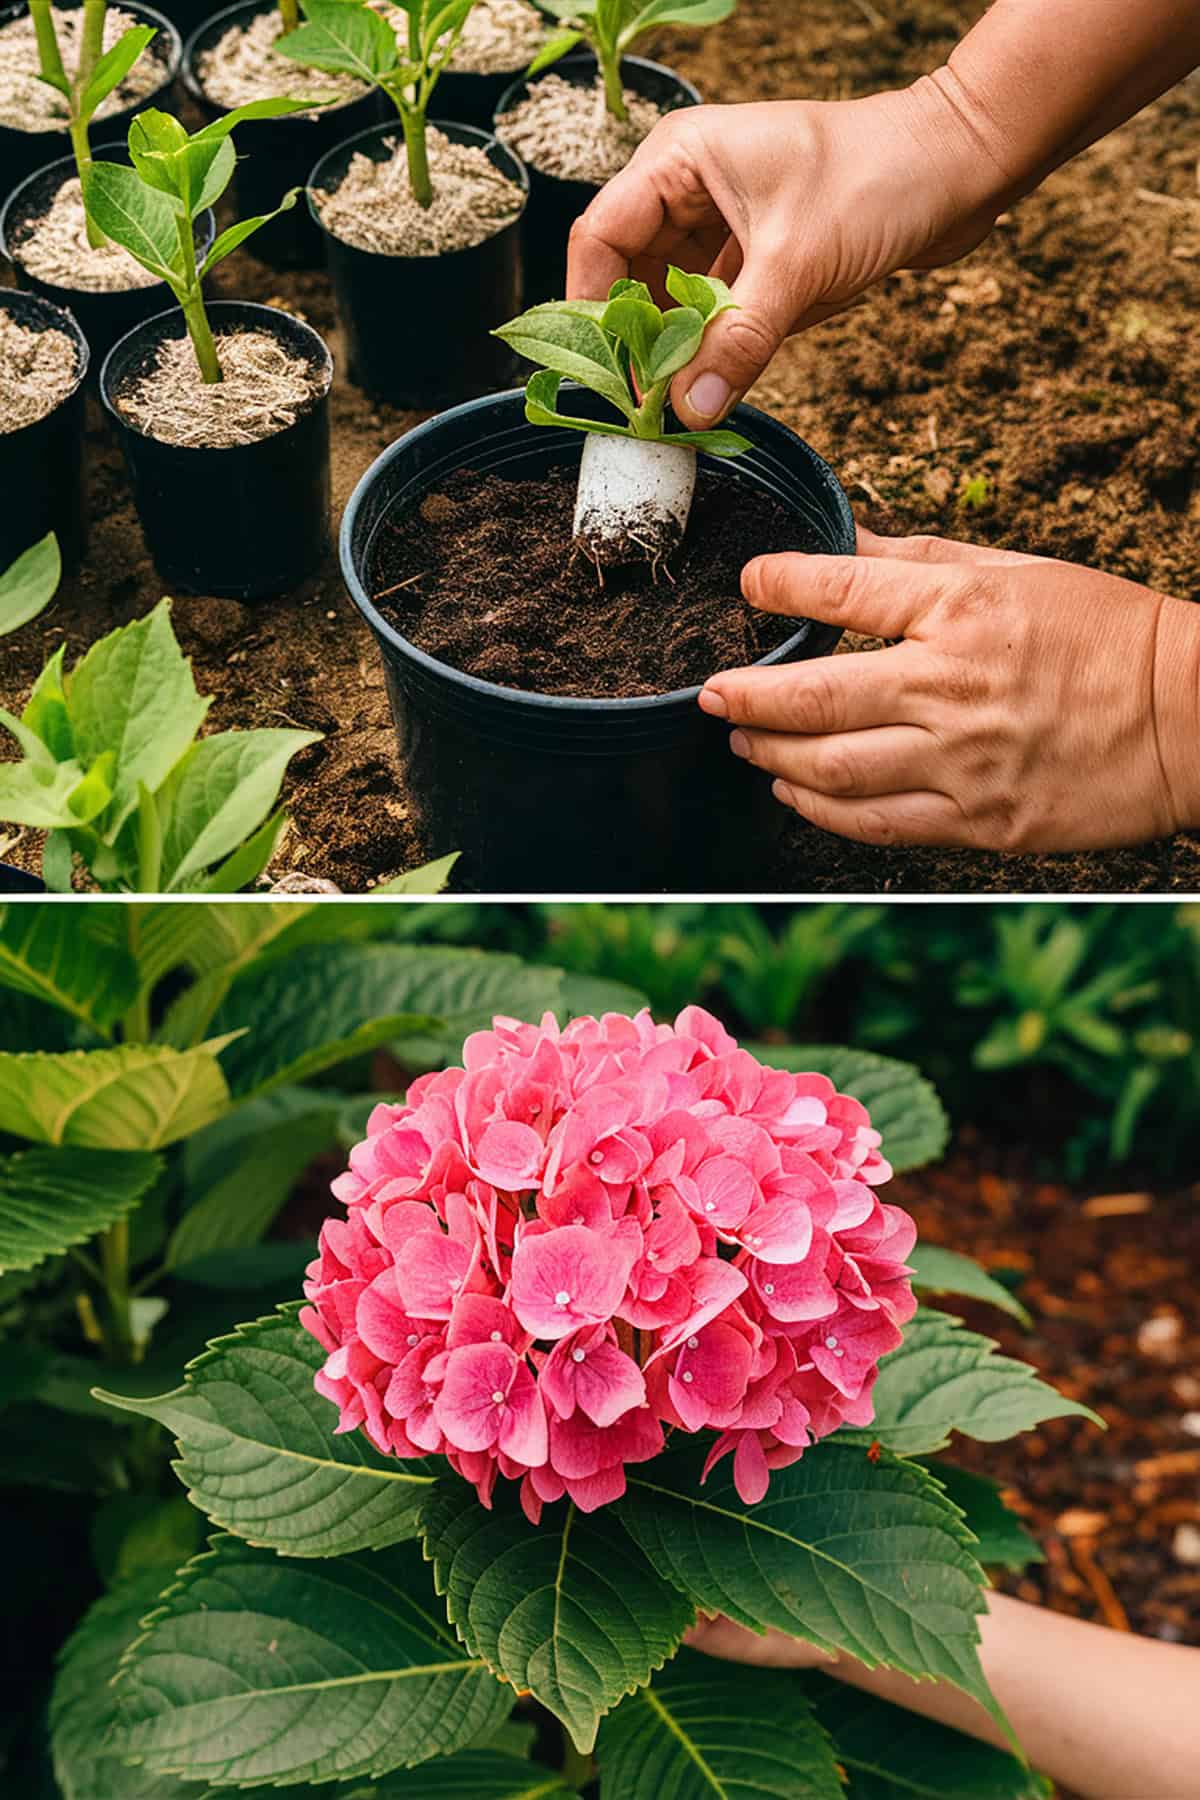
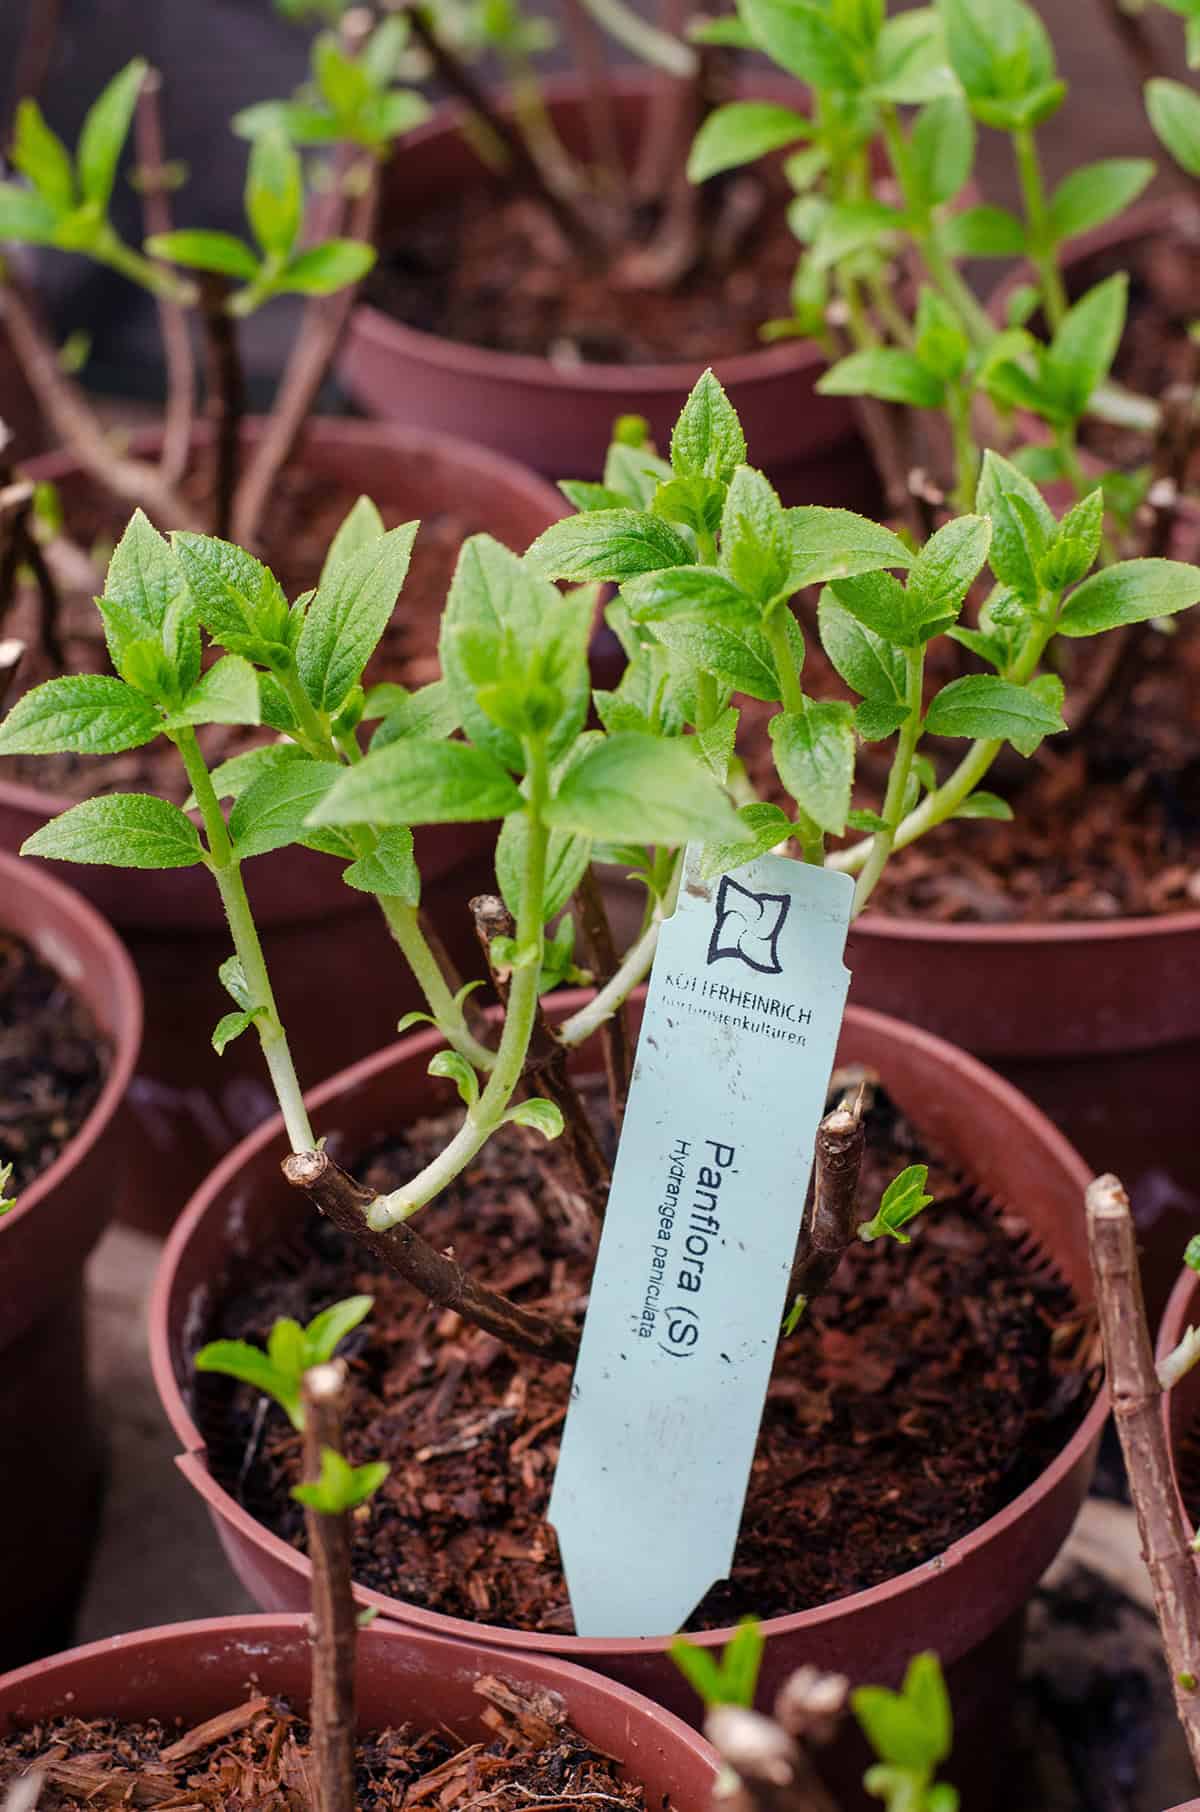
The most common way to propagate hydrangeas is by taking cuttings. Cut a healthy, non-flowering shoot from the plant, ensuring it has at least two to three nodes. Remove the lower leaves, leaving the pair of leaves at the top. Dip the cut end into rooting hormone to encourage root growth.
Place the cutting into a container with moist potting mix. Keep the container in a warm, humid environment to promote rooting. Covering the container with a plastic bag can help maintain humidity. Check regularly for moisture and new root development. Once roots have formed, typically within a few weeks, transplant the cutting to a larger pot or directly into the garden.
Seed Propagation
Hydrangeas can be propagated from seeds, though this method is less common. Collect seeds from the plant after the flowers have dried. Clean and dry the seeds thoroughly before planting. Sow the seeds in a seed tray filled with a light seed-starting mix. Cover them lightly with soil.
Keep the soil moist but not waterlogged. Place the tray in a warm location with bright, indirect light. Germination can take several weeks. Seedlings often vary in their characteristics, so they may not resemble the parent plant completely. Once the seedlings are large enough to handle, transplant them to individual pots and then to the garden.
Division Method
Division is suitable for mature hydrangea plants with multiple stems emerging from the ground. Dig up the entire plant carefully, ensuring minimal root damage. Gently shake off the excess soil to expose the roots. Using a sharp knife or spade, divide the plant into smaller sections. Each section should have a good number of roots and at least one stem.
Replant each section immediately in a prepared bed or container. Water well to help the plants settle in their new location. This method helps manage plant size and rejuvenates older plants. It is best done in early spring or fall when the plants are not actively growing. Division results in multiple new plants that are genetically identical to the parent plant.
Caring for New Plants
New hydrangea plants require specific care to thrive. This includes initial nurturing, proper planting techniques, and ongoing maintenance to ensure healthy growth and blooming.
Initial Care Requirements
Young hydrangea plants need a balanced environment to establish well. Provide partial shade to protect them from harsh sunlight, especially if they are newly rooted cuttings. Water the plants regularly to keep the soil consistently moist, but avoid waterlogging.
Check for proper drainage to prevent root rot. Mulch around the base using organic material to retain moisture and regulate soil temperature. This also helps suppress weeds that may compete for nutrients.
Feed new plants with a balanced, slow-release fertilizer to promote healthy growth. Choose one formulated for flowering shrubs for optimal results. Monitor for early signs of pests or diseases, and address issues promptly with appropriate treatments.
Transplanting
Transplanting hydrangeas should be done carefully to avoid shock. The best time to transplant is in spring or autumn when the plant is dormant or growing slowly. Choose a location with partial shade and well-draining soil to avoid water accumulation around the roots.
Dig a hole twice as wide and just as deep as the root ball. Gently remove the plant from its current container and place it in the hole at the same depth it was growing before. Backfill with soil and water thoroughly to settle the soil around the roots.
Monitor the plant closely for the first few weeks after transplanting. Ensure it receives adequate water and shading. Adding a layer of mulch can help retain moisture and protect the roots while the plant adjusts to its new location.
Ongoing Maintenance
Consistent care is key for hydrangeas to flourish. Continue to water regularly, adjusting for weather conditions such as heat or rain. Prune dead or damaged stems to encourage new growth and shape the plant. The timing of pruning can vary; some hydrangeas bloom on old wood, while others bloom on new growth.
Feed the plant with appropriate fertilizers during the growing season to maintain vigor and support blooming. Monitor soil pH, as it can affect flower color in certain hydrangea varieties. Acidic soil tends to produce blue flowers, while alkaline soil can lead to pink blooms.
Inspect for pests like aphids and fungal infections. Treat issues promptly to prevent widespread damage. Keep the area around the plants clean and free from debris to reduce the risk of disease.
Troubleshooting Common Issues
Hydrangeas sometimes have trouble blooming. Winter injury is a common cause. Too much shade can also be a problem. Hydrangeas need sufficient light.
Poor soil fertility is another issue. Hydrangeas thrive in nutrient-rich soil. Over-fertilizing with nitrogen might inhibit blooms. Use balanced fertilizers for best results.
Diseases can affect hydrangeas. Cercospora leaf spot and anthracnose are common diseases. Powdery mildew can also affect the plant. Regular inspection helps catch problems early.
Pests may also trouble hydrangeas. Common pests include aphids, spider mites, and scale. Regular treatment with insecticidal soap can manage these pests. Always follow labeled instructions for any treatment.
Weak and damaged stems should be cut back. This encourages healthy growth. Prune in early spring for the best results. Avoid pruning too late in the season.
Propagation can sometimes be challenging. Using a plant growth hormone may help. Softwood cuttings are typically used. Be patient, as roots can take time to form.