You’ve just bought a packet of heirloom tomato seeds, excited to start your garden early. But now you’re wondering how to give them the best start indoors. In this article, we’ll learn the straightforward steps to successfully start seeds indoors, ensuring strong, healthy plants are ready for transplanting.
Table of Contents
Benefits of Starting Seeds Indoors
Starting seeds indoors offers many advantages for gardeners. One key benefit is control over the growing environment. You can manage temperature, moisture, and light to create ideal conditions for seedlings.
You can extend the growing season by starting seeds indoors. This allows you to grow long-season crops that might not otherwise thrive in your climate. Plants like tomatoes and peppers can start growing well before the last frost date.
Cost savings is another benefit. Buying seeds is often cheaper than purchasing mature plants. You can grow a diverse array of plants without spending much money.
Starting seeds indoors means fewer pest problems. Indoors, seedlings are protected from many pests and diseases that can affect them outdoors. This leads to healthier, stronger plants.
You also have greater variety by starting seeds indoors. You can choose from a wide range of species and cultivars. Many unique and heirloom plants are only available as seeds.
Better root development is another advantage. When you start seeds in containers, you can ensure they have sufficient space and nutrients from the beginning. This leads to robust root systems.
Finally, starting seeds indoors can be a rewarding project. Watching seeds germinate and grow gives you a sense of accomplishment. It’s a great way to engage with nature and see the fruits of your labor.
Best Time to Start Seeds Indoors
Starting seeds indoors can give your plants a head start. Timing is crucial. The best time to start seeds indoors varies by plant type and growing zone.
Cool-Season Plants
Vegetables like broccoli and cabbage are cool-season plants. Start these seeds in early to mid-March. For leeks and onions, late February is ideal.
Warm-Season Plants
Peppers, tomatoes, and eggplants need a longer growing season. Start these seeds six to eight weeks before the last frost. This ensures they are ready to transplant outdoors.
Flowers
Annual flowers often need an indoor start. Many need six to eight weeks before moving outside. Check specific flower types for precise timing.
General Tips
Use the last frost date in your area as a guide. Count back the number of weeks indicated on the seed packet. Local extension services often provide specific advice.
Choosing the Right Seeds
When you start seeds indoors, selecting the right type of seeds is crucial. Consider the specific needs of your garden and the characteristics of different seed types to ensure successful growth.
Seed Selection Criteria
Choosing the right seeds involves considering factors like climate, space, and personal preference. Think about the local climate since certain seeds thrive better in specific conditions. For instance, if you live in a cooler area, opt for seeds that can withstand lower temperatures.
Additionally, assess the space available in your garden. Compact plants like cherry tomatoes are better suited for small gardens, while larger varieties like pumpkins need more room. Familiarize yourself with the growing time; some plants require a longer season to mature.
Considering disease resistance is also important. Choose seeds known for their resilience against local pests and diseases. This ensures a healthier garden with fewer issues.
Hybrid vs Heirloom Seeds
Selecting between hybrid and heirloom seeds depends on your gardening goals. Hybrid seeds are excellent for consistent and vigorous growth. These seeds are bred to improve specific traits such as yield, resistance to diseases, and adaptability. They are ideal if you want uniform plants with reliable performance.
Heirloom seeds, however, offer a unique advantage. They are open-pollinated and have been passed down through generations. These seeds often have better flavor and historical value. They are perfect for gardeners who wish to preserve plant diversity and enjoy a wide variety of flavors and colors.
Heirloom plants can also adapt to local environments over time, becoming more resilient. When considering heirloom seeds, ensure you have space and isolation to prevent cross-pollination, preserving the purity of the seeds.
Gathering Supplies
To start seeds indoors, you will need a few essential items. These include seed starting containers, appropriate soil or soilless mixes, and lighting or heating equipment.
Seed Starting Containers
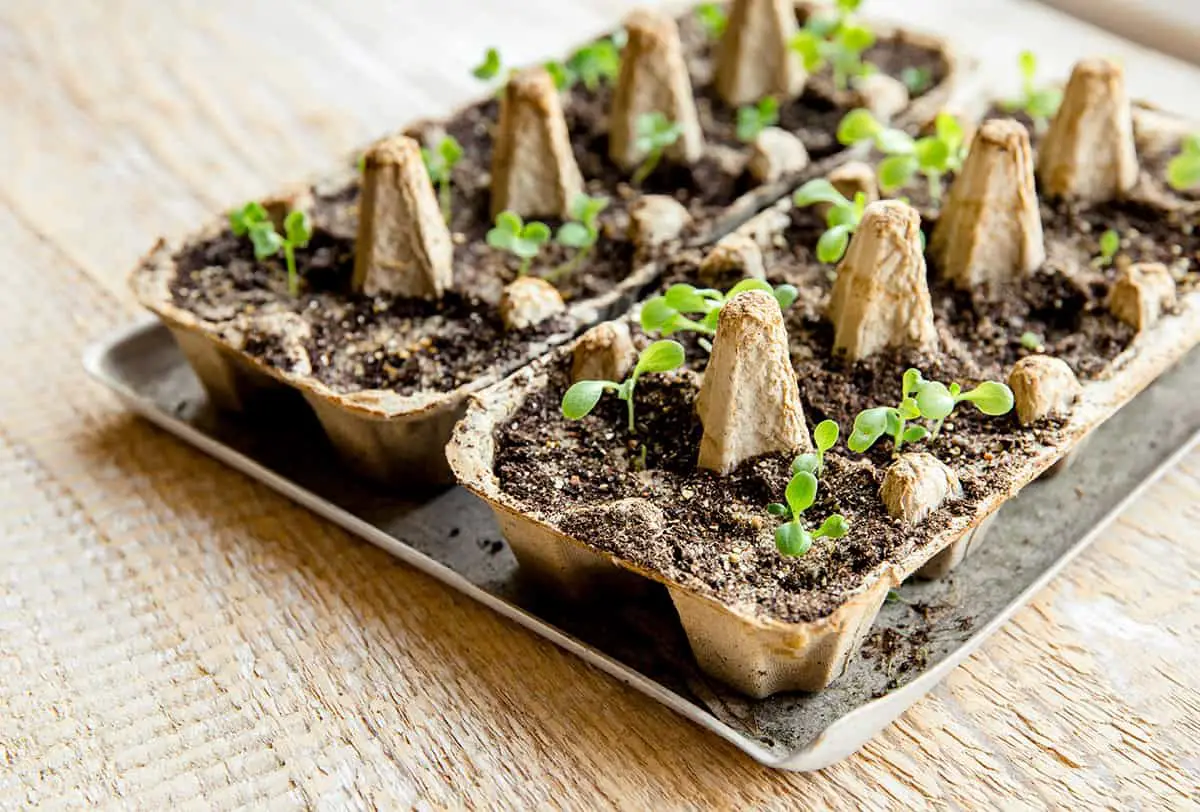
You can use various containers to start seeds indoors. Options include plastic trays, peat pots, and seed starting flats. Containers must have drainage holes to prevent water logging. Recycled materials like cut-off milk cartons, plastic jugs, and paper cups also work well.
Cleanliness is crucial. Wash containers with a bleach solution to prevent disease. Consider using seed starting kits, which often come with cells and trays, making the process more convenient. Match container size to the plant type. Small seeds do best in shallow trays, while larger seeds need deeper pots.
Soil and Soilless Mixes
The medium you use for seed starting is critical. Many gardeners prefer soilless mixes, which are lightweight and free of disease. These mixes typically contain peat moss, vermiculite, and perlite. They ensure good drainage and aeration for seedlings.
Use fresh media each season. Old soil can harbor diseases. Pre-moisten the mix before planting seeds to provide uniform moisture. If you use garden soil, sterilize it to kill pathogens. Warm the mix slightly before planting to encourage quicker germination.
Lighting and Heating Equipment
Adequate lighting is essential for indoor seed starting. Natural light from windows is often insufficient. Use fluorescent or LED grow lights to provide the necessary intensity. Position the lights a few inches above the seedlings and adjust as they grow. Aim for 14-16 hours of light per day.
Heat is also vital. Seeds germinate faster in warm conditions. Use heat mats under seed trays to maintain a consistent temperature. Most seeds thrive at 65-75 degrees Fahrenheit. Avoid placing seeds by drafty windows or in cold basements.
Step-by-Step Guide to Seed Planting

Starting seeds indoors can be a rewarding experience. It allows you to grow a wide variety of plants, even those that require a longer growing season.
Preparing the Containers
Choose the right containers for starting your seeds. They should have drainage holes to prevent waterlogging. You can use seed trays, pots, or recycled containers such as yogurt cups.
Fill your containers with a high-quality seed-starting mix. This soil is sterile and provides the right environment for germination. Avoid using garden soil, as it can contain pests and diseases.
Moisten the seed-starting mix before you fill the containers. It should be damp but not soggy. This helps the seeds to absorb water and start the germination process.
Planting the Seeds
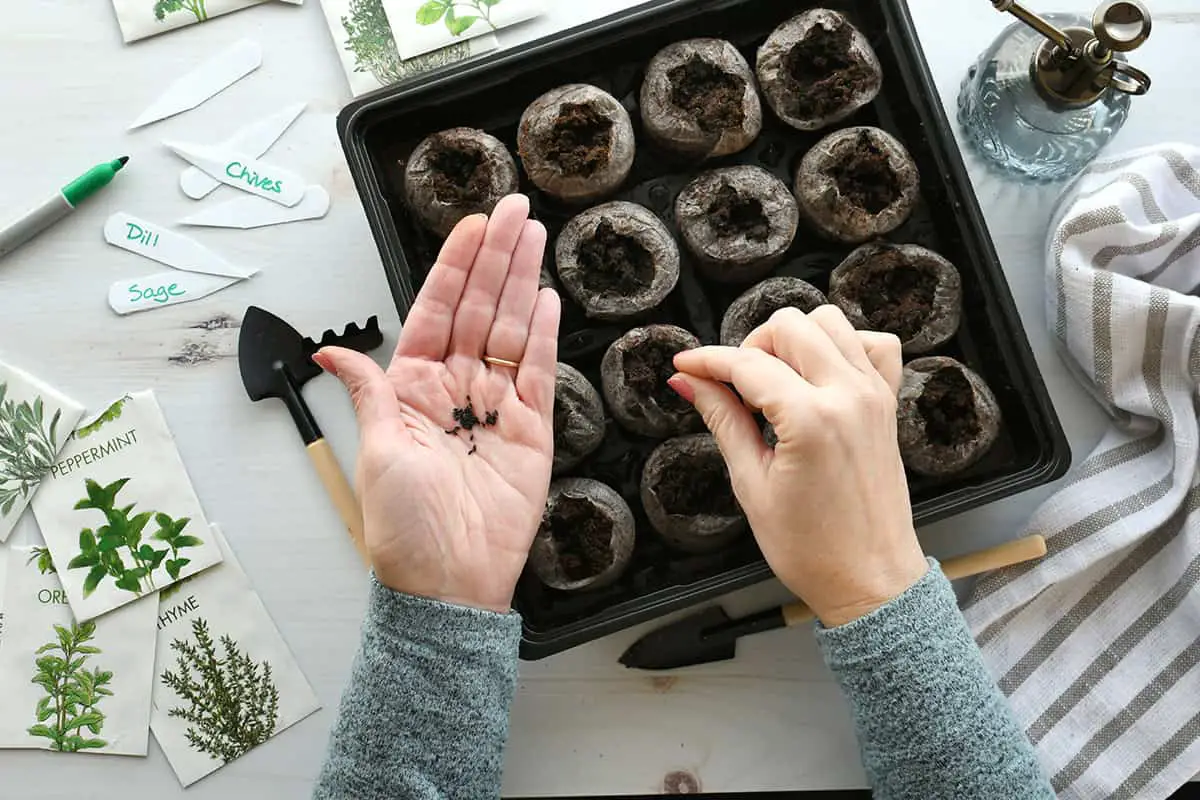
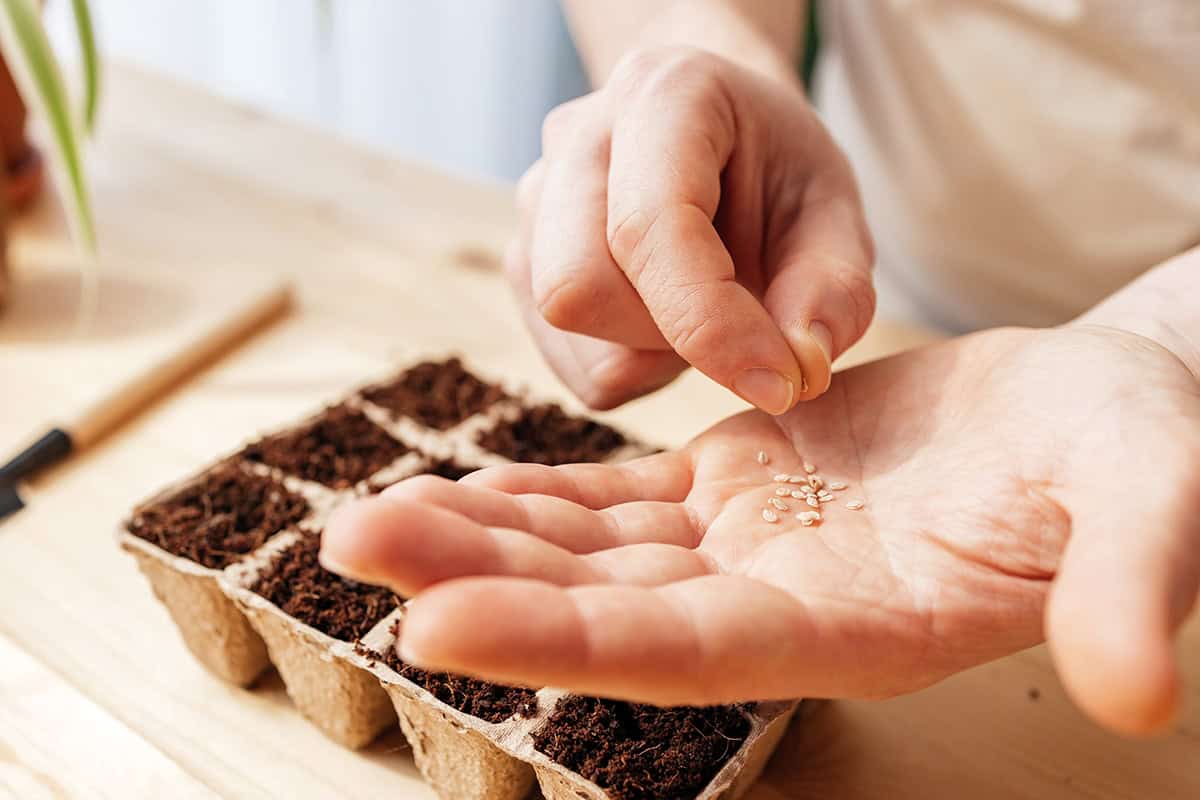
Check the seed packet for information on planting depth and spacing. Different seeds require different depths, so follow the guidelines carefully. Poke holes in the soil to the required depth using a pencil or the butt end of a nail.
Drop one or two seeds into each hole. Adding more seeds may be necessary if the germination rate is low. Cover the seeds with a thin layer of soil, just enough to bury them.
Label each container with the plant type and planting date. Use a pencil or waterproof pen for labeling to avoid fading over time. This helps you keep track of what you planted and when.
Moisture and Watering
After planting, keep the soil consistently moist. Use a spray bottle to mist the soil gently. Avoid using a watering can with a strong stream to prevent disturbing the seeds.
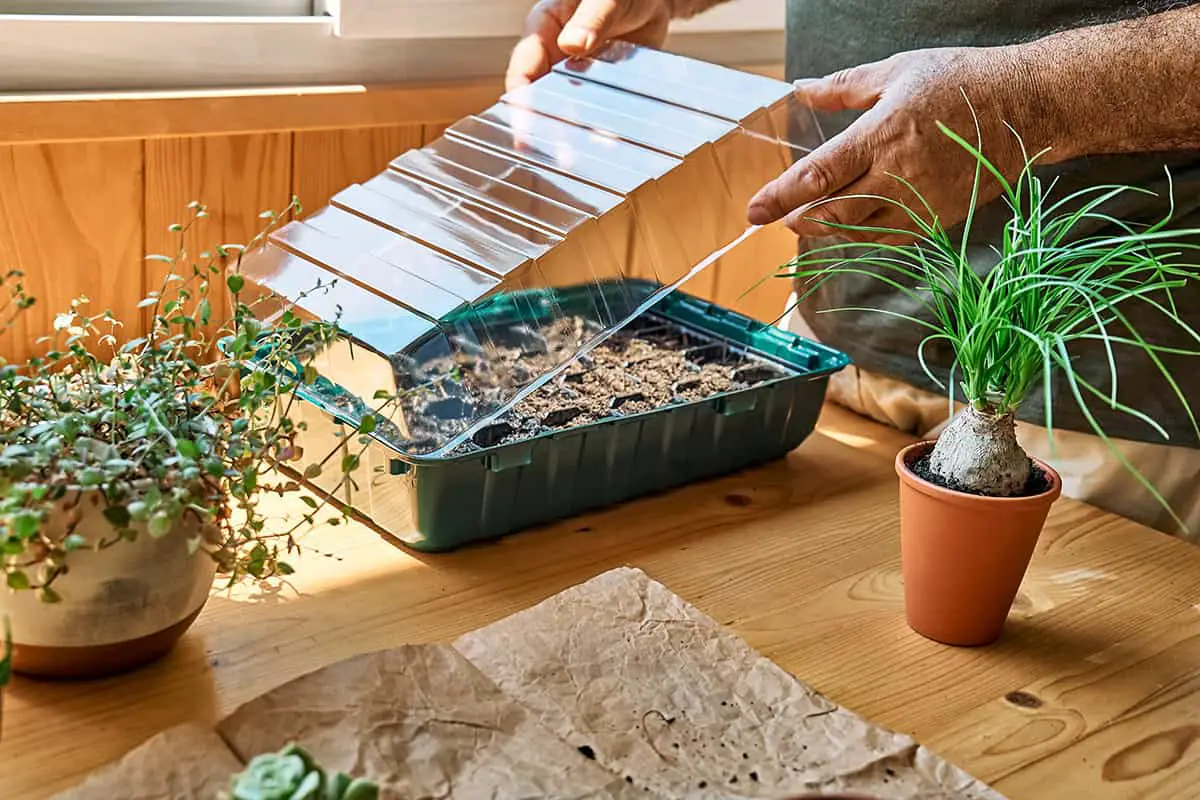
Cover containers with plastic lids or plastic wrap to maintain humidity. This creates a greenhouse effect and helps retain moisture. Remove the covers once the seeds germinate to allow for airflow.
Check the soil moisture daily. The top layer should stay moist, but not waterlogged. Adjust your watering routine based on the soil’s condition and the type of seeds you’ve planted.
Care and Maintenance
Proper care and maintenance are crucial for healthy seedlings. This involves managing the spacing between plants and gradually acclimating them to outdoor conditions.
Thinning Seedlings
Thinning your seedlings is essential to ensure that each plant has enough space to grow. When seedlings have a couple of sets of true leaves, it’s time to thin them. You need to remove the weaker seedlings to allow the stronger ones to flourish.
Use small scissors to cut the unwanted seedlings at the soil level. This prevents disturbing the roots of the remaining plants. Keep about one seedling every couple of inches, depending on the plant type.
Maintain consistent moisture during this phase. Water gently to avoid uprooting the young plants. Also, continue providing sufficient light and monitor for signs of crowding.
Hardening Off Seedlings
Hardening off your seedlings prepares them for the transition to outdoor life. Start this process about one to two weeks before planting them outside.
Begin by placing the seedlings outside for a few hours each day. Choose a sheltered, partially shaded location for this exposure. Gradually increase their time outside and the amount of direct sunlight they receive.
Ensure they are protected from strong winds and cold temperatures initially. Bring them in at night to avoid too much cold.
Troubleshooting Common Issues
Starting seeds indoors can be rewarding, but you might encounter some common problems. By addressing germination issues and managing diseases and pests, you can improve your seed-starting success.
Germination Problems
Seeds may not germinate for several reasons. One key factor is temperature. Most seeds germinate best at 70-75°F. Cooler conditions can slow down germination or even cause seeds to fail. If you’re starting seeds in a cool area, use a heat mat to maintain the optimal temperature.
Watering practices also play a significant role. Too much or too little water can hinder seed germination. Watering from below can prevent displacing seeds on the surface. Submerge your containers in water and let them absorb moisture from the bottom until the surface is wet. Drain excess water to avoid oversaturation.
Using fresh seed and clean materials is crucial. Older seeds or contaminated containers can reduce germination rates. Check seed packets for the recommended planting depth and timeline. Sow seeds accordingly, and ensure you have abundant light to promote growth.
Disease and Pest Management
Damping-off is a common disease that affects seedlings. It often results from overwatering and poor air circulation. To prevent this, use a well-draining soil mix and avoid excessive watering. Increase humidity during germination but reduce it once seedlings emerge. Provide good airflow by spacing out containers and using fans if necessary.
High-quality seeds are less likely to carry diseases. Purchase seeds from reputable suppliers. Clean containers and tools to minimize contamination. If you notice symptoms like mold or wilting, remove affected seedlings immediately.
Pests such as aphids and fungus gnats can also pose problems. Monitor your seedlings regularly for signs of pests. Sticky traps can help control flying insects, and insecticidal soap can manage more established infestations.
Transplanting to Outdoor Garden
When your seedlings have grown strong indoors, it’s time to move them to the outdoor garden. The best time to transplant is after the last frost date in your area.
Harden off your seedlings before transplanting. This means gradually exposing them to outdoor conditions. Start by placing them outside for a few hours a day, increasing the time over a week.
Make sure the soil temperatures are suitable for your plants. Warm-season crops like tomatoes prefer soil temperatures above 60°F.
Plant spacing is crucial. Refer to seed packets for recommended distances to avoid overcrowding. This ensures each plant gets enough nutrients, light, and space to grow.
Dig holes slightly larger than the root balls of your seedlings. Place each plant in a hole at the same depth as in its indoor container. Gently firm the soil around it. Water immediately to help roots settle.
Water consistently after transplanting. Keep the soil moist, not waterlogged. Mulching can help retain moisture and regulate soil temperature.
Make sure the plants get enough light. Most vegetables require full sun and at least six hours of direct sunlight daily. Place your plants in an area that meets these light requirements.
When transplanting larger plants like watermelon or pumpkin, be careful with the root system. Large plants are more prone to transplant shock. Consider planting them in peat pots that can be placed directly in the soil.
Monitoring the plants for a few days after transplant is essential. Look for any signs of stress, such as wilting or yellowing leaves, and address them promptly.