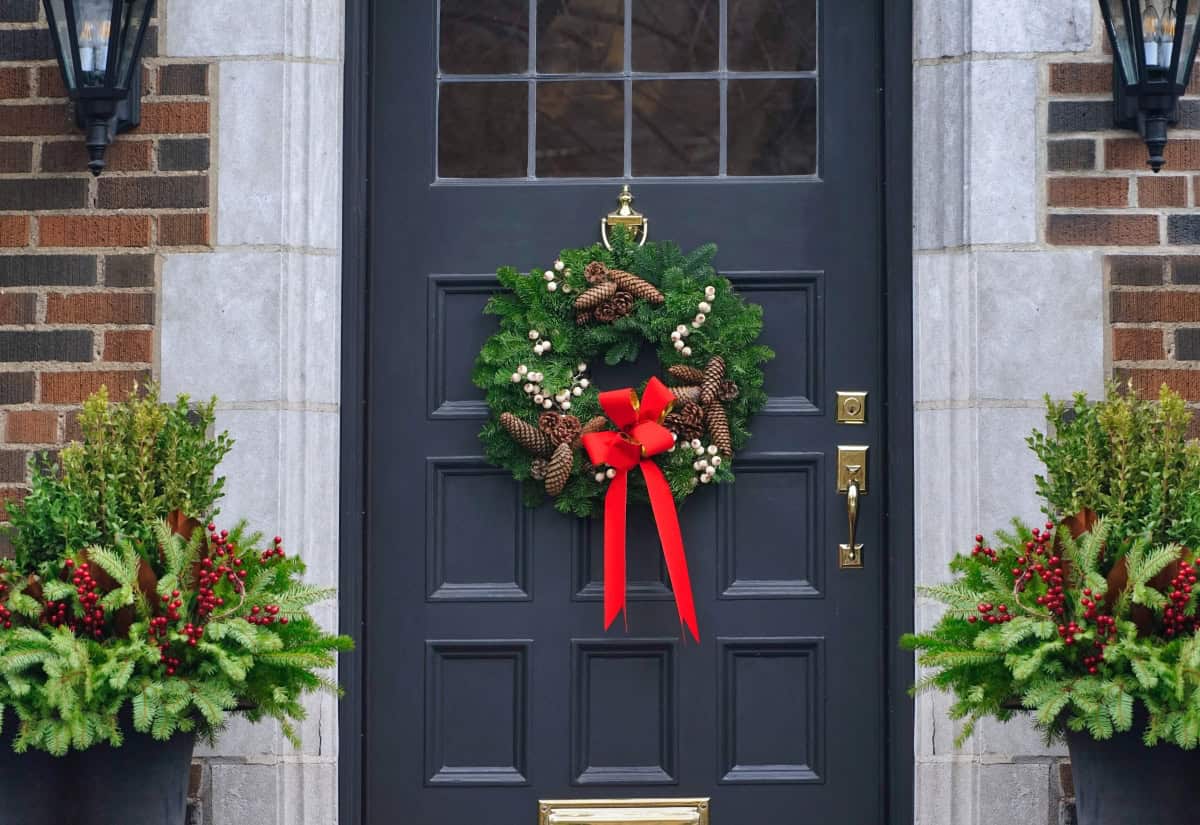
To make a fresh evergreen wreath, trim fresh branches into short sprigs, gather them into small bundles, and wire the bundles around a wreath frame with each new bundle covering the stems beneath it. A 12-inch frame makes a manageable first project; its greenery will extend beyond the frame once assembled.
Freshness starts before the first bundle is attached. Supple branches, secure wire wraps, and a cool display spot help the wreath hold its shape.
Table of Contents
- What You’ll Need to Make a Fresh Evergreen Wreath
- Best Evergreen Branches to Use for a Wreath
- How Much Greenery Do You Need?
- Step 1: Prepare and Trim the Evergreen Branches
- Step 2: Make Small Bundles of Greenery
- Step 3: Attach the First Bundle to the Wreath Frame
- Step 4: Layer and Secure the Remaining Greenery
- Step 5: Fill Gaps and Shape the Wreath
- Step 6: Add Pinecones, Berries, or Other Natural Accents
- Step 7: Add a Ribbon or Bow
- How to Hang a Fresh Evergreen Wreath
- How to Keep a Fresh Evergreen Wreath from Drying Out
- How Long Does a Fresh Evergreen Wreath Last?
- Where to Display Your Evergreen Wreath
- Common Mistakes to Avoid
- How to Dispose of or Compost the Wreath After Christmas
What You’ll Need to Make a Fresh Evergreen Wreath
A 12-inch metal wreath frame and a spool of paddle wire provide a sturdy base for a medium-size wreath. Gather these supplies before trimming the greenery:
– One 12-inch metal wreath frame
– Approximately 36 to 45 evergreen sprigs, each 6 to 8 inches long
– One spool of 22- to 24-gauge green paddle wire
– Sharp pruning shears and wire cutters
– Gardening gloves and a towel for the assembly surface
– Optional pinecones, berry stems, ribbon, and short lengths of floral wire
The finished wreath will extend several inches beyond the frame. A towel catches loose needles and sap, while gloves make prickly branches easier to handle.
Best Evergreen Branches to Use for a Wreath
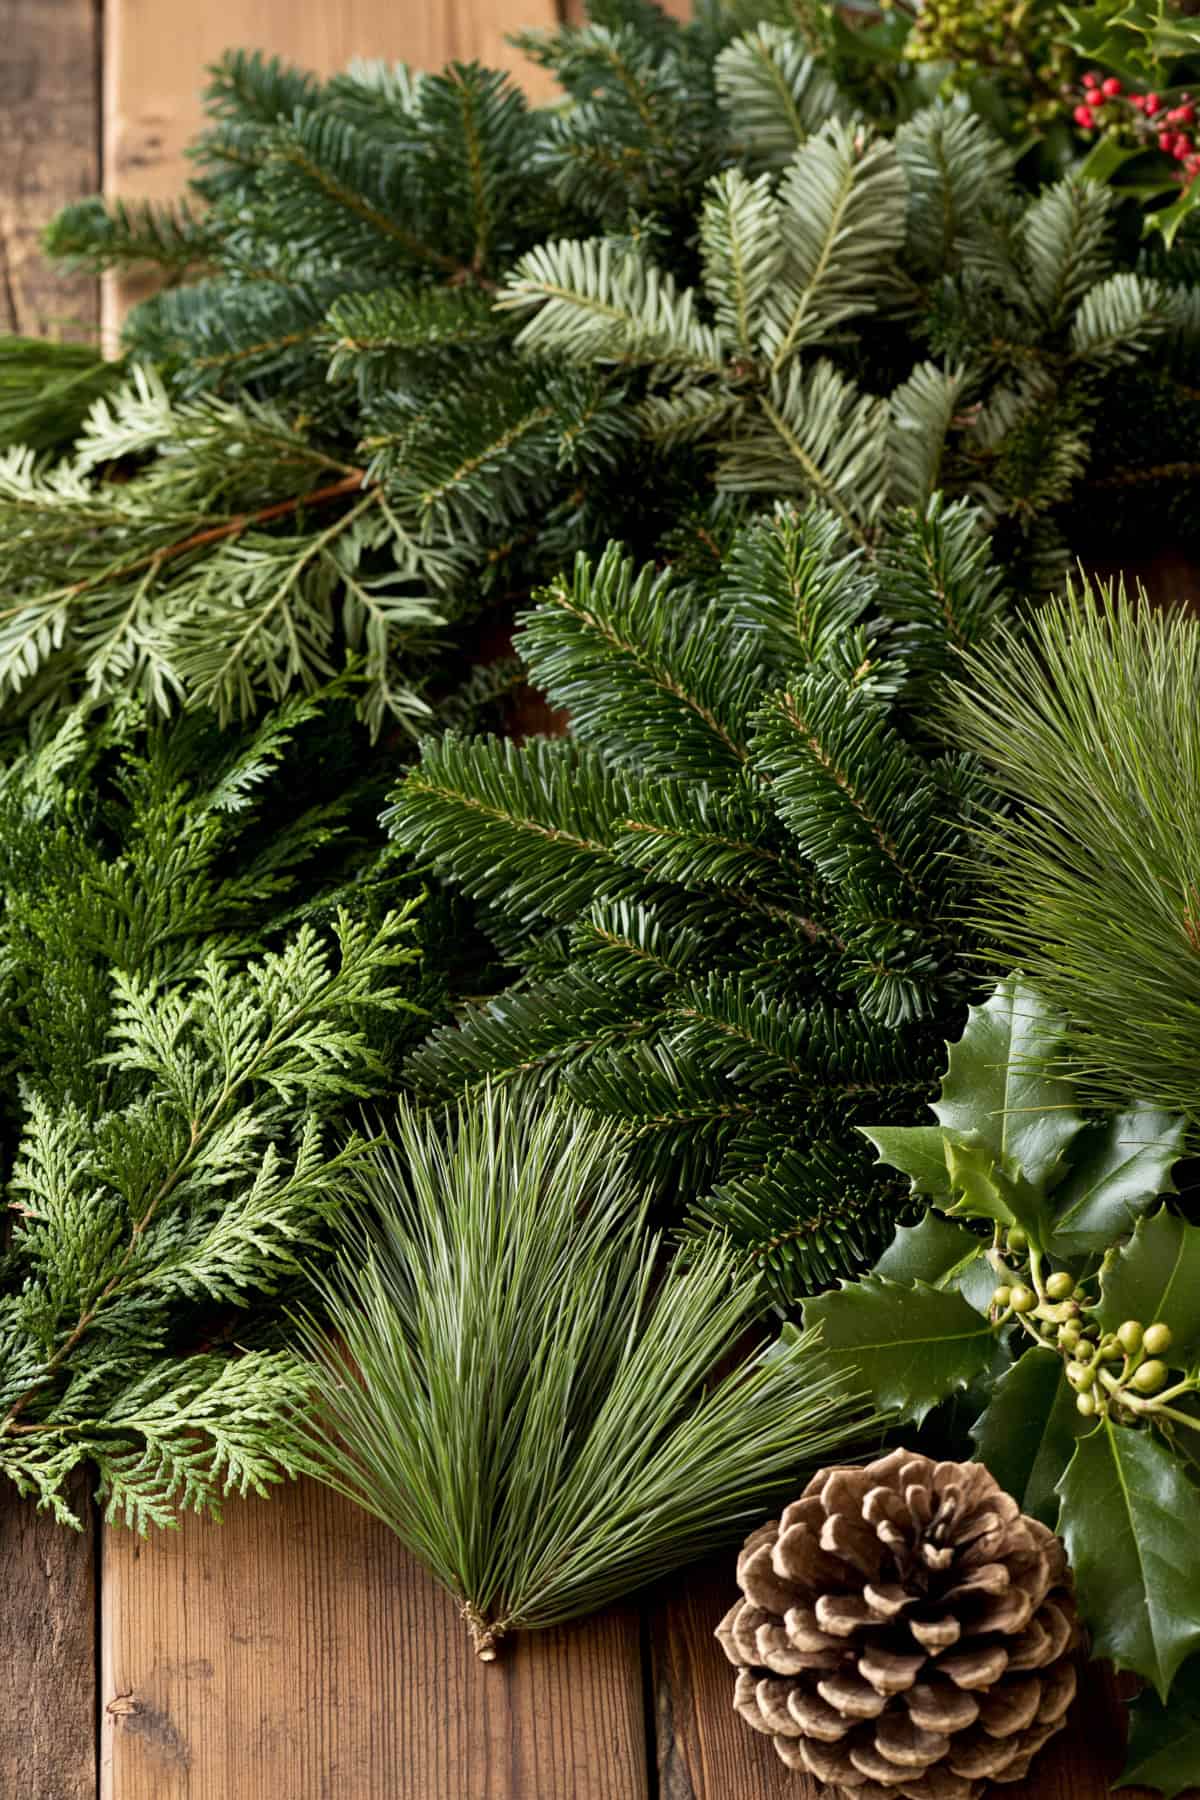
Fir and cedar are dependable choices because their branches form full bundles and hold their needles well when fresh. Douglas fir has soft, flat needles; noble fir offers sturdy stems; and cedar adds graceful sprays that cover exposed wire. Pine creates a looser outline and pairs well with the denser branches.
Select flexible cuttings with rich color and firmly attached needles. Brittle tips or heavy needle drop signal that the greenery has begun to dry. Branches from a florist, tree lot, or a tree pruned with permission are suitable. If several species are available, placing fir at the back of each bundle gives finer cedar or pine tips support.
How Much Greenery Do You Need?
For a 12-inch frame, plan on approximately 36 to 45 sprigs cut to 6 to 8 inches, enough for about 12 to 15 bundles of three sprigs each. Fuller wreaths and broad cedar sprays may require a few extra pieces. The amount refers to usable tips, not whole branches, since thick or bare sections contribute little coverage.
Before assembly, place the loose sprigs around the frame to check that they span its circumference. Set aside six to eight shorter tips for thin spots and the final join. A small reserve makes it easier to correct the shape without cutting into finished bundles.
Step 1: Prepare and Trim the Evergreen Branches
Cut the branches into 6- to 8-inch sprigs, leaving sturdy stems beneath the foliage for wiring. Remove needles or small offshoots from the bottom 1 to 2 inches of each stem. That cleared section sits flat against the frame and gives the wire a firm place to grip.
If the branches were cut well before assembly, recut the stem ends and stand them in cool water for several hours. Let excess surface water drain before making bundles. Discard brittle pieces, then sort the remaining sprigs by size. Reserve the shortest, fullest tips for filling gaps after the main ring is complete.
Step 2: Make Small Bundles of Greenery

Group three sprigs with their cut ends aligned and their foliage pointing in the same direction. Place a broad fir or cedar sprig at the back, then stagger the other tips slightly so each remains visible. The stems should form a compact base about 1 to 2 inches wide.
Prepare roughly 12 to 15 bundles before attaching the first one. Similar bundle sizes keep the wreath’s thickness consistent, while a few narrower bundles help around tight spots. Leave the stems unwired at this stage; securing each bundle directly to the frame with the continuous paddle wire keeps the attachment method straightforward.
Step 3: Attach the First Bundle to the Wreath Frame
Set the first bundle against the front of the frame with its foliage pointing clockwise and its cleared stems resting across the metal rings. Hold the paddle wire against the frame, leaving a short tail, and wrap it around the stems and frame three or four times. Pull each wrap snugly without crushing the greenery.
Keep the wire attached to its spool. Tuck the short starting tail behind the frame so it does not catch on later bundles. The first bundle establishes the direction of the wreath, so its tips should follow the curve of the frame.
Step 4: Layer and Secure the Remaining Greenery
Place each new bundle clockwise, overlapping its foliage over the exposed stems of the previous bundle. Position its base about 2 to 3 inches beyond the last attachment point, then wrap the continuous wire around the new stems and frame three or four times. Repeat around the ring, keeping the bundles at a consistent angle.
Near the starting point, lift the first bundle’s foliage gently and slide the final bundle’s stems underneath it. Wire those stems in place, then bring the wire to the back of the frame, cut it with a few inches to spare, and twist the end securely around the metal.
Step 5: Fill Gaps and Shape the Wreath

Hold the wreath upright and check its front, inner opening, and outer edge for visible frame or uneven areas. Short reserved sprigs are best for small gaps: tuck their stems beneath nearby foliage and fasten them to the frame with separate short pieces of floral wire. Conceal each wire end on the back.
A crowded area may need a tip trimmed back, while a sparse section may need two small sprigs pointing in slightly different directions. Turn the wreath as it is checked so the outline stays round. Shake it gently once to find any loose pieces before adding decorations.
Step 6: Add Pinecones, Berries, or Other Natural Accents
Pinecones and berry stems should be fastened to the frame or a sturdy branch, not balanced on the needles. Wrap a short piece of floral wire around the base of each pinecone, thread the ends through the greenery, and twist them together behind the frame. Berry stems need the same firm attachment near their base.
Use berries known to be safe for the display setting, particularly where children or pets have access. A few accents grouped along one side leave the evergreen outline visible. Check that heavier pinecones stay in place when the wreath hangs vertically.
Step 7: Add a Ribbon or Bow

A wired ribbon holds a bow’s loops in place and gives the wreath a finished focal point. Form the bow separately, pinch its center, and secure that center with a short length of floral wire. Thread the wire through the greenery and attach it to the frame, keeping the twist at the back.
A bow at the bottom or slightly off-center leaves the hanging point clear. Trim the ribbon tails after the wreath is upright so their length suits its proportions. For an outdoor display, choose ribbon labeled for outdoor use and check its attachment after windy weather.
How to Hang a Fresh Evergreen Wreath
A door hook or wreath hanger rated for the finished wreath’s weight gives the frame a secure resting point. Hang the metal frame directly on the hanger, or make a loop of sturdy wire attached to the frame’s upper rings. Lift the wreath by that point before placing it on the door to confirm that it hangs level.
A thin protective pad behind the frame helps prevent scratches. Check that the wreath clears the doorframe as the door opens and that branches do not obstruct the handle or lock. On glass, use a hanger designed for the door and the wreath’s weight.
How to Keep a Fresh Evergreen Wreath from Drying Out
Cool temperatures and shelter from direct sun help fresh cuttings retain moisture. An outdoor door under a porch roof is a suitable spot when the wreath is protected from harsh afternoon sun and drying wind. Indoors, place it away from fireplaces, heating vents, and sunny windows.
A light misting every few days helps when the greenery looks dry; allow the wreath to dry before it touches a painted door or delicate surface. Misting does not restore brittle branches. Check decorative berries and ribbon first, since moisture may damage their finish or cause color to transfer.
How Long Does a Fresh Evergreen Wreath Last?
A fresh evergreen wreath commonly stays presentable for about two to four weeks in a cool, sheltered outdoor spot. Heated indoor air shortens that span, and the starting freshness of the cuttings also makes a difference. Fir and cedar selected with flexible stems give the wreath its best chance of lasting through the season.
Needle drop, fading color, and brittle tips are signs that it is drying out. Check the wreath periodically, especially before leaving it on an interior wall or door where fallen needles collect. Once branches become dry and shed readily, take the wreath down.
Where to Display Your Evergreen Wreath

A shaded front door gives the wreath a prominent place while limiting sun exposure. A covered porch wall or sheltered gate also suits fresh greenery, provided the frame is secured against wind. The display surface should have enough clearance for the wreath’s full outer diameter, which will exceed the frame’s 12-inch measurement.
Indoors, a cool entryway is preferable to a spot near a heat source. Keep the wreath clear of candles and open flames, and use a protective backing where sap or damp foliage might mark a wall. Check the hanging hardware and nearby surface after the first day.
Common Mistakes to Avoid
Loose wire wraps let bundles shift as the wreath hangs. Each bundle should sit firmly against the frame before the next one covers its stems; a gentle tug reveals weak attachments early. Leaving too much bare stem also creates visible gaps that later sprigs struggle to hide.
Branch length affects the shape. Very long sprigs make a 12-inch frame look uneven, while tightly packed, oversized bundles crowd the inner opening. Trim and sort the greenery before assembly, and check the wreath upright before cutting the paddle wire. Securing decorations only to soft needles is another common cause of fallen accents.
How to Dispose of or Compost the Wreath After Christmas
Remove ribbon, wire, pinecones with attached hardware, and any artificial accents before handling the greenery. Untwist or cut the binding wire from the back, then lift the branches off the frame.
The metal frame and reusable decorations should be stored separately for another season. Clean, untreated evergreen cuttings may go into a home compost pile after they are chopped into short pieces and mixed with other plant material.
Needles break down slowly, so local yard-waste collection may be more practical. Check municipal rules before setting branches out, especially if the wreath contains flocking, glitter, or treated decorations.