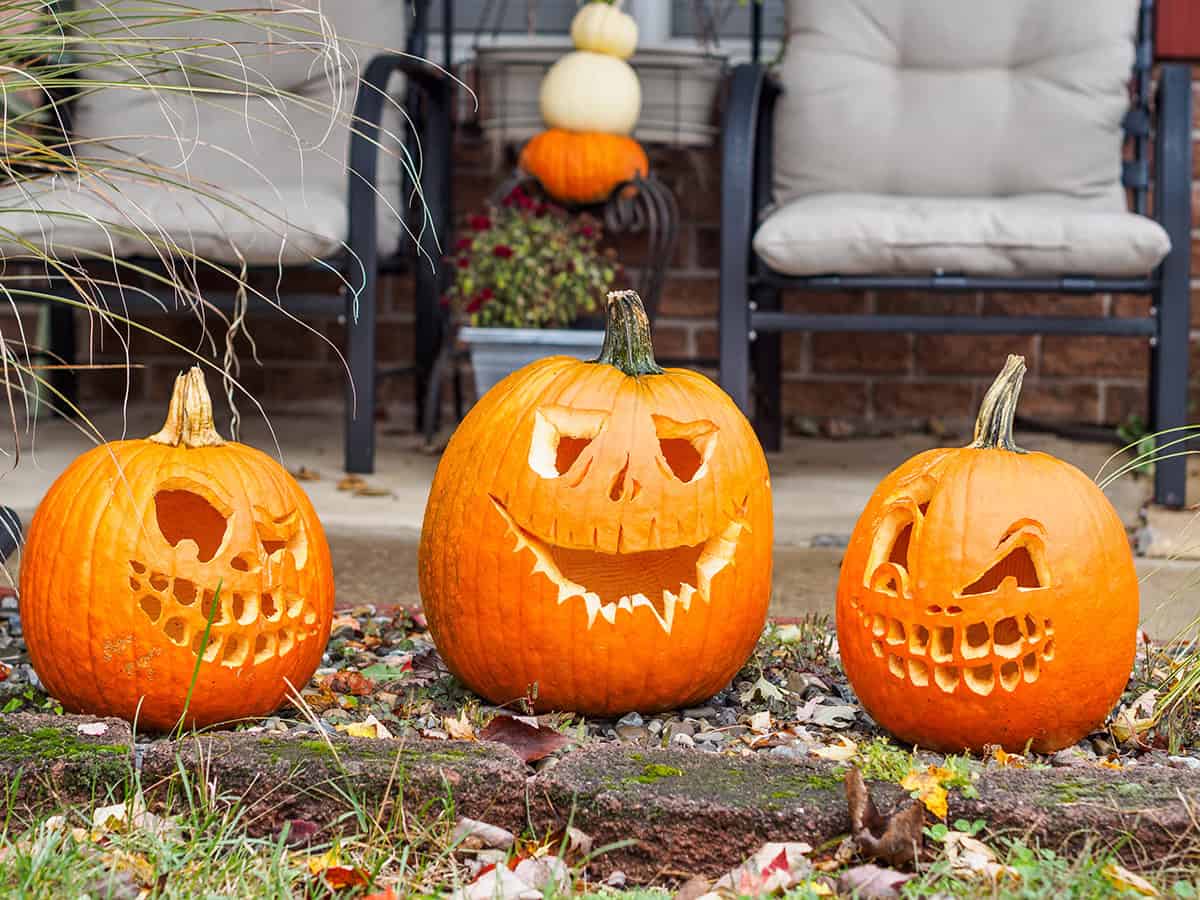
The best pumpkin designs are rarely the hardest ones. One oversized eye, a sleepy face, or a row of square teeth may earn more laughs than an intricate stencil. This article gathers approachable ideas with clear shapes and plenty of creative variety. Pick a favorite from the 36 designs ahead and start planning your first cut.
Table of Contents
- X-Eyed Pumpkin Face
- Wide-Grin Pumpkin With Spiral Eyes
- Simple Sunburst Carved Pumpkin
- Sharp-Toothed Monster Pumpkin
- Round-Eared Pumpkin Carving
- Pumpkin Eating A Tiny Pumpkin
- One-Eyed Monster Pumpkin
- Moon And Star Jack-O’-Lantern
- Kindness Message Pumpkin Carving
- Heart-Eyed Pumpkin Carving
- Happy Smiling Pumpkin
- Goofy Sunflower Garden Pumpkin
- Glowing Owl Pumpkin
- Glowing Bat And Crescent Pumpkin
- Friendly Ghost And Stars Pumpkin
- Friendly Floating Ghost Pumpkin
- Easy Straw-Hat Scarecrow Pumpkin
- Cute And Simple Cat Pumpkin
- Crescent Moon And Stars Pumpkin
- Cool Pumpkin Planter With Sunglasses
- Classic Grinning Jack-O’-Lantern
- Carved Pumpkin Restroom Sign
- Black Cat And Crescent Moon Pumpkin
- Winking Pumpkin Face
- Umbrella Pumpkin
- Tiny Townhouse Pumpkin
- Spiderweb Corner Pumpkin
- Snail Pumpkin
- Smiling Rain Cloud Pumpkin
- Sleepy Face Pumpkin
- Silly Mustache Pumpkin
- Penguin Pumpkin
- Mushroom Cottage Pumpkin
- Little Robot Pumpkin
- Frog Face Pumpkin
- Cupcake Pumpkin
X-Eyed Pumpkin Face
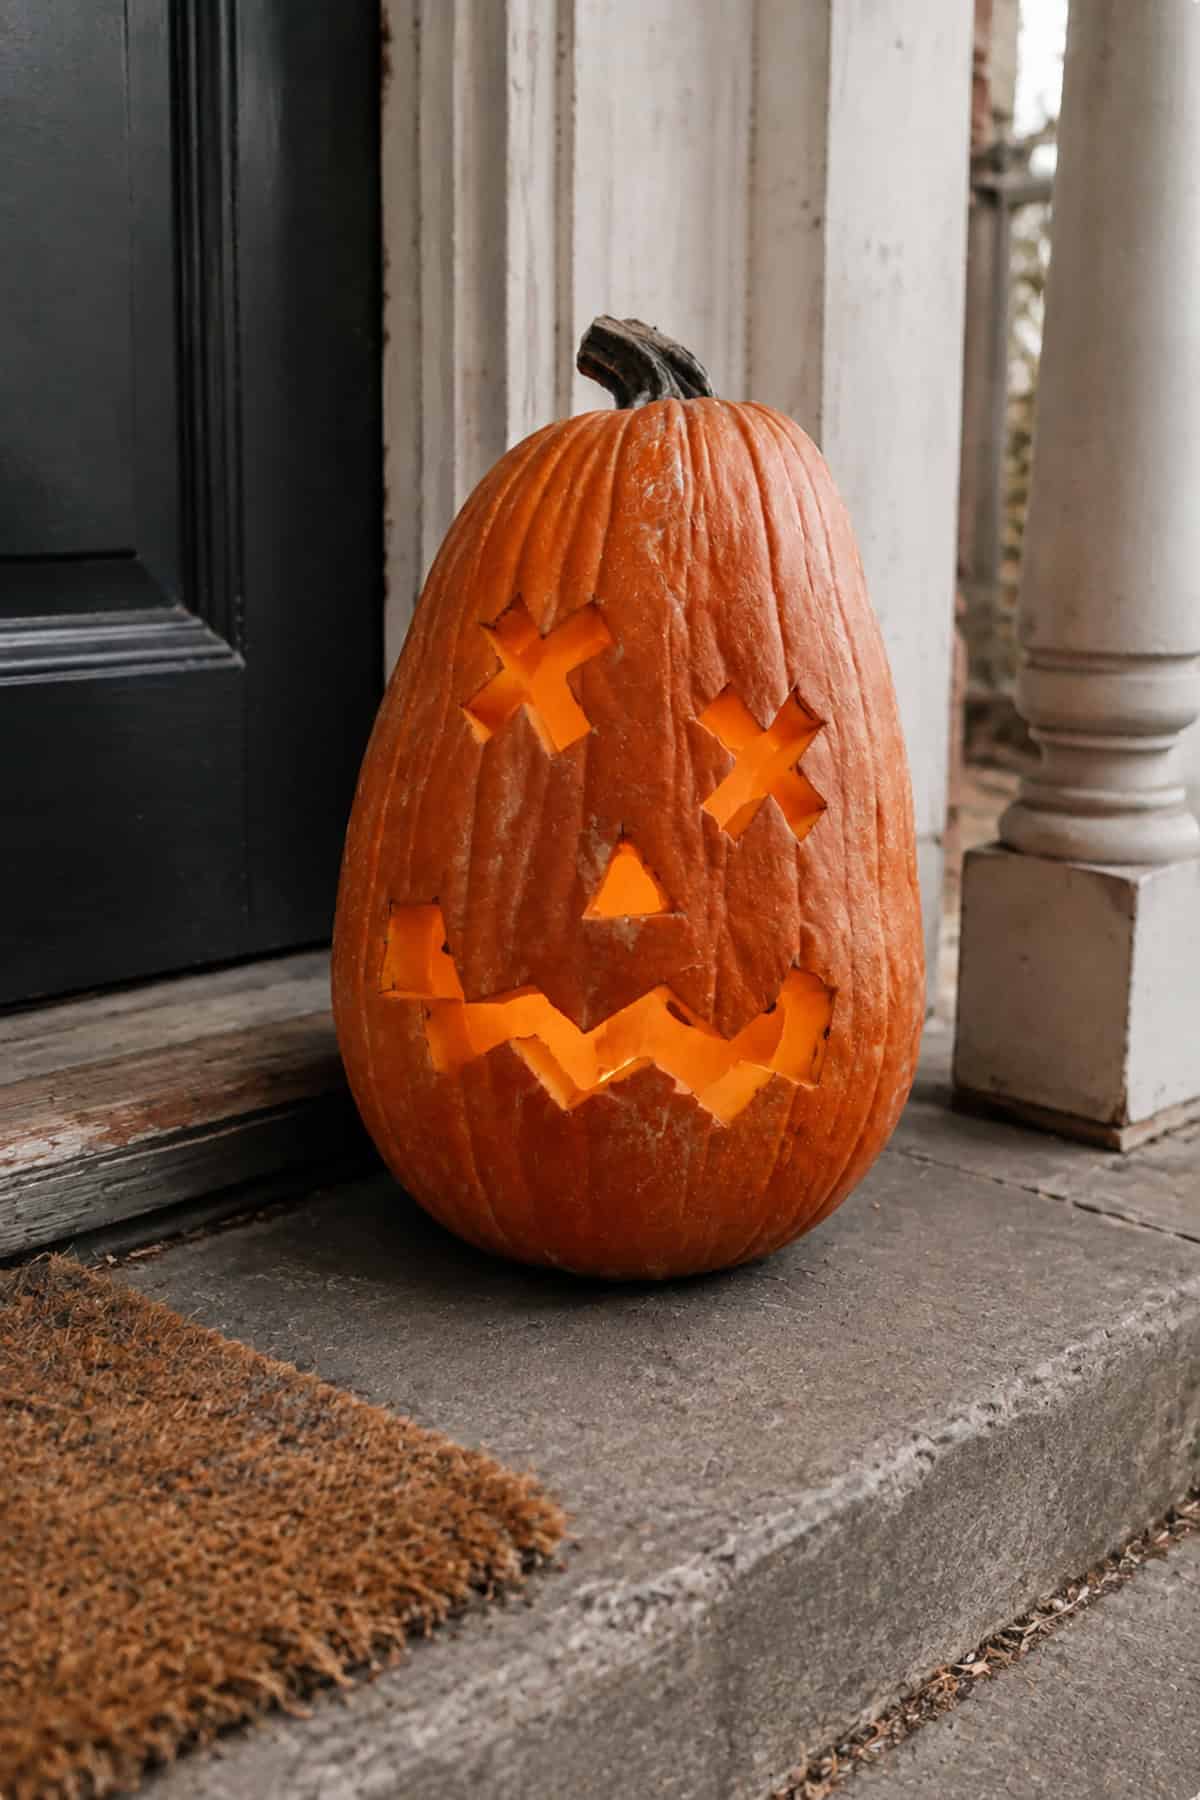
For a quick face with a scrappy sense of humor, cut two thick X-shaped eyes into a tall pumpkin. Add a small triangular nose, then make the mouth wide, crooked, and sharply uneven.
The rough geometry removes any pressure for perfect symmetry. Beginners only need three basic shapes, while the jagged smile leaves plenty of room for personal variations.
Wide-Grin Pumpkin With Spiral Eyes
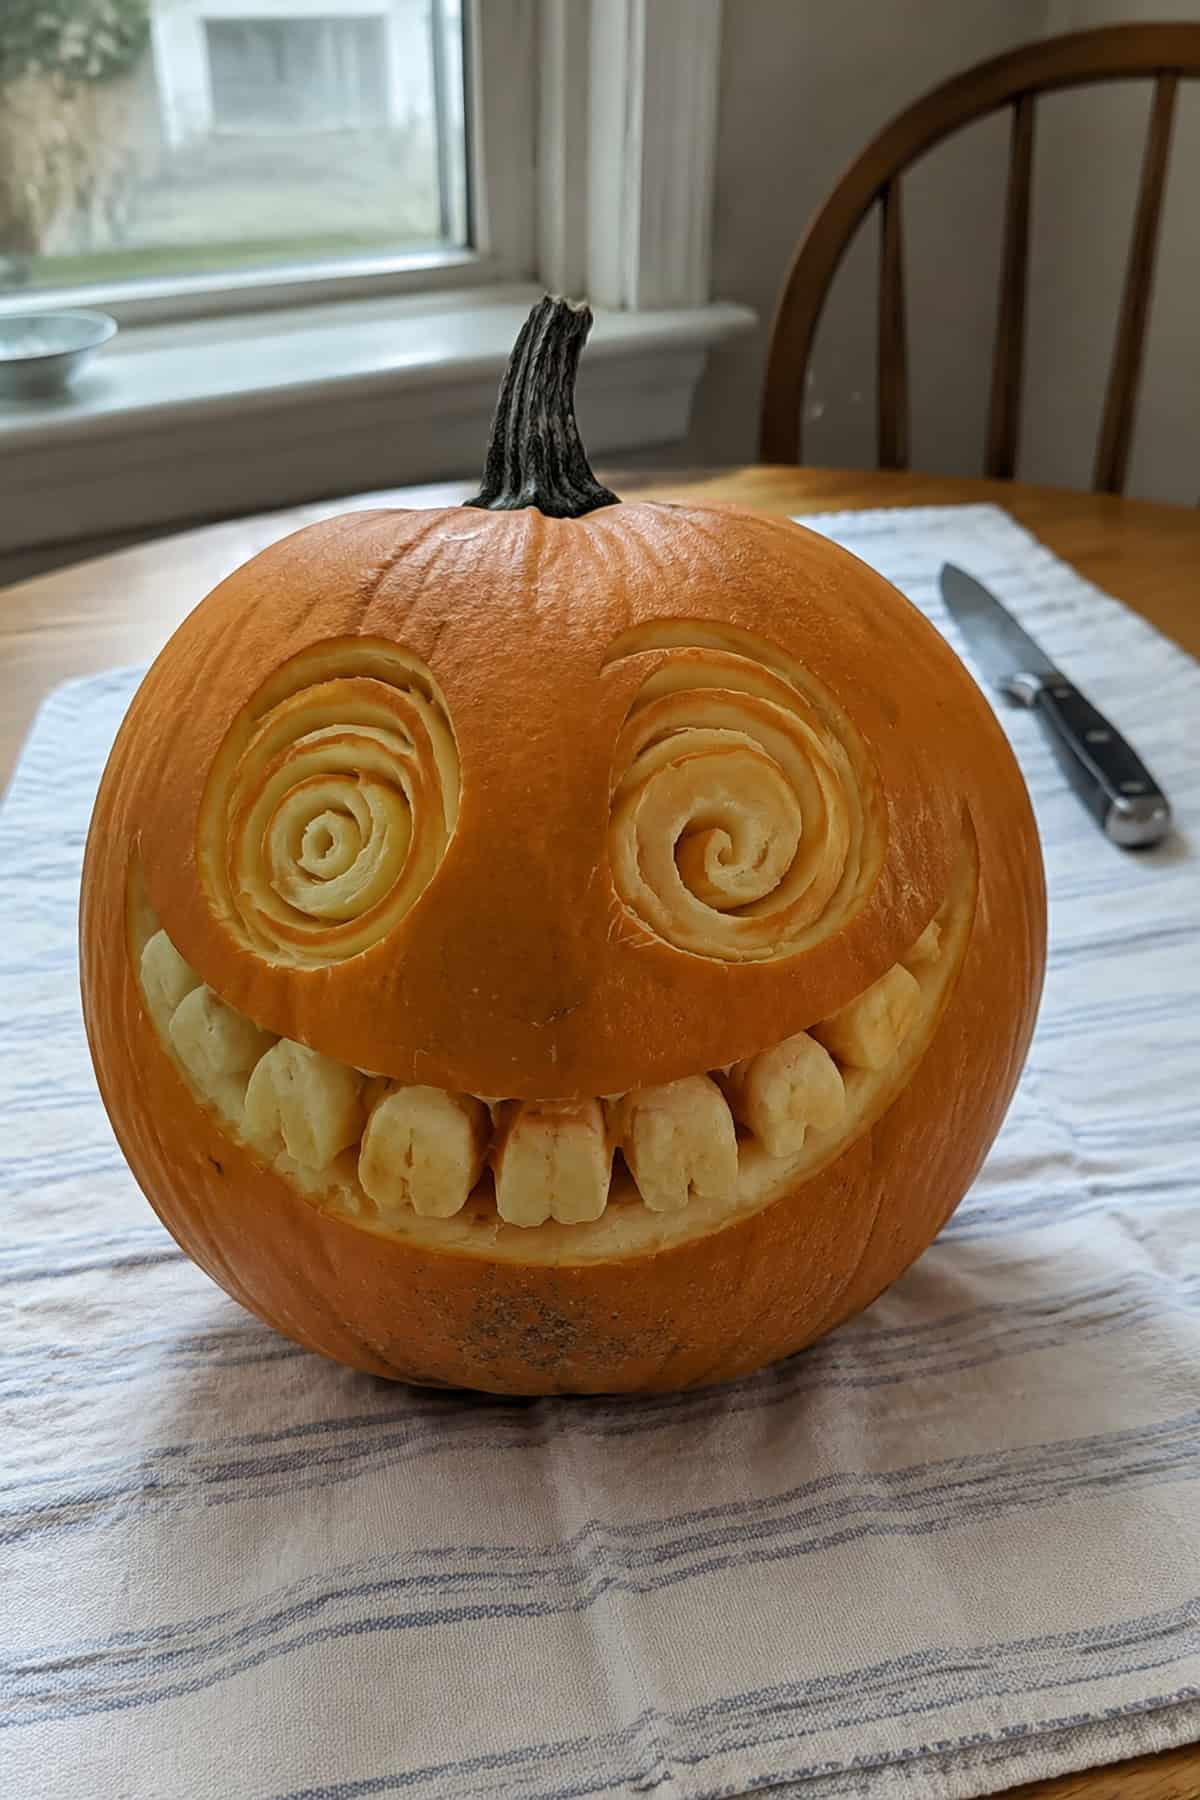
Those hypnotic eyes require shallow cuts rather than complete openings. Trace two large spirals and remove the outer rind along each line to expose the pale flesh.
Below them, carve a broad smile with oversized, irregular teeth. Leave narrow gaps between the teeth so each one stays attached. The ridiculous expression rewards imperfect cuts, which makes the design easier than its detail suggests.
Simple Sunburst Carved Pumpkin
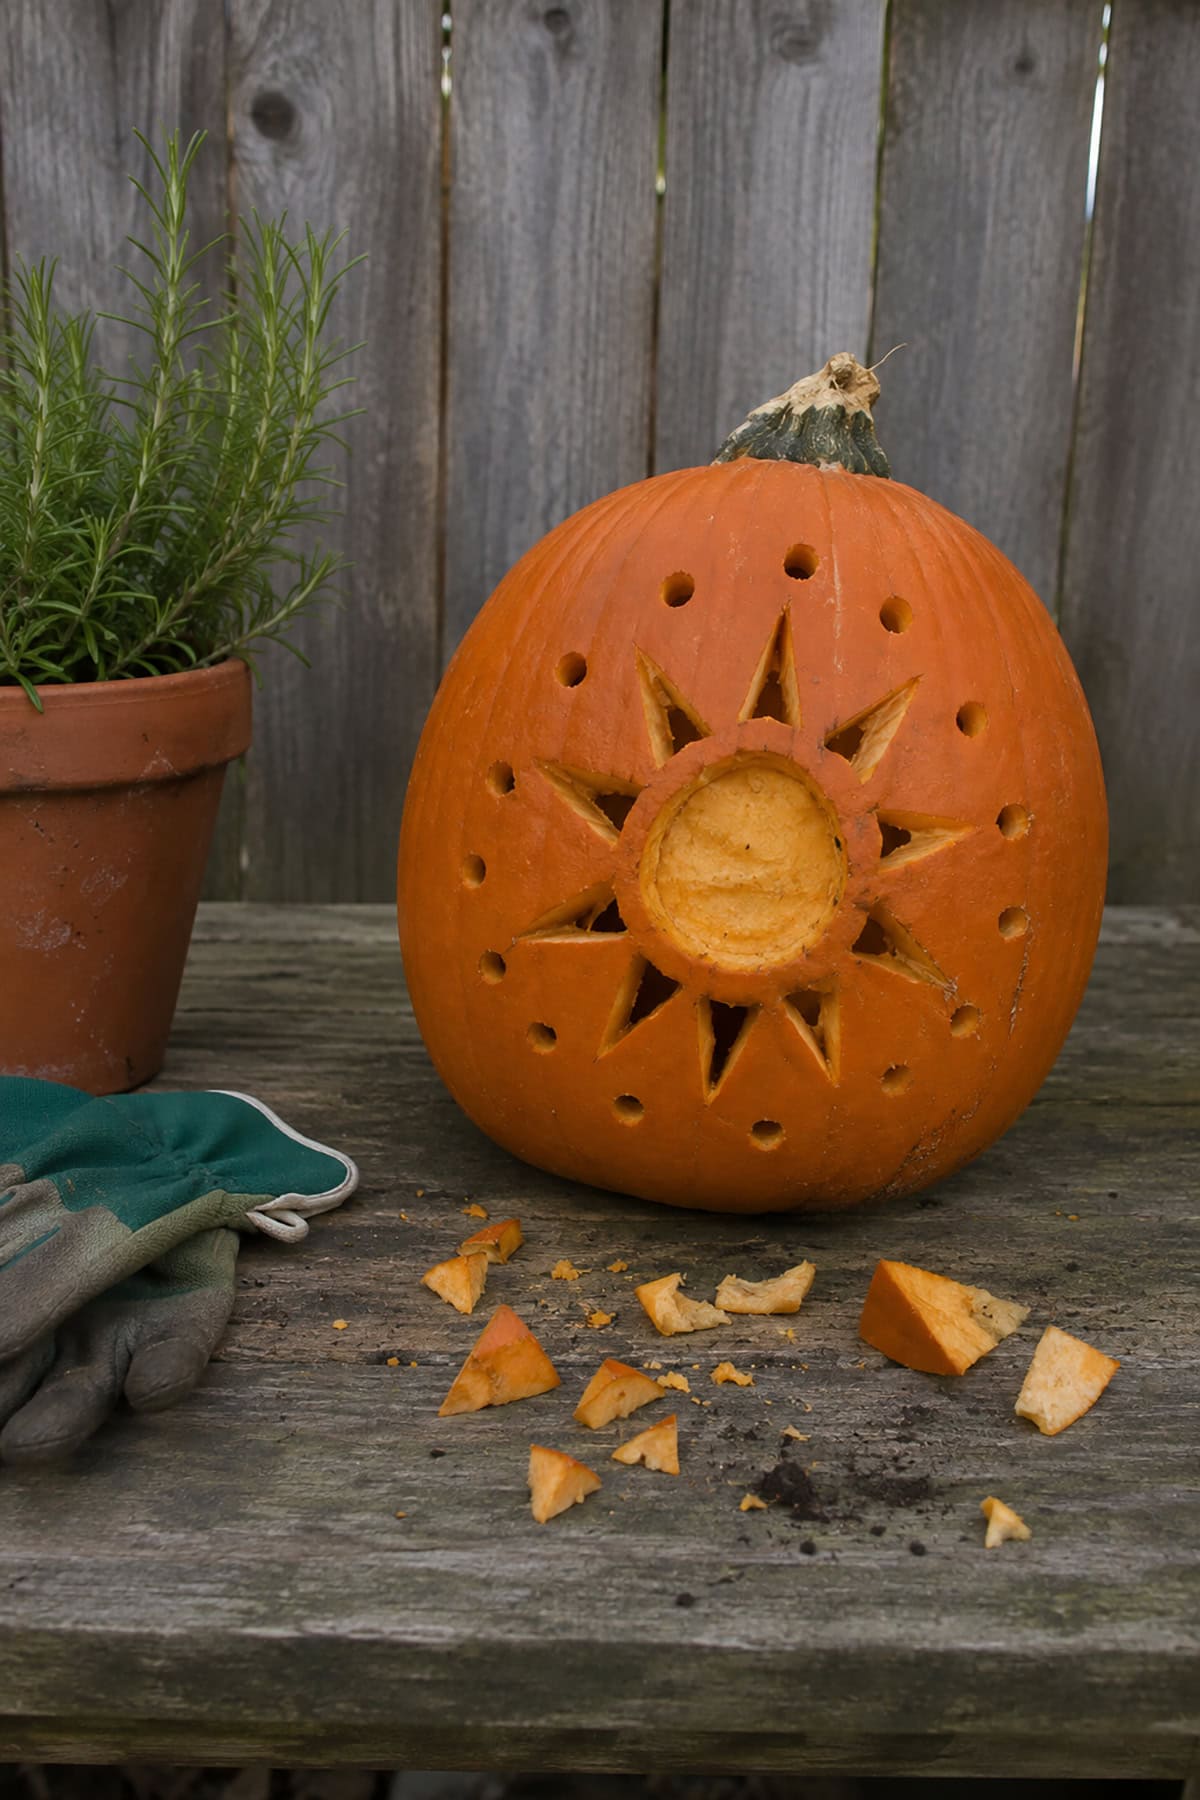
Skip the standard face and place a large sun at the center of the pumpkin. Scrape out a wide circle, then cut a row of triangular rays around its edge.
Drill loose rings of small holes beyond the rays for extra light. Equal spacing matters very little for this design, which makes it a relaxed choice for beginners and younger helpers.
Sharp-Toothed Monster Pumpkin
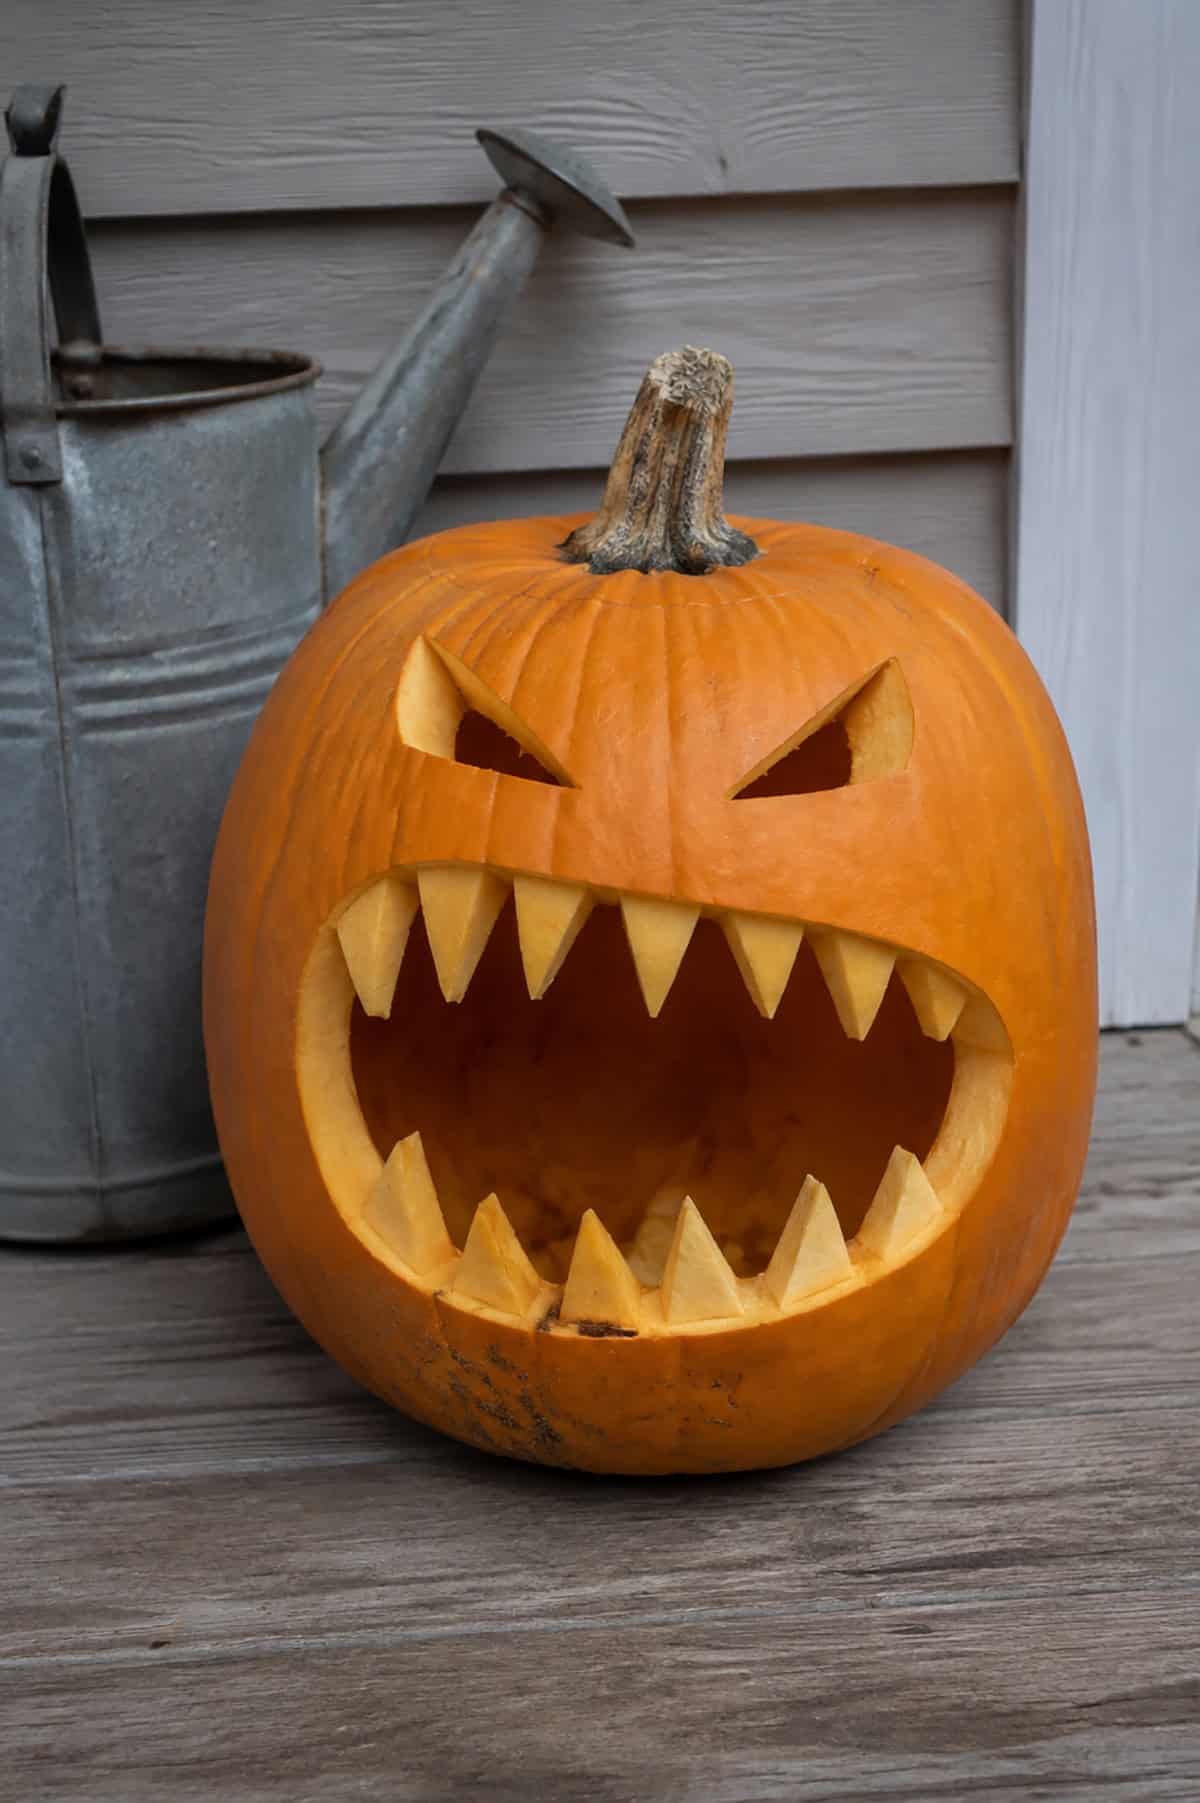
Big triangular teeth carry this monster design. Cut two narrow eyes, angle their inner corners downward, and remove one enormous oval section for the mouth.
Shape the top and bottom edges into mismatched points, with wider teeth near the center. A few blunt or crooked tips add more humor to the expression. Choose a large pumpkin so the teeth have enough rind between them.
Round-Eared Pumpkin Carving
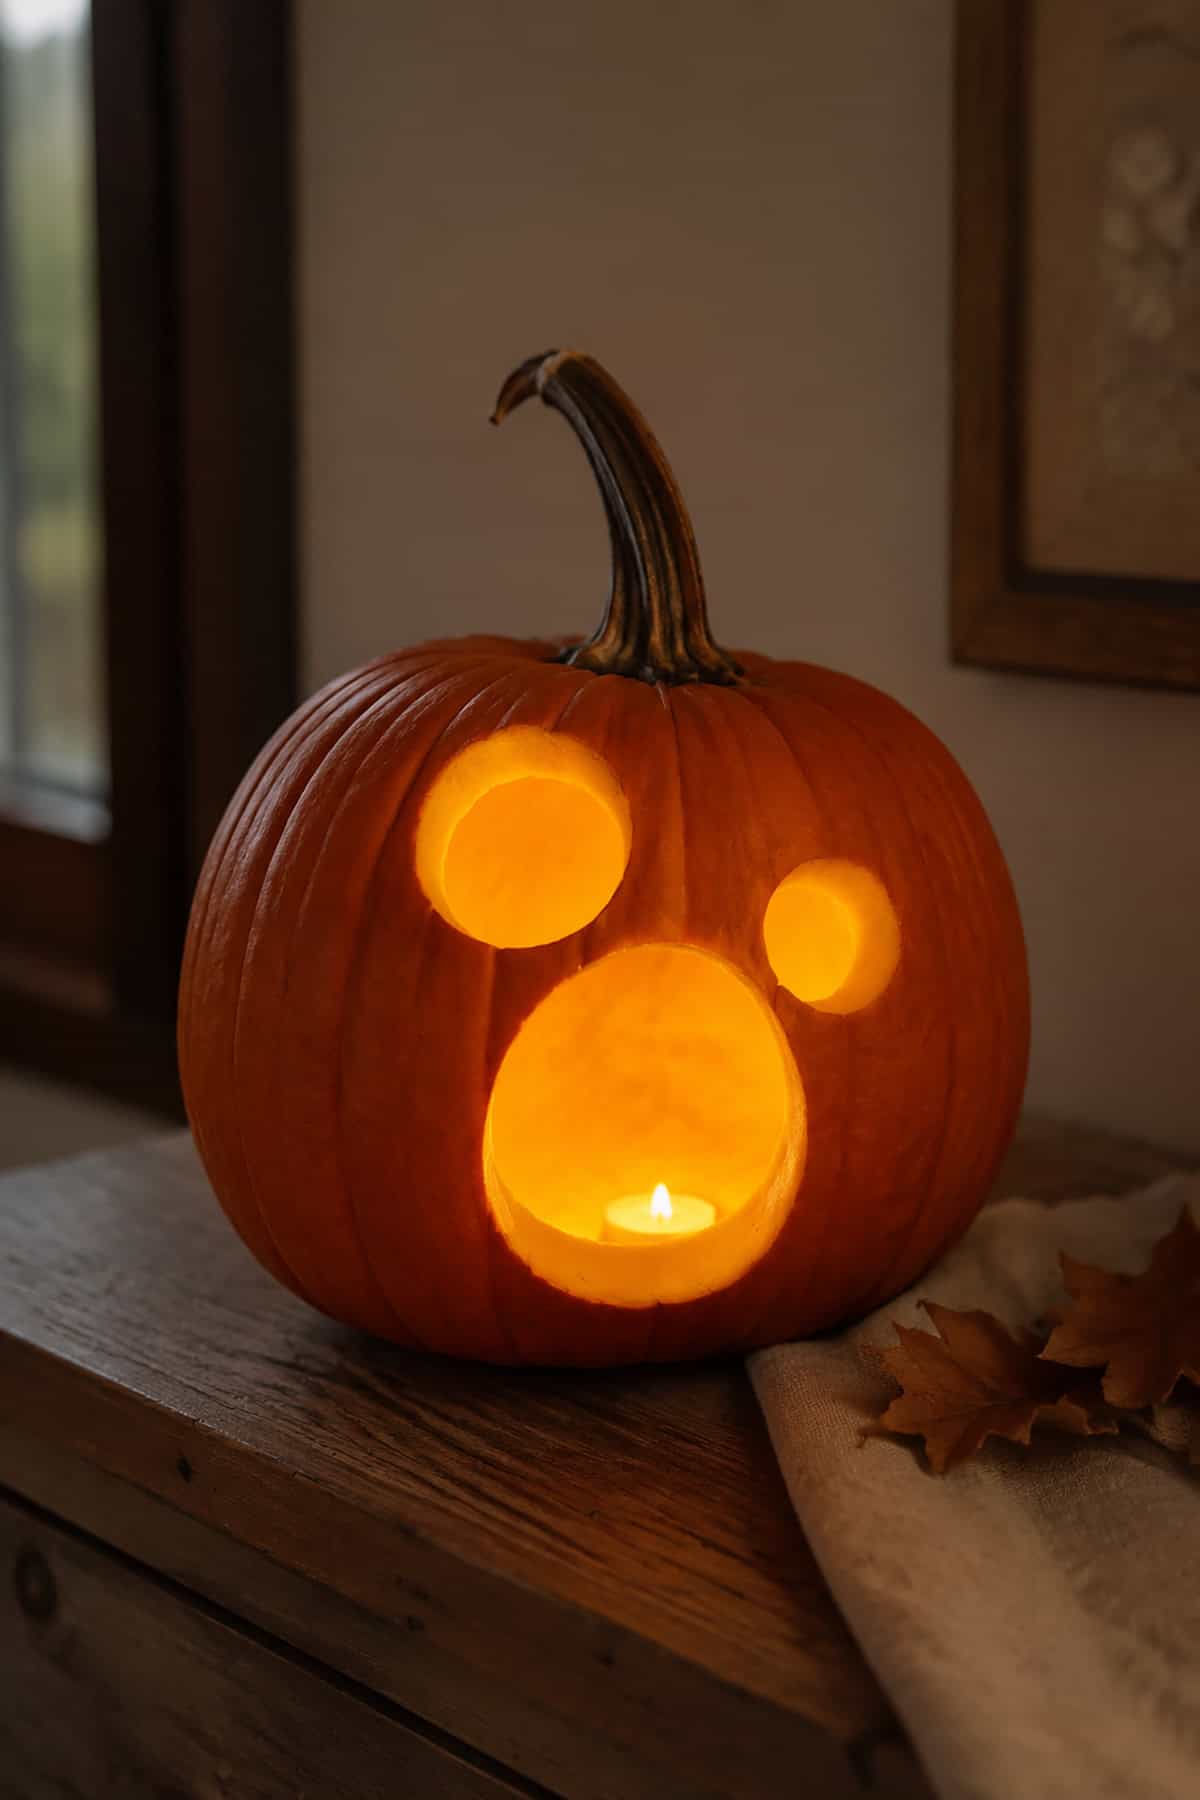
Three simple openings create a surprised creature with an unusual face. Place two round holes near the upper half as mismatched ears or eyes, then cut one oversized oval below for the mouth.
Smooth circles require fewer awkward knife movements than stars, letters, or jagged features. Once lit, the large lower opening becomes the brightest part and exaggerates that shocked expression.
Pumpkin Eating A Tiny Pumpkin
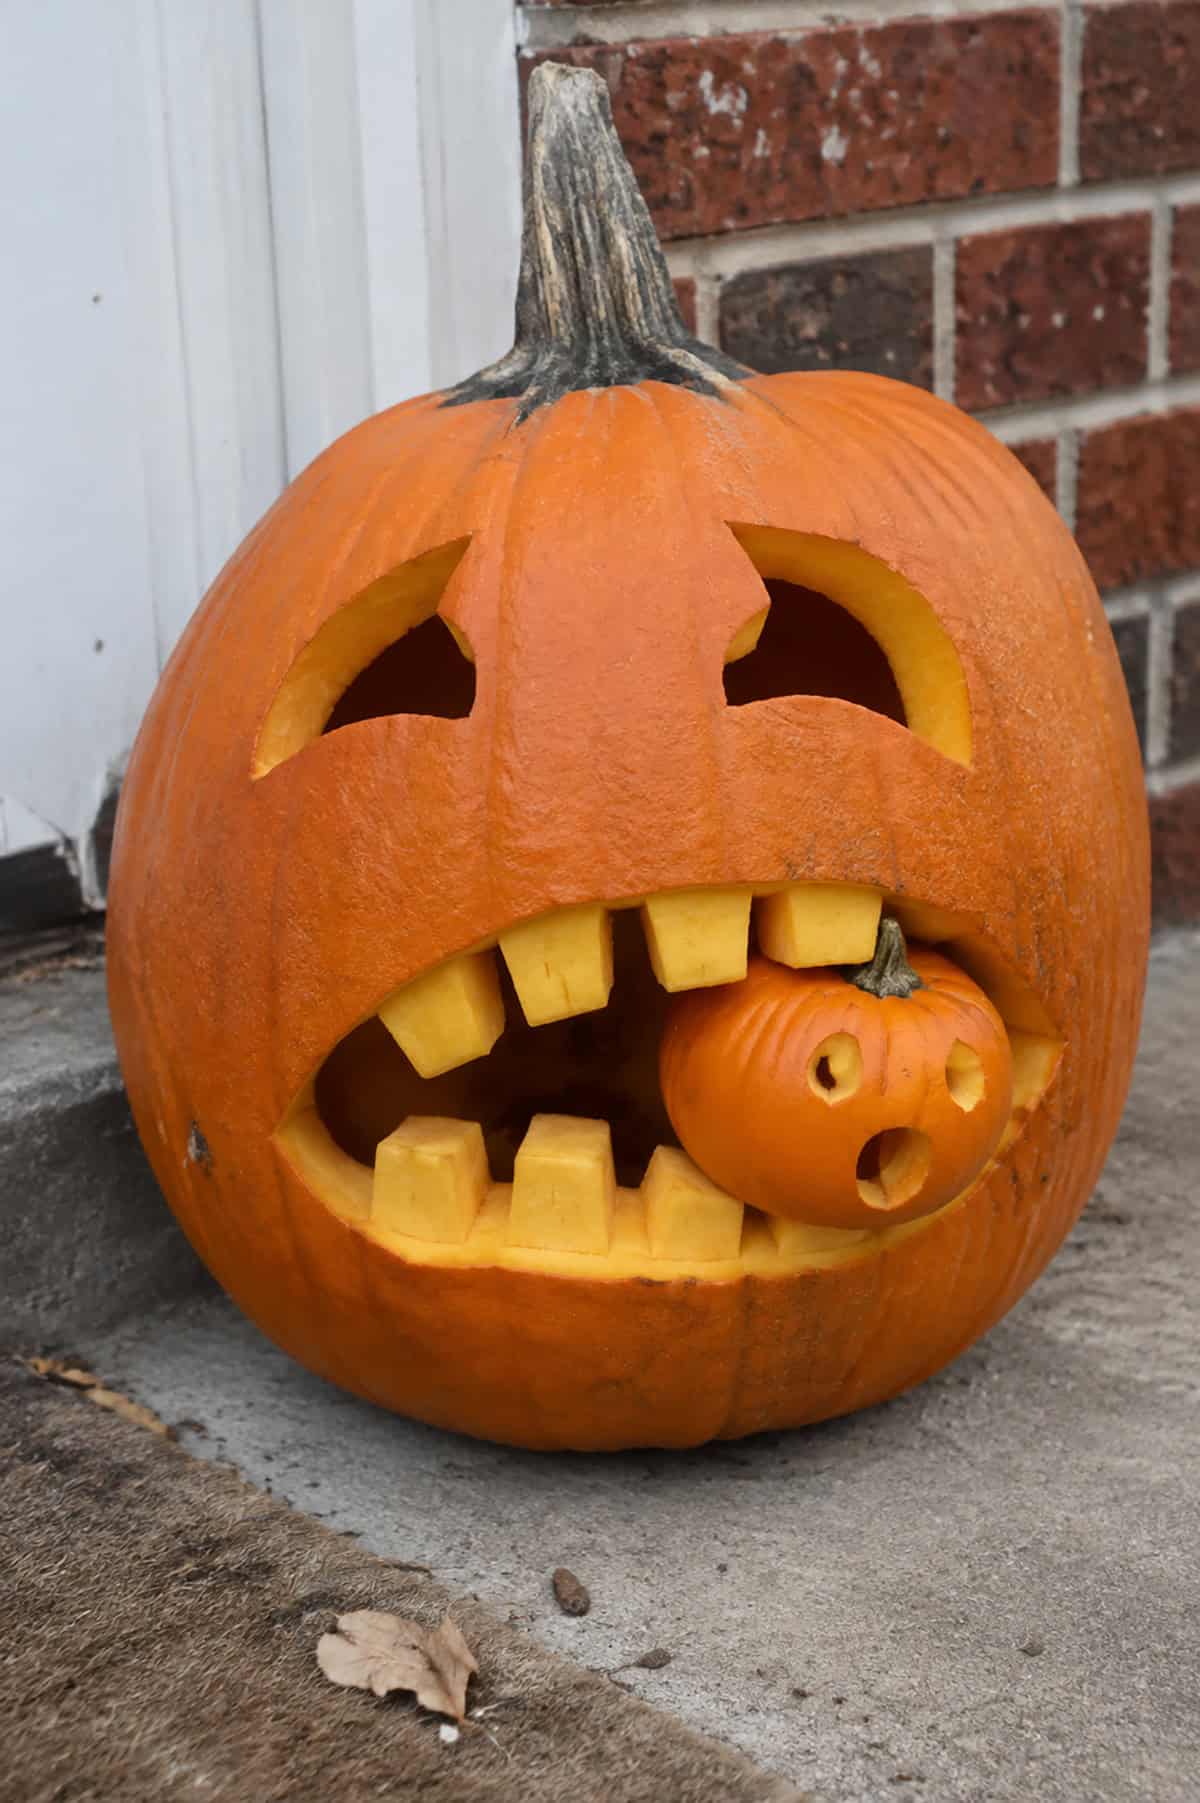
Carve a huge mouth across the larger pumpkin, then shape several wide square teeth along both edges. Leave a gap on one side large enough for a miniature pumpkin.
Give the smaller pumpkin two tiny eyes and a round shocked mouth before placing it between the teeth. The joke depends on scale, so select a mini pumpkin that fits securely yet remains clearly visible.
One-Eyed Monster Pumpkin
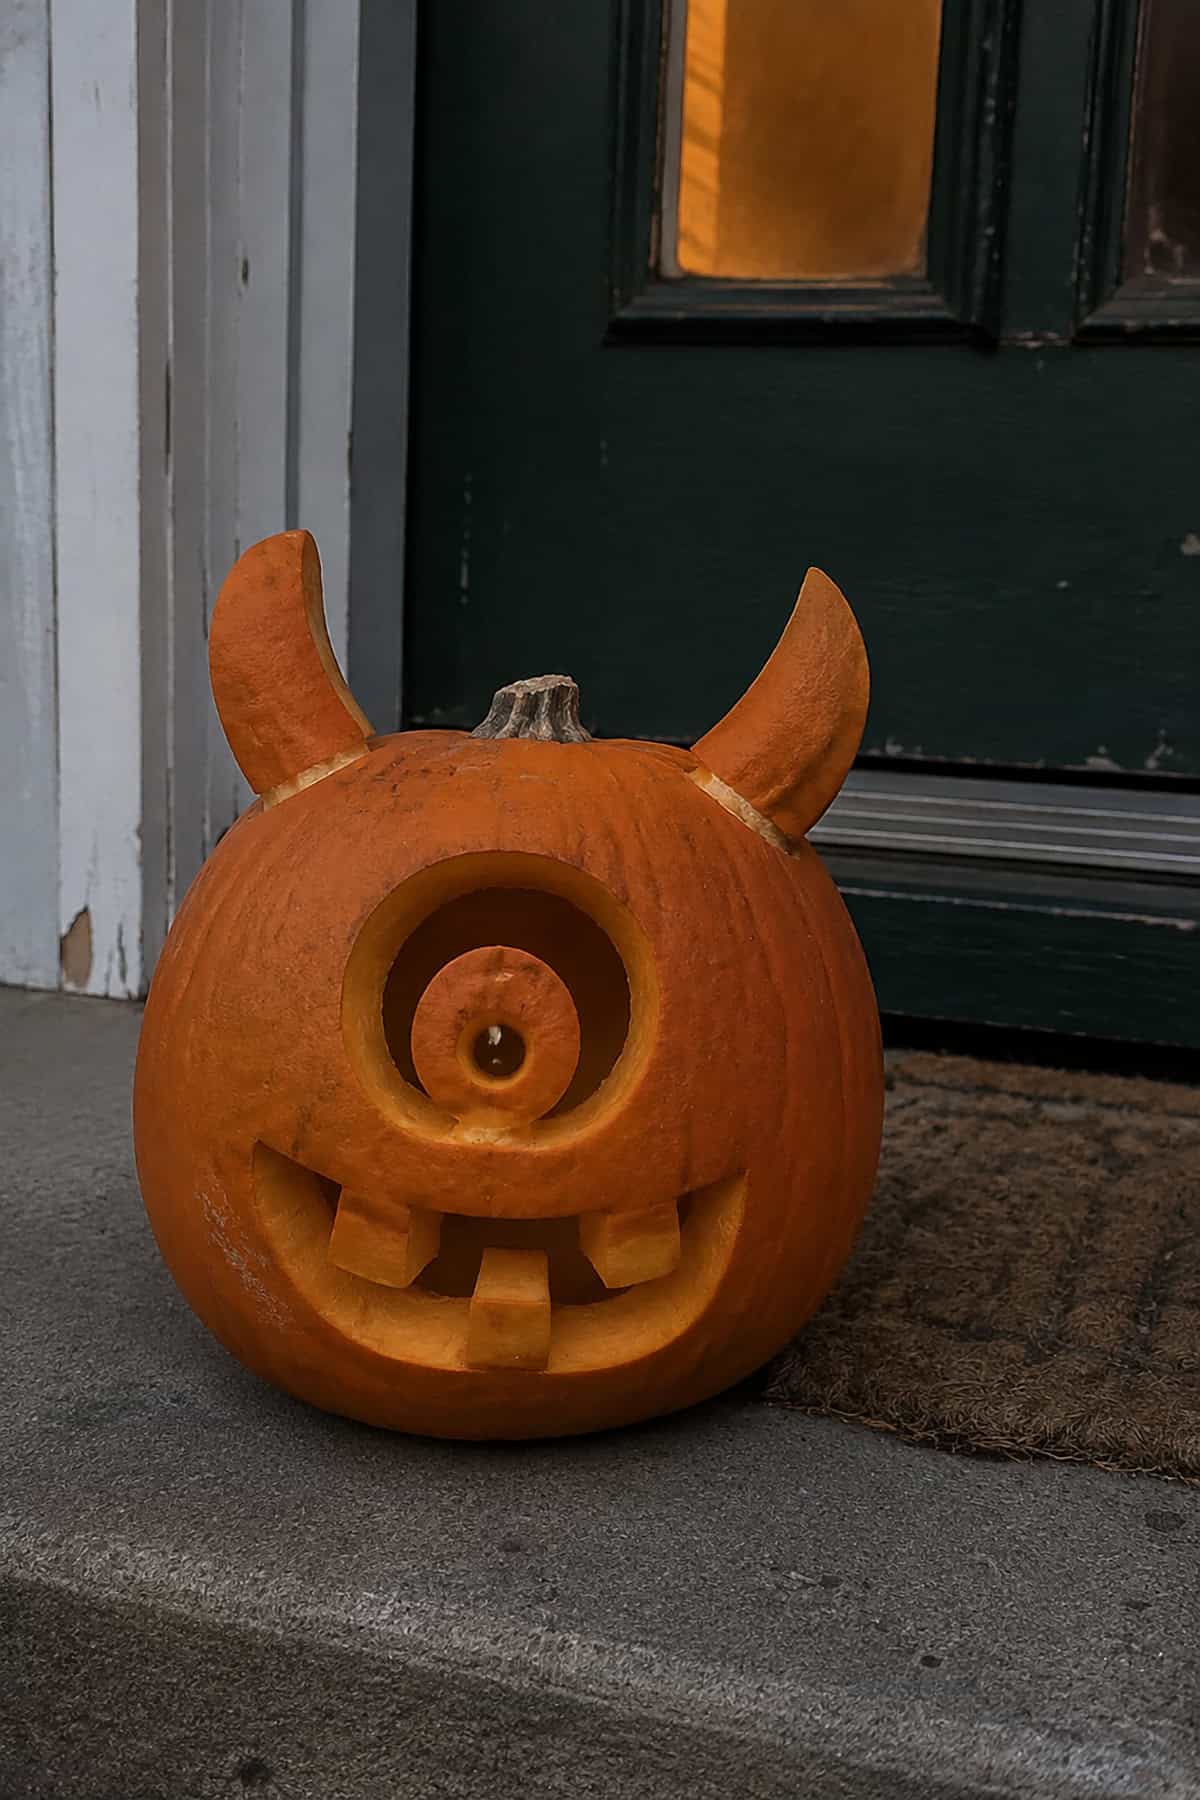
One oversized eye creates this entire monster expression. Cut a broad circular socket, then reuse part of the removed rind as a smaller iris. Pierce its center for the pupil and secure the iris inside with toothpicks. Add two curved rind horns above the eye and a short mouth with chunky teeth below. The limited number of shapes makes this an approachable weekend project.
Moon And Star Jack-O’-Lantern
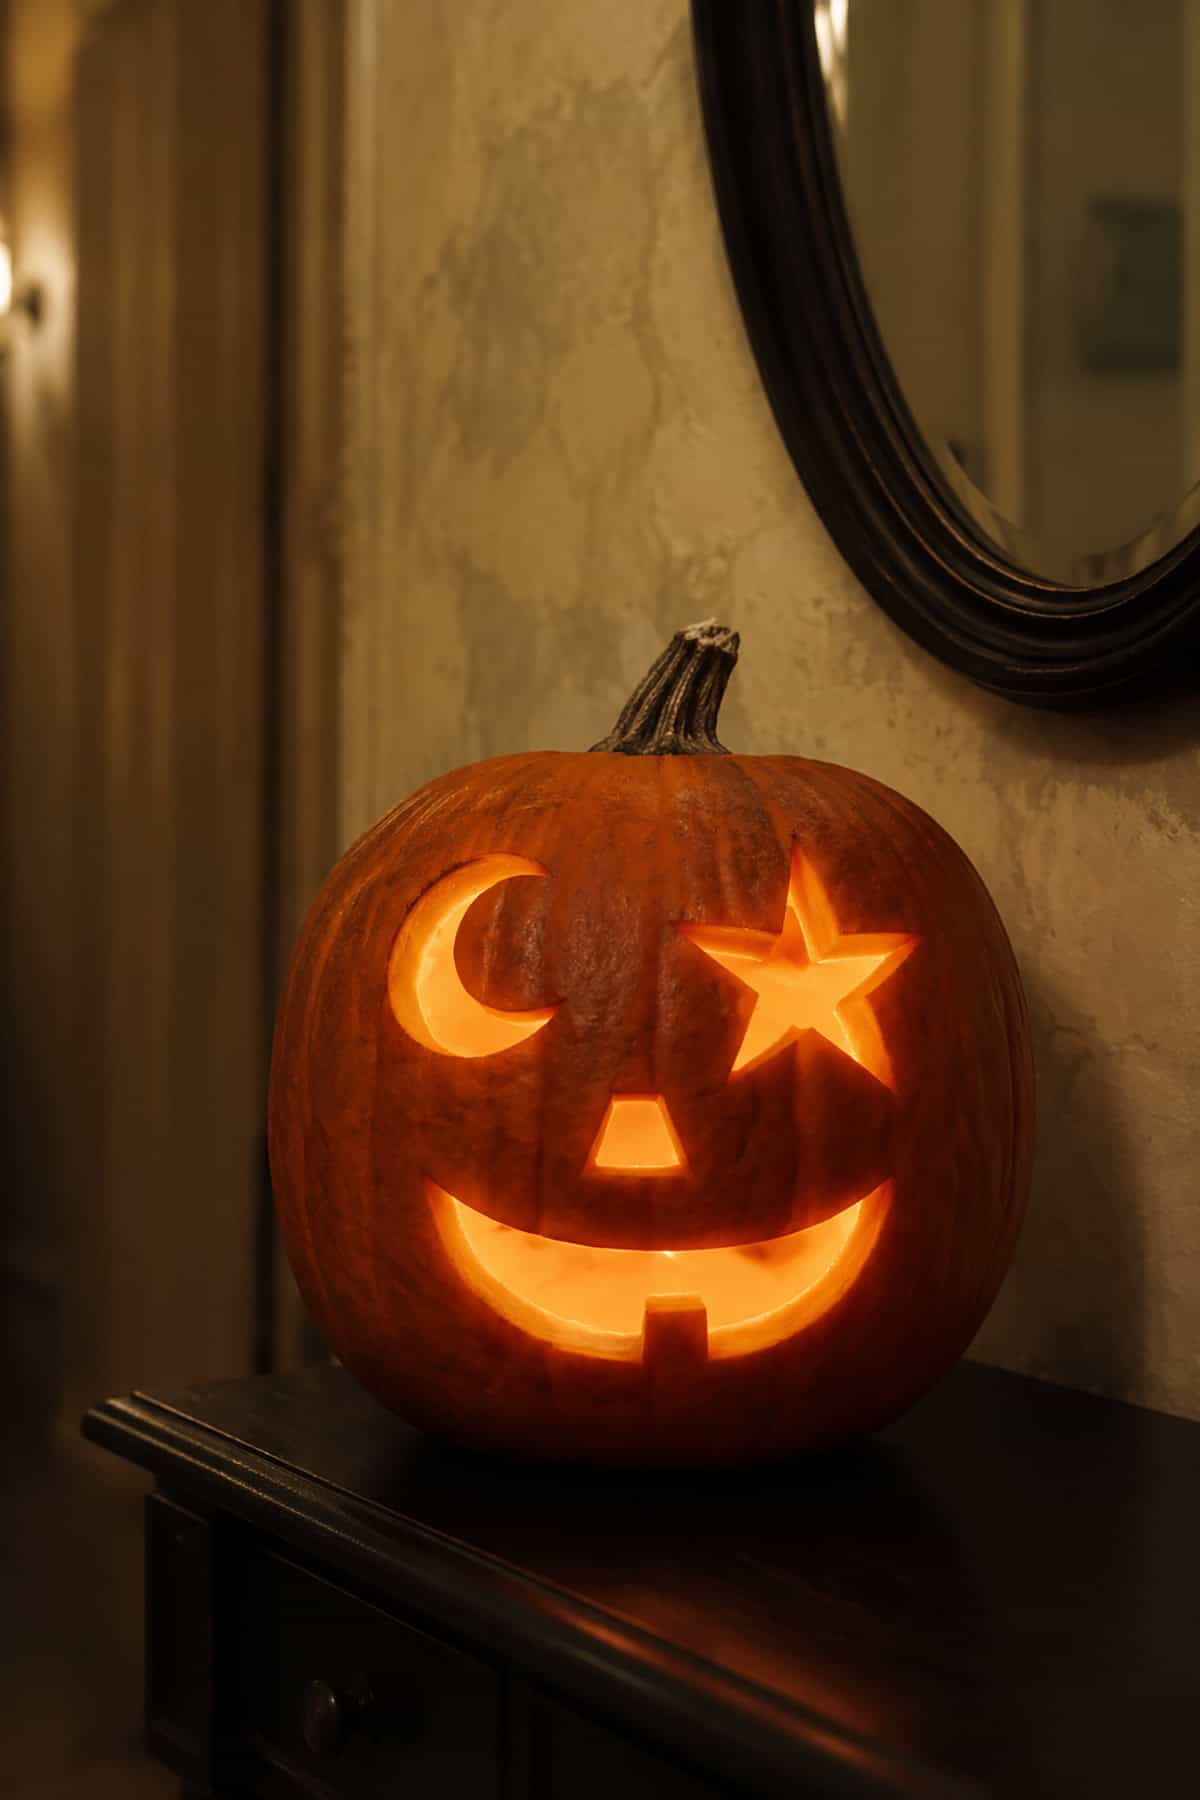
Replace ordinary triangular eyes with a crescent moon and a five-point star. Cut a tiny trapezoid nose beneath them, followed by a broad curved smile with one square tooth. Draw the star slightly larger than the crescent so its narrow points remain sturdy. The mismatched eyes add visual interest, yet every feature still relies on familiar shapes and straightforward cuts.
Kindness Message Pumpkin Carving
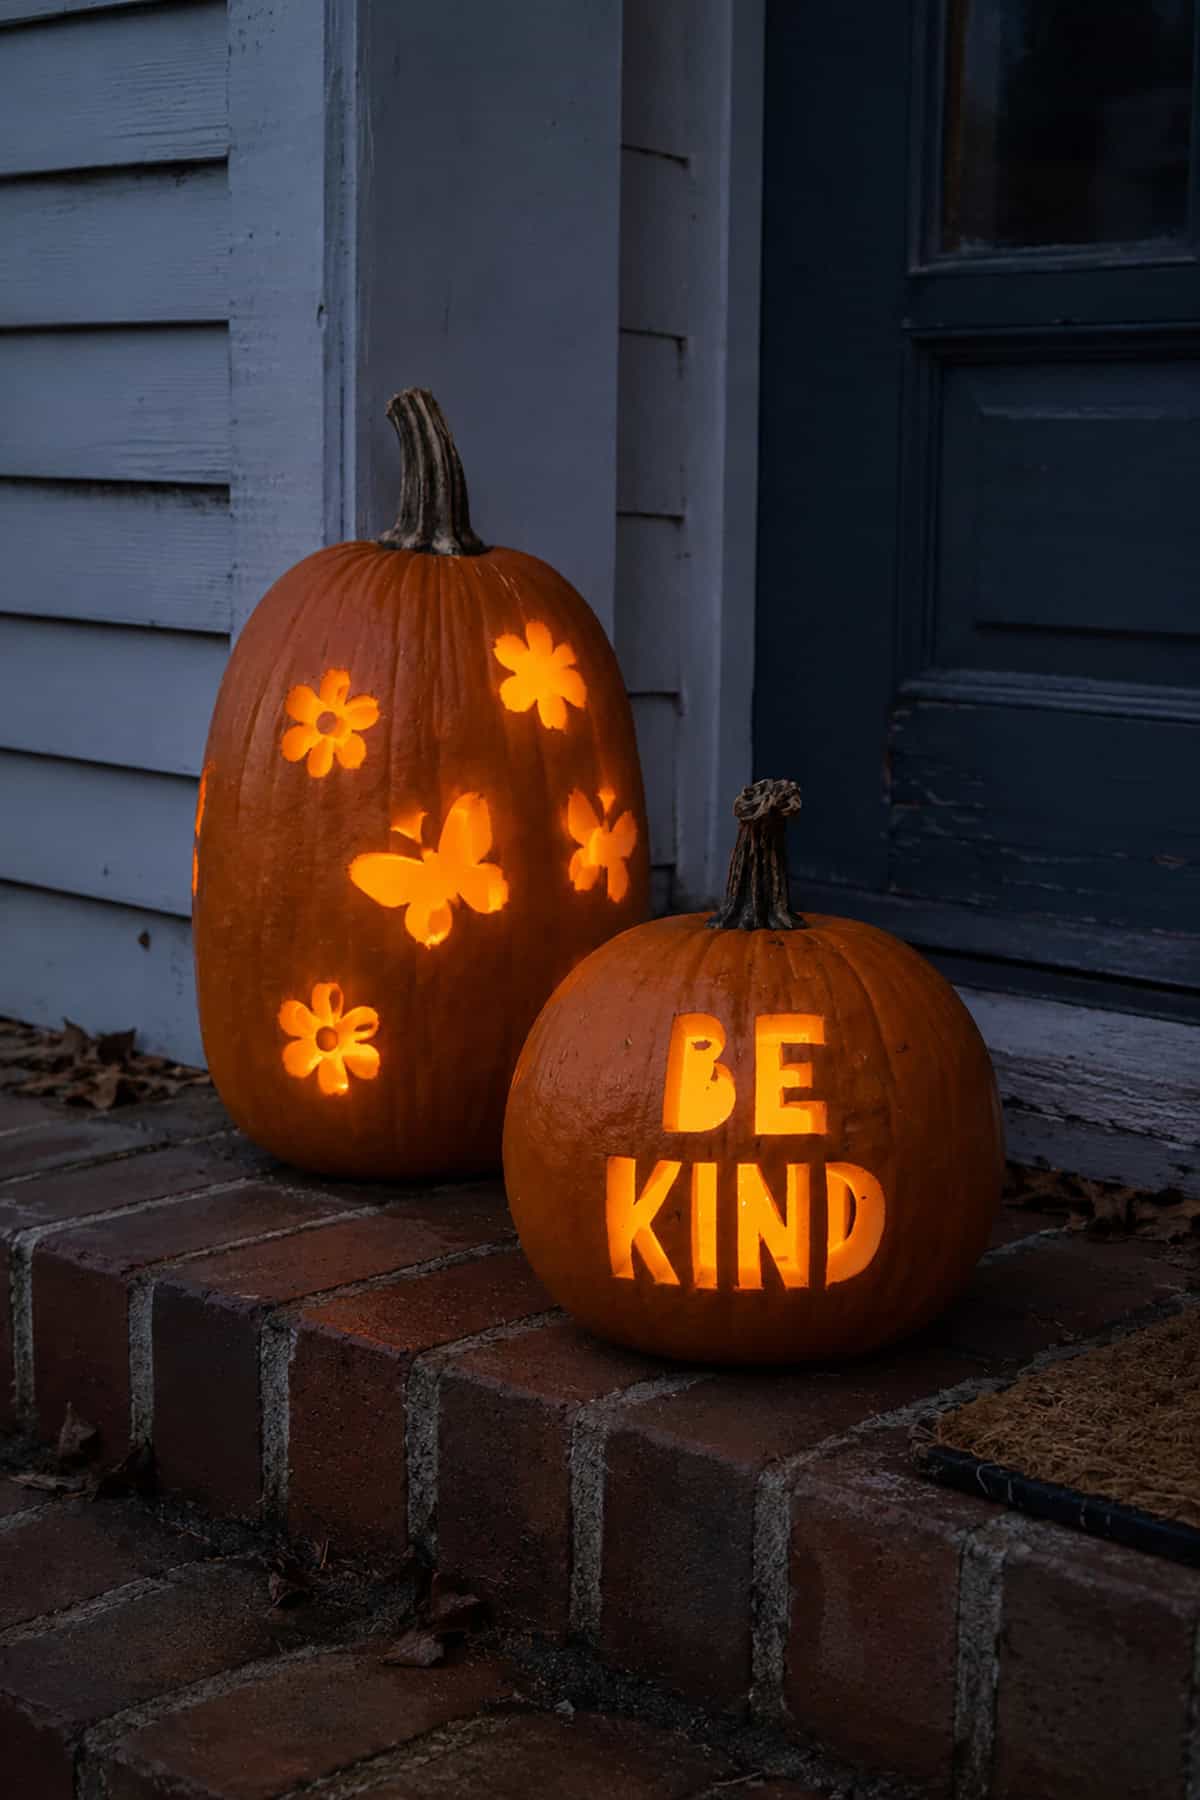
Block letters make a short message easier to carve than cursive script. Write “BE KIND” across two centered rows, with thick strokes and generous gaps between the letters. Preserve the enclosed sections inside the B and D with small rind bridges. Trace the phrase on paper first, tape it to the pumpkin, and pierce along the outlines before the main cuts begin.
Heart-Eyed Pumpkin Carving
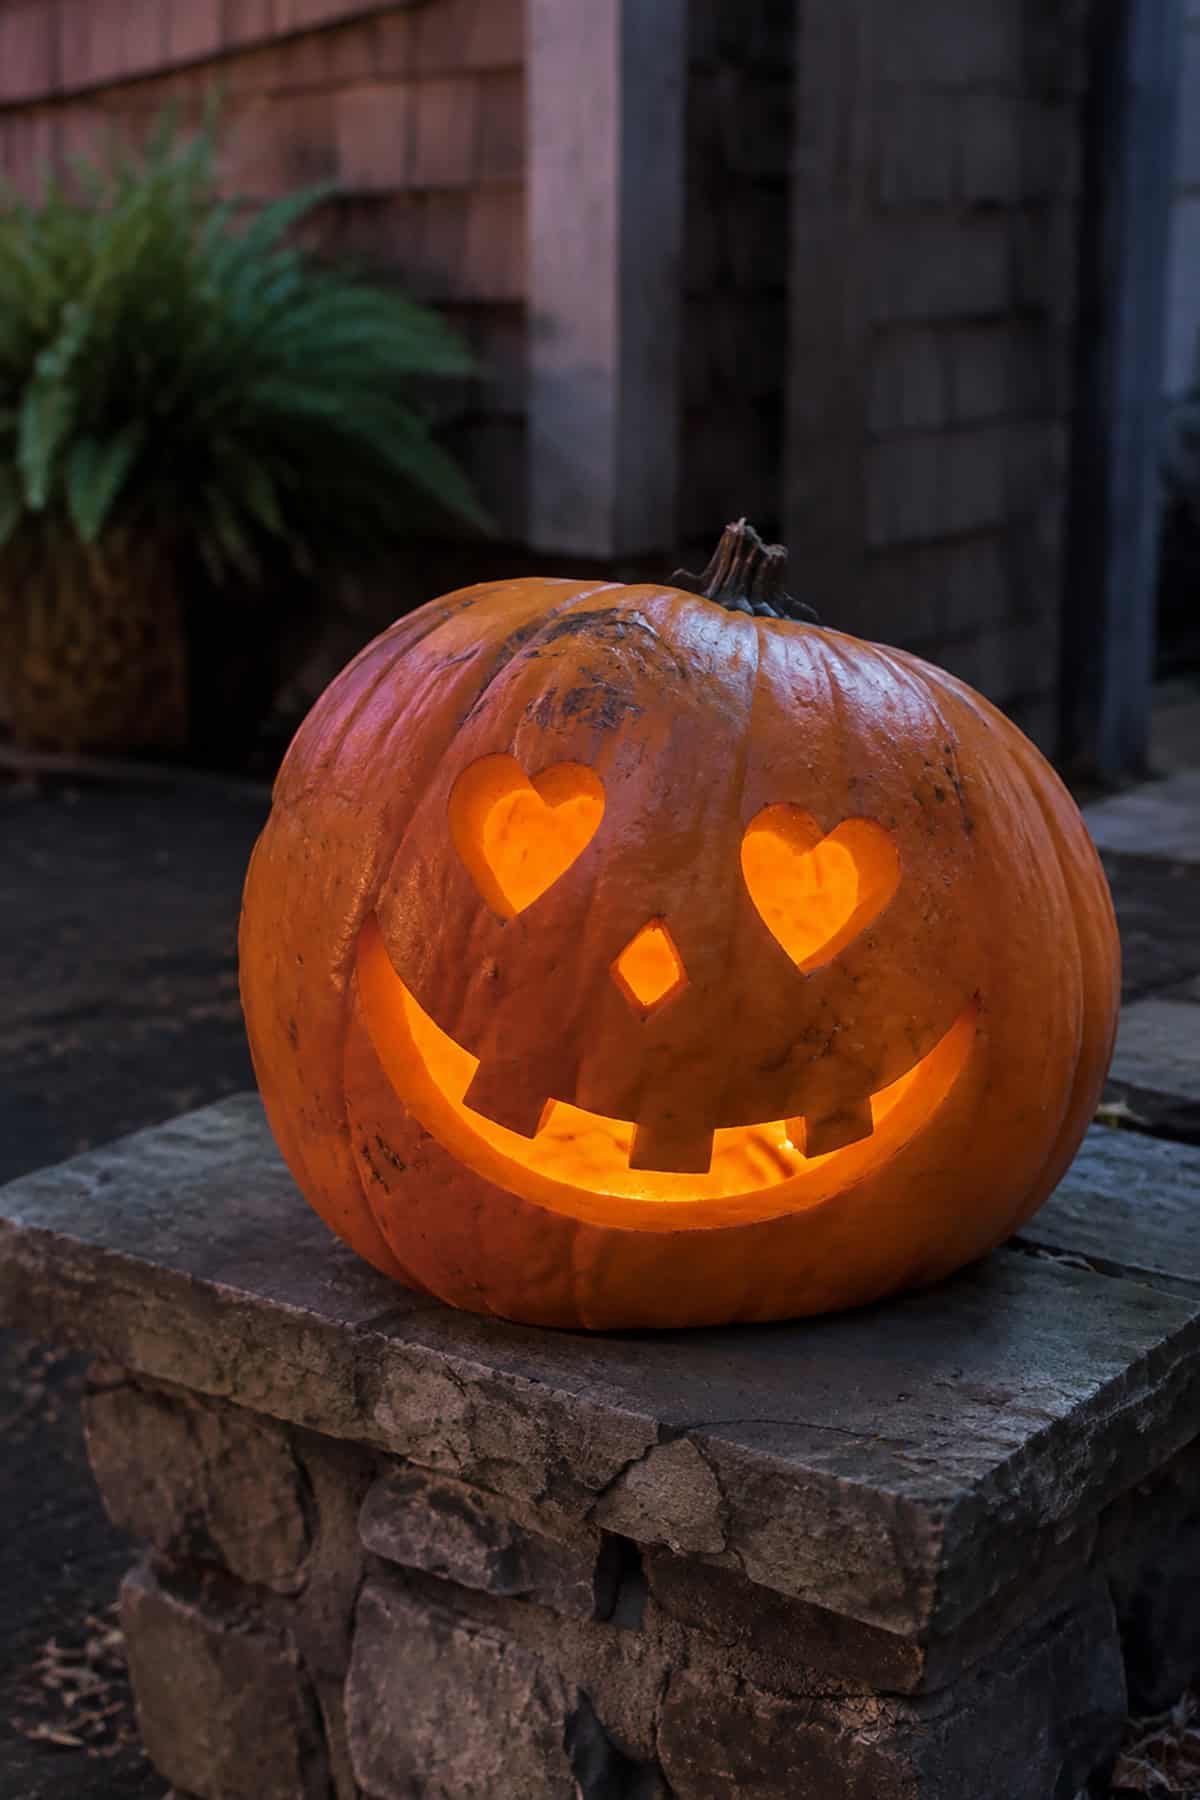
Two heart-shaped eyes create a cheerful alternative to the classic spooky face. Draw each heart with a broad base and a shallow center dip to avoid fragile corners. Add a small diamond nose and a long curved mouth with three square teeth. Slight differences between the hearts add charm, so exact symmetry has little importance. This design uses familiar shapes and only a handful of cuts.
Happy Smiling Pumpkin
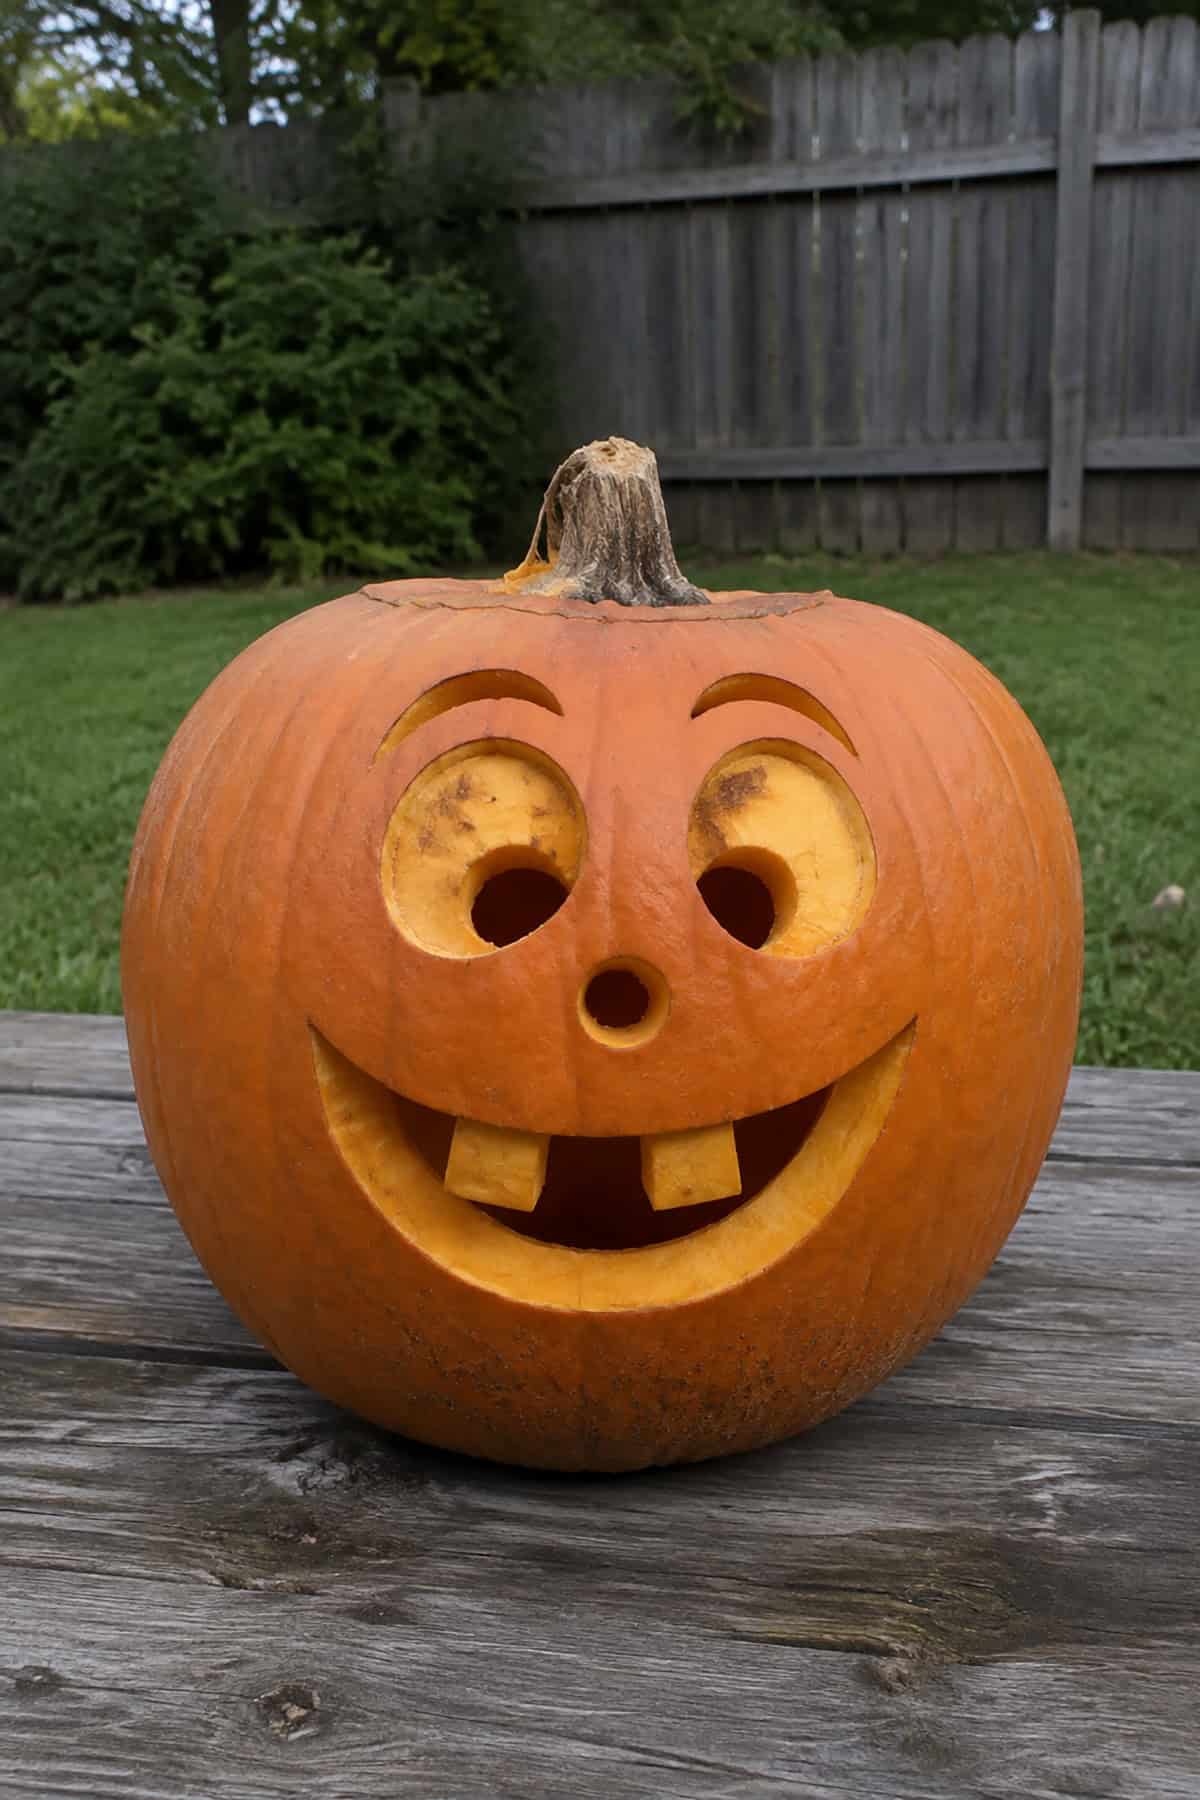
A cheerful face starts with two large circular eyes and small offset pupils that look toward the nose. Add curved eyebrows above them for extra expression. A tiny round nose requires only one clean opening, while the broad smile uses a smooth crescent cut. Leave two square teeth attached to the upper edge. The uneven pupils make the pumpkin look lively rather than perfectly posed.
Goofy Sunflower Garden Pumpkin
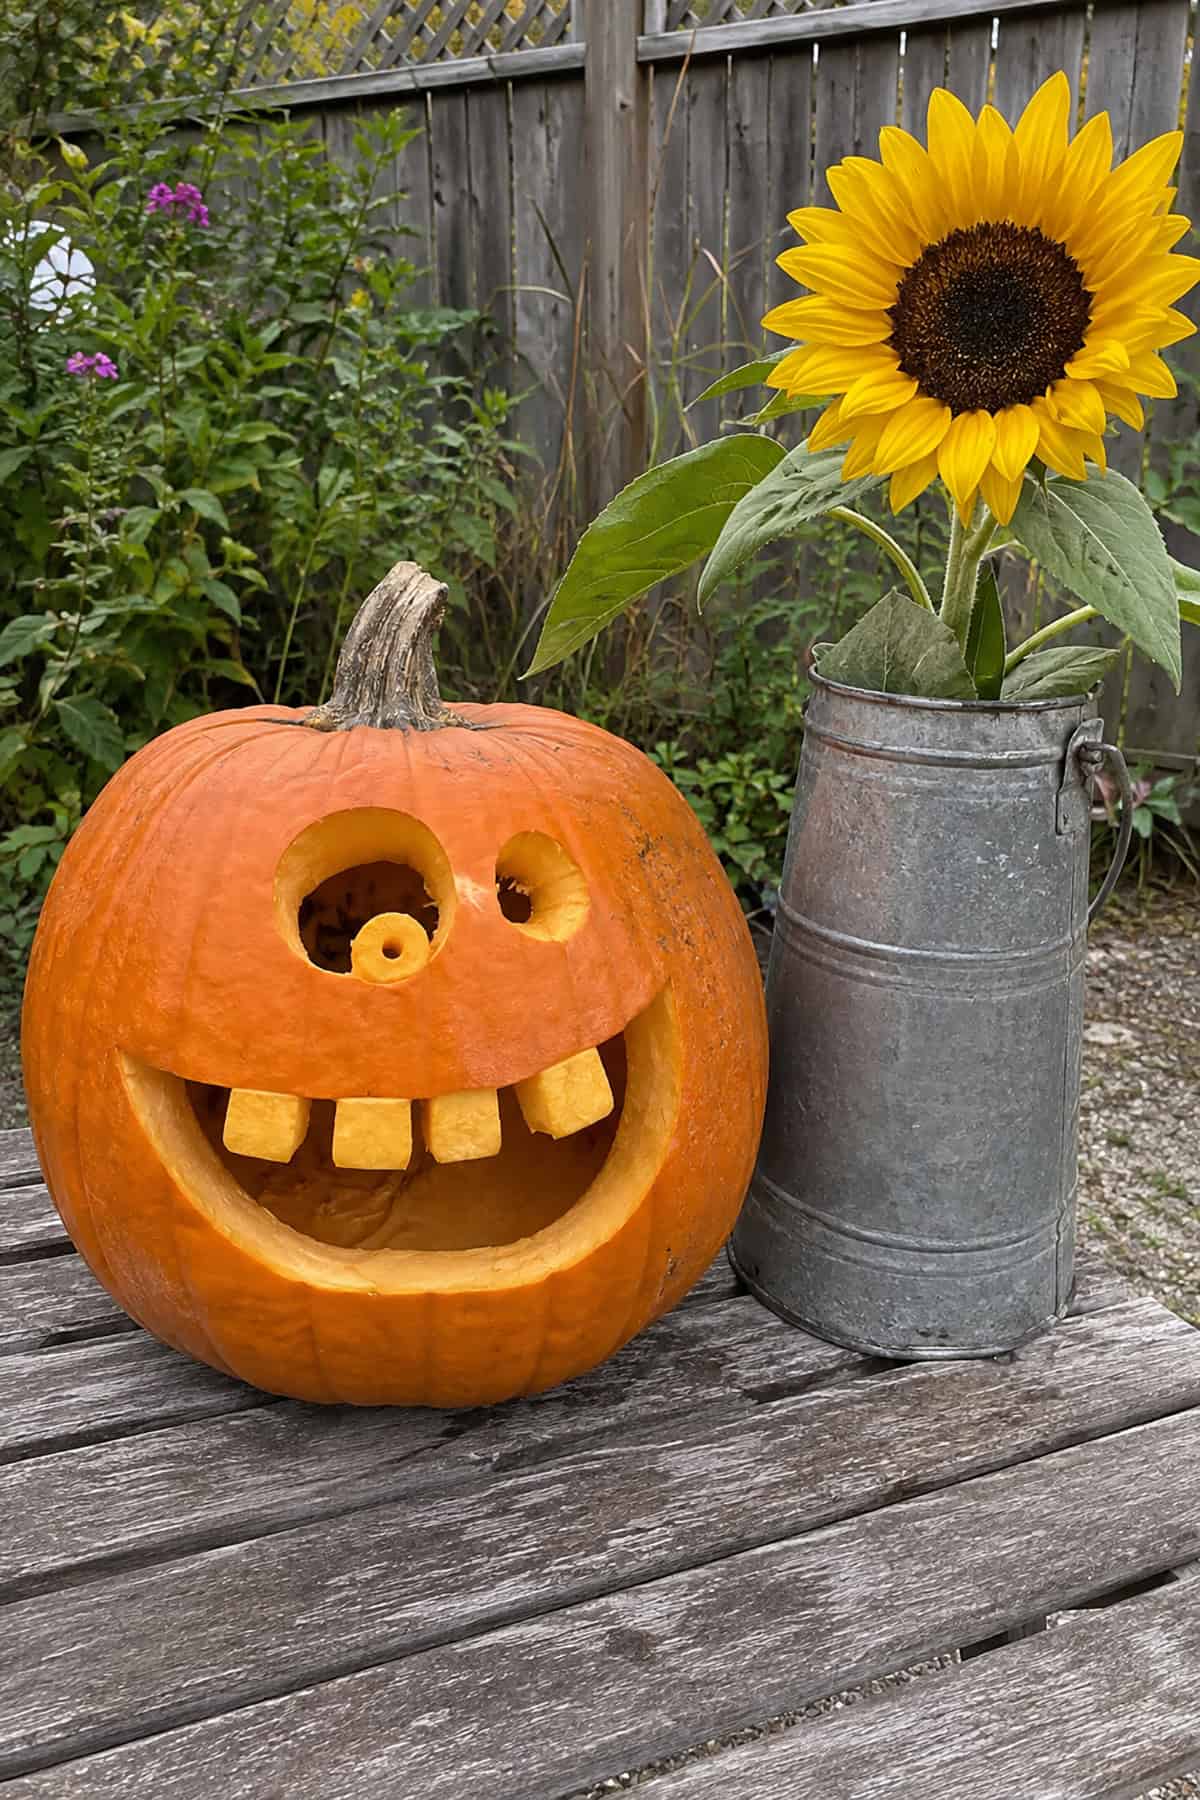
This goofy design depends on exaggerated proportions. Cut one eye much larger than the other, then place a small rind circle inside the larger opening as a wandering pupil. Below, carve an enormous open smile and preserve four thick upper teeth. Their mismatched widths strengthen the silly expression. Straight cuts form the teeth, while the mouth’s wide curve stays forgiving around small mistakes.
Glowing Owl Pumpkin
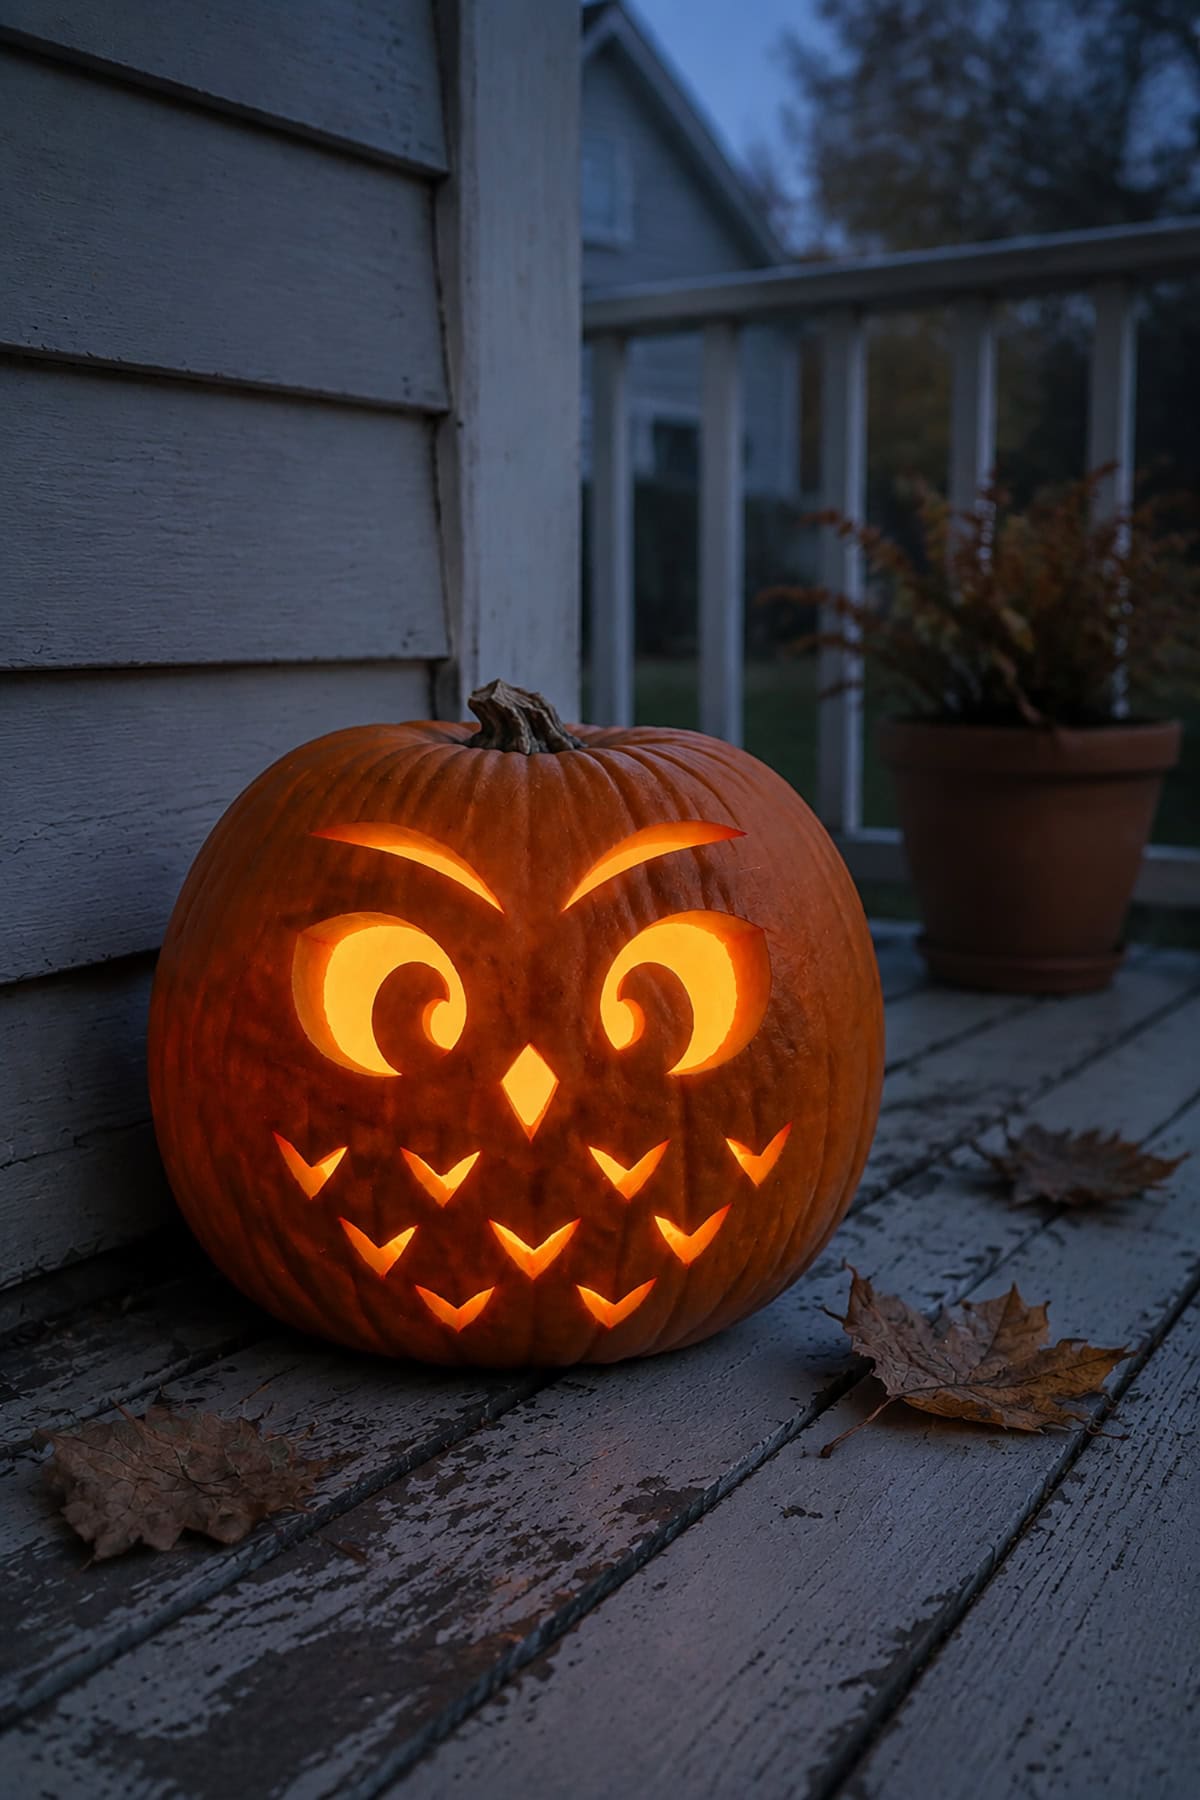
Those enormous owl eyes command attention, yet the shapes remain fairly simple. Use two wide circles with curled inner sections, then add narrow arched brows and a diamond-shaped beak. Several small V cuts across the lower half suggest layered chest feathers. Repeat the V shape in loose rows rather than precise lines. A bright interior light makes every feather opening easy to recognize.
Glowing Bat And Crescent Pumpkin
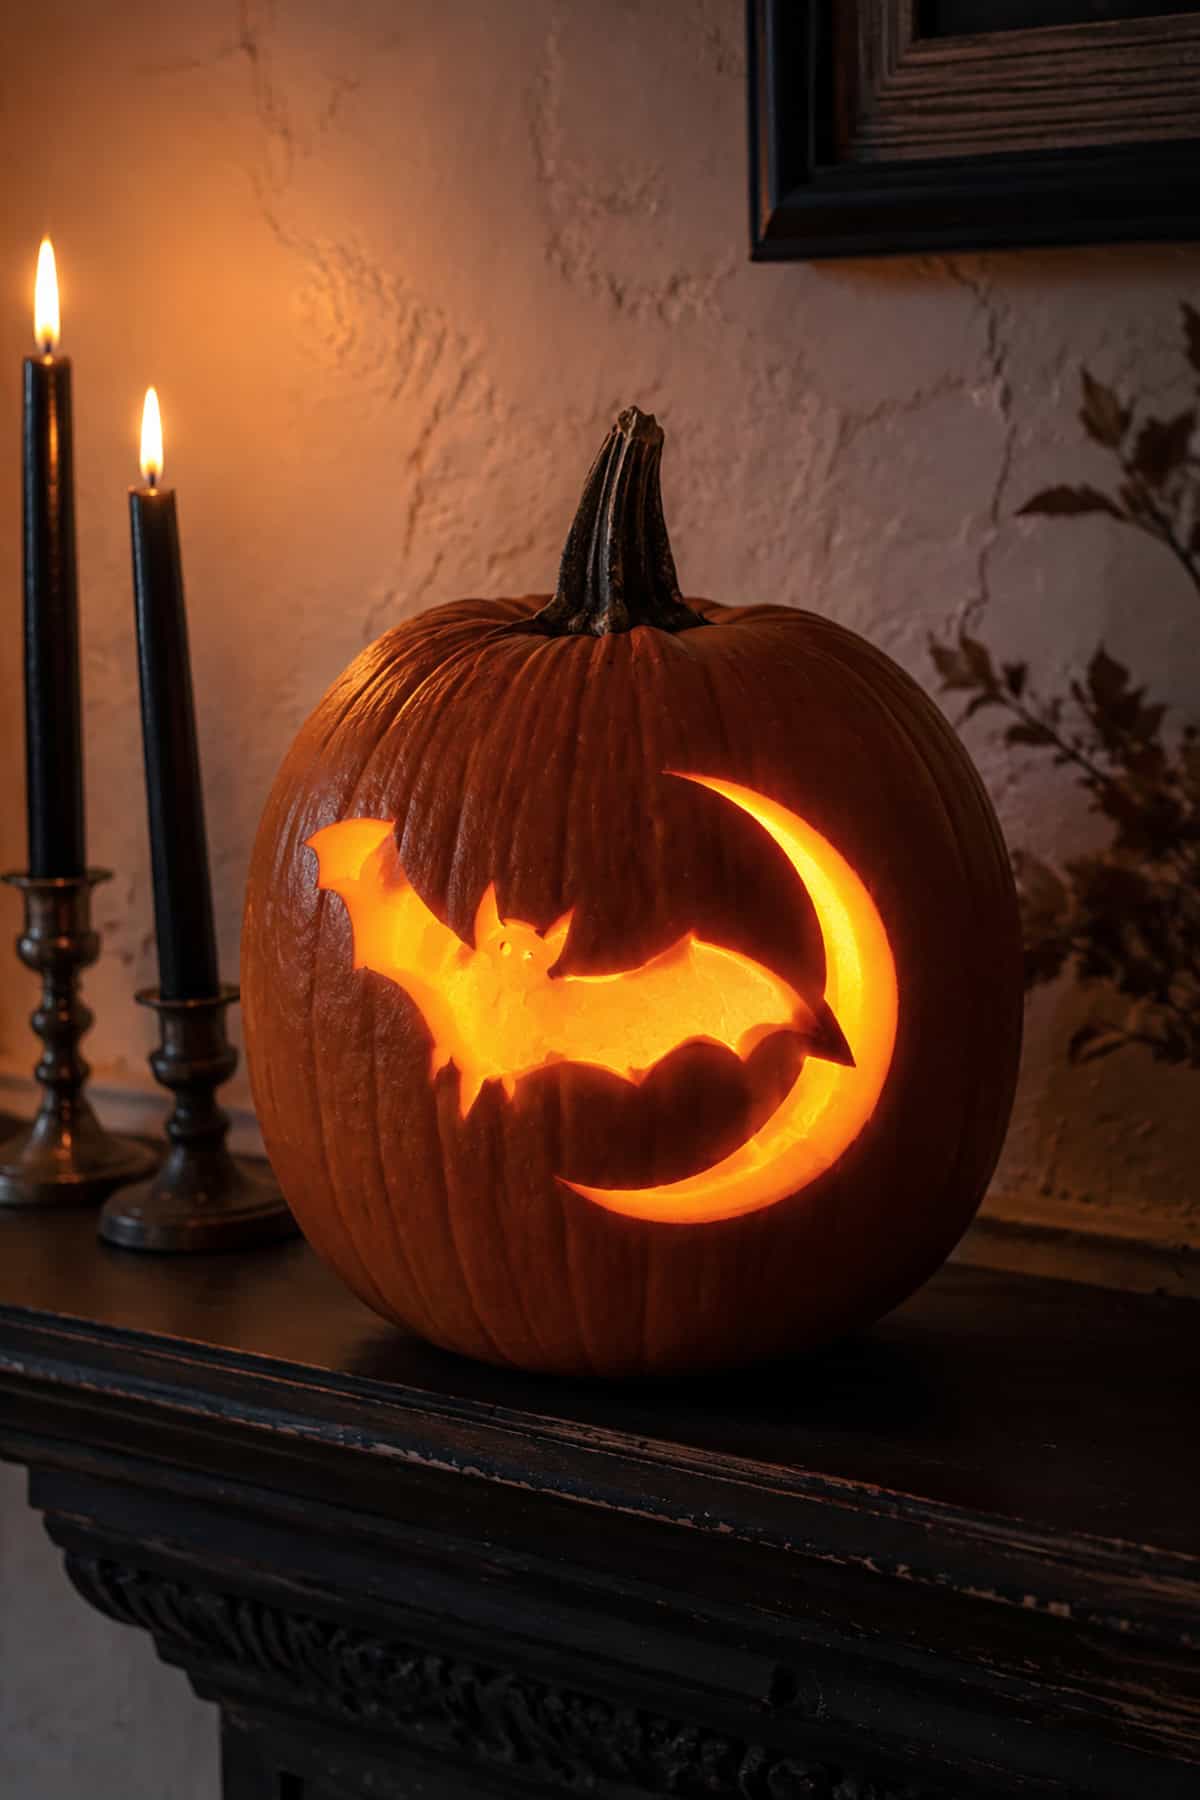
A bat across a crescent moon brings two Halloween symbols into one bold design. Draw the moon first, then position the bat so its wings overlap the open curve. Preserve solid rind around the bat’s body, ears, and wing tips to form a dark silhouette against the light. Keep each wing point broad; skinny tips break easily. Two tiny holes near the head serve as eyes.
Friendly Ghost And Stars Pumpkin
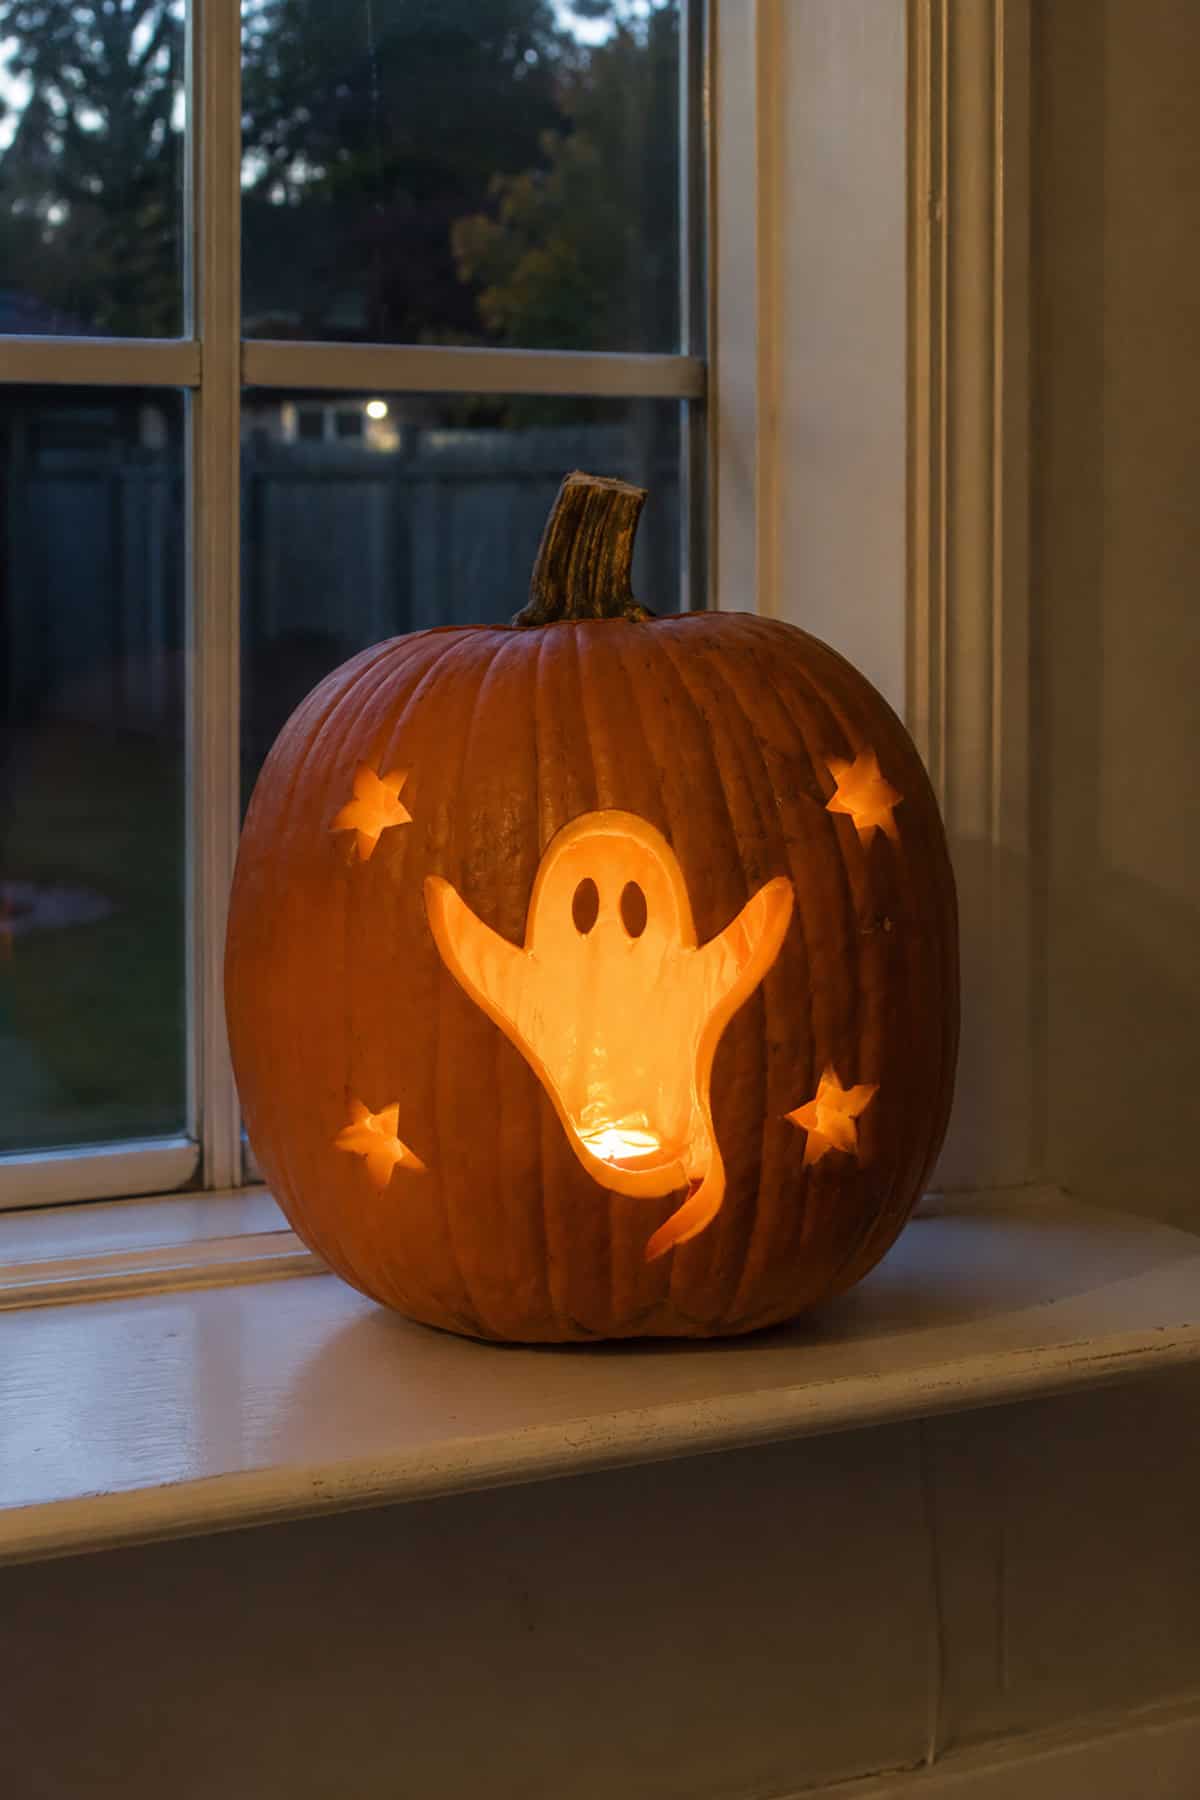
One large ghost provides the central shape, while four small stars fill the open areas around it. Give the ghost a rounded head, raised arms, two oval eyes, and a curved tail. Broad sections make the outline easier to follow with a small saw. Cut the stars last, since their narrow points require slower movements. Uneven stars still look perfectly natural across this playful night scene.
Friendly Floating Ghost Pumpkin
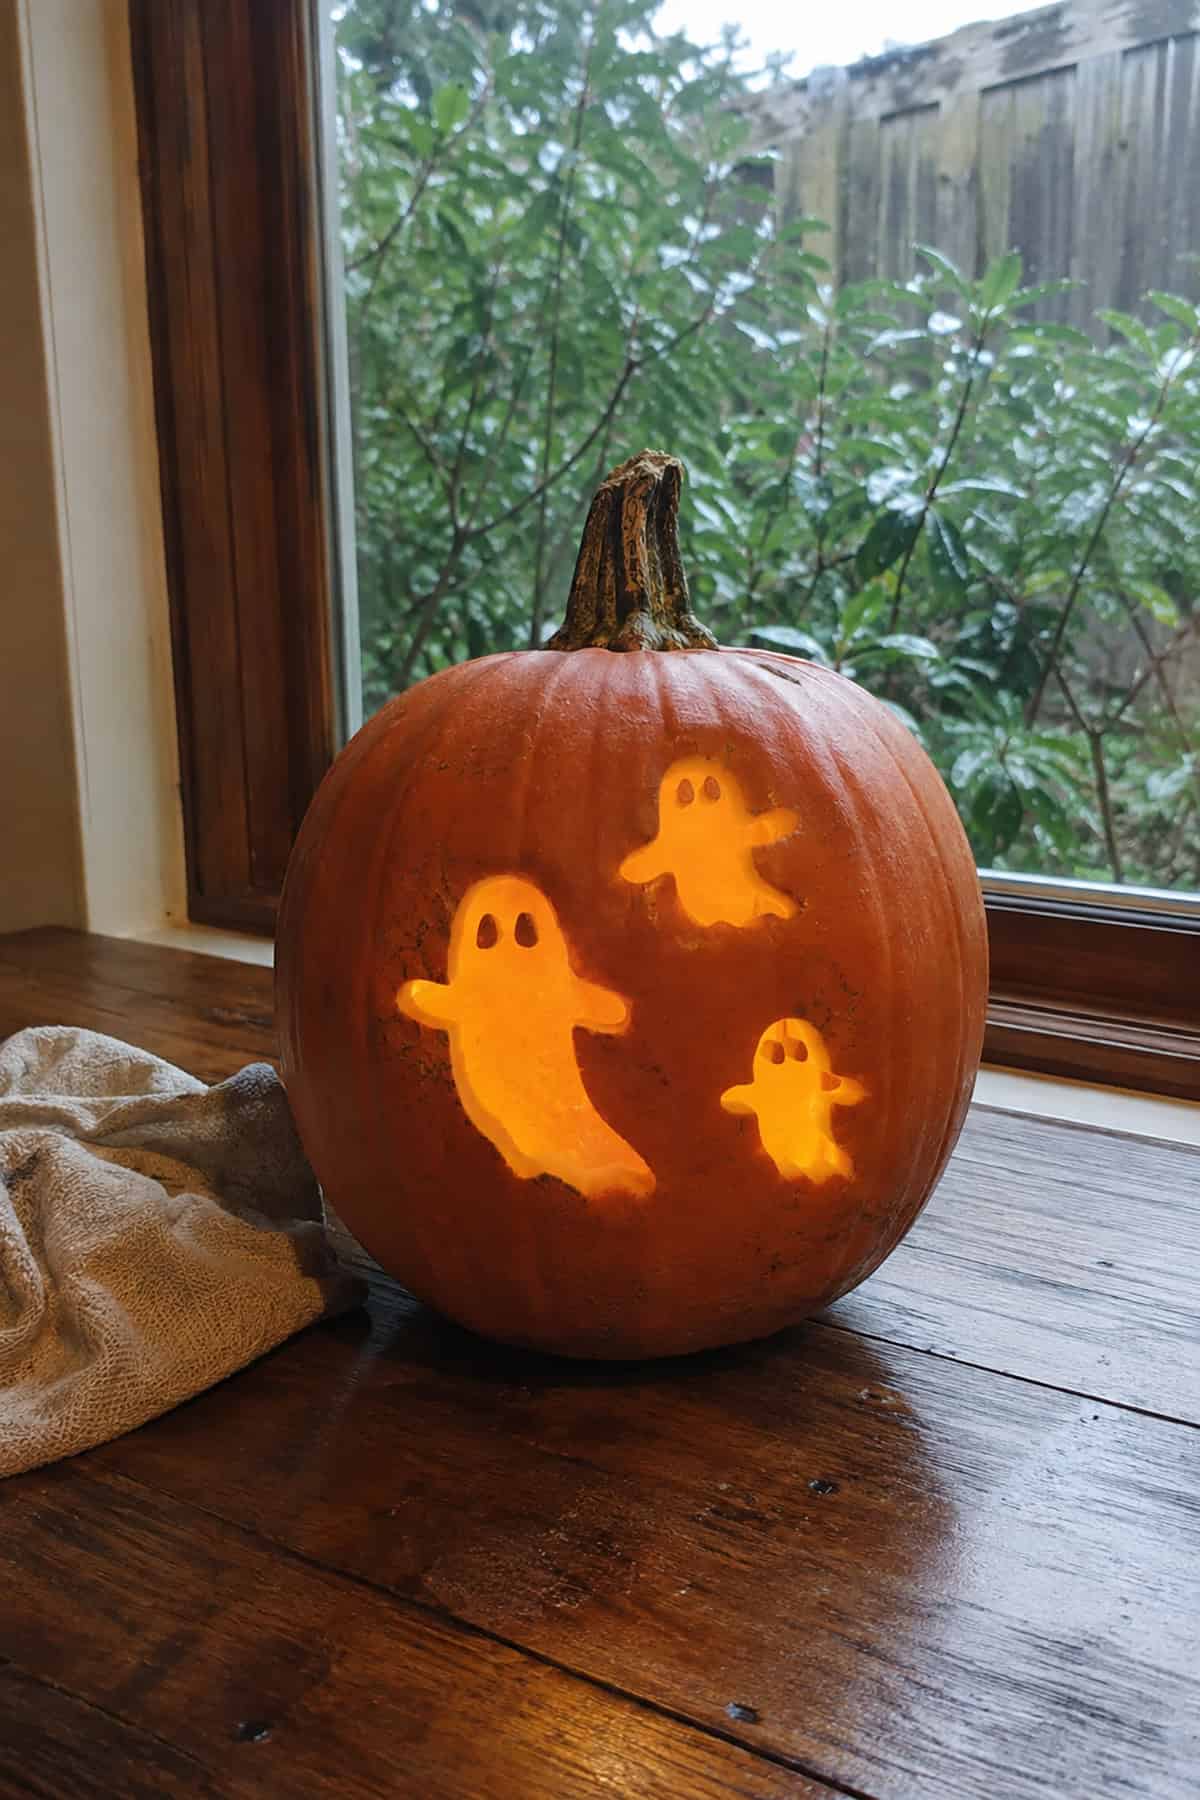
Why carve one ghost when three simple ones fit so easily? Draw each figure at a different size and angle so the group appears scattered across the pumpkin. Rounded heads, short arms, and wavy lower edges define their shapes. Add two tiny oval eyes to every ghost. The repeated design saves planning time, although the varied sizes stop the arrangement from looking stiff or copied.
Easy Straw-Hat Scarecrow Pumpkin
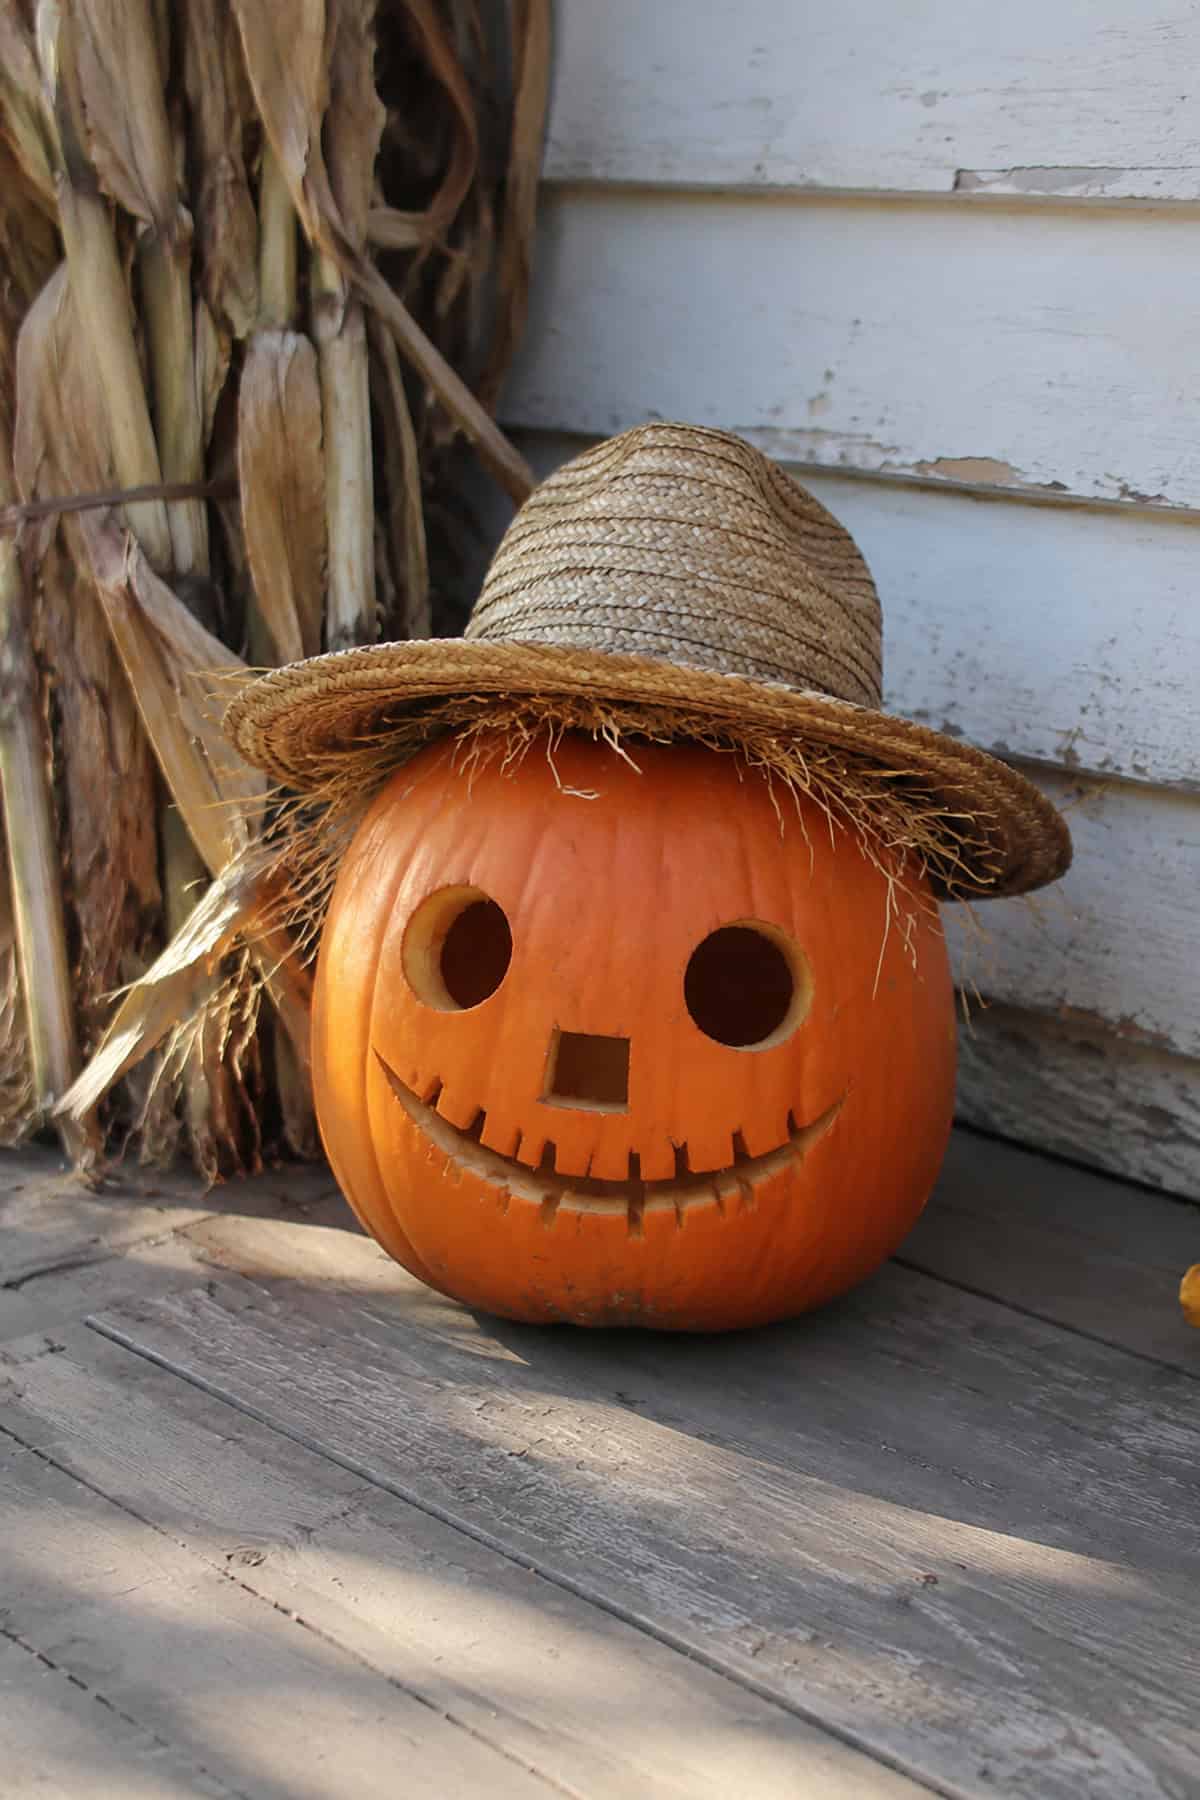
Round eyes and a square nose form the base of this friendly scarecrow face. For the mouth, cut one shallow upward curve, then add short vertical marks along its edge to resemble stitches. These little cuts require less effort than individual teeth. A loose straw hat completes the idea, though the stitched smile identifies the scarecrow by itself. Slightly uneven marks make the face more convincing.
Cute And Simple Cat Pumpkin
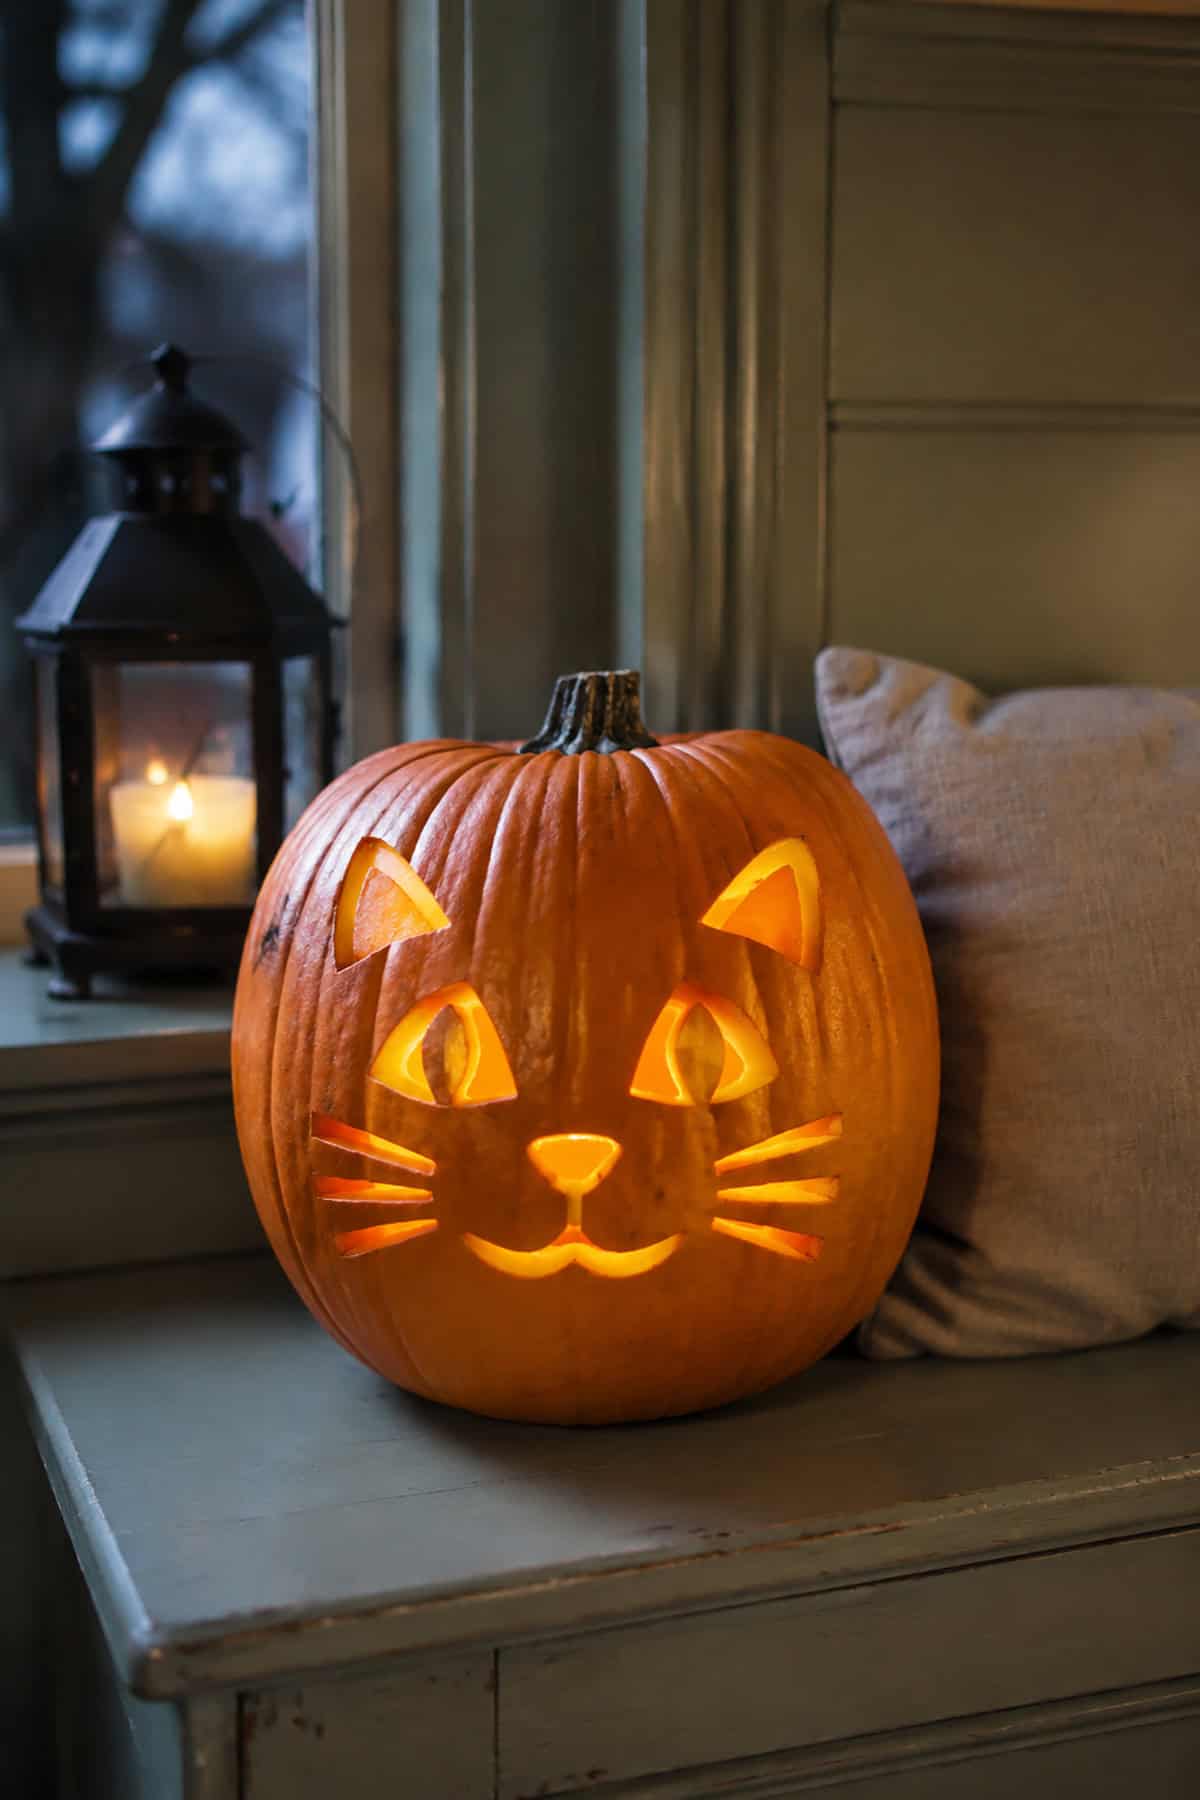
Pointed ears, almond eyes, and long whiskers make this cat easy to recognize. Cut two triangular ears near the top, followed by eyes with narrow rind slits left inside as vertical pupils. A small upside-down triangle forms the nose. Below it, use two short curves for the mouth and three straight cuts on each cheek for whiskers. Wide spacing protects the thin sections between those features.
Crescent Moon And Stars Pumpkin
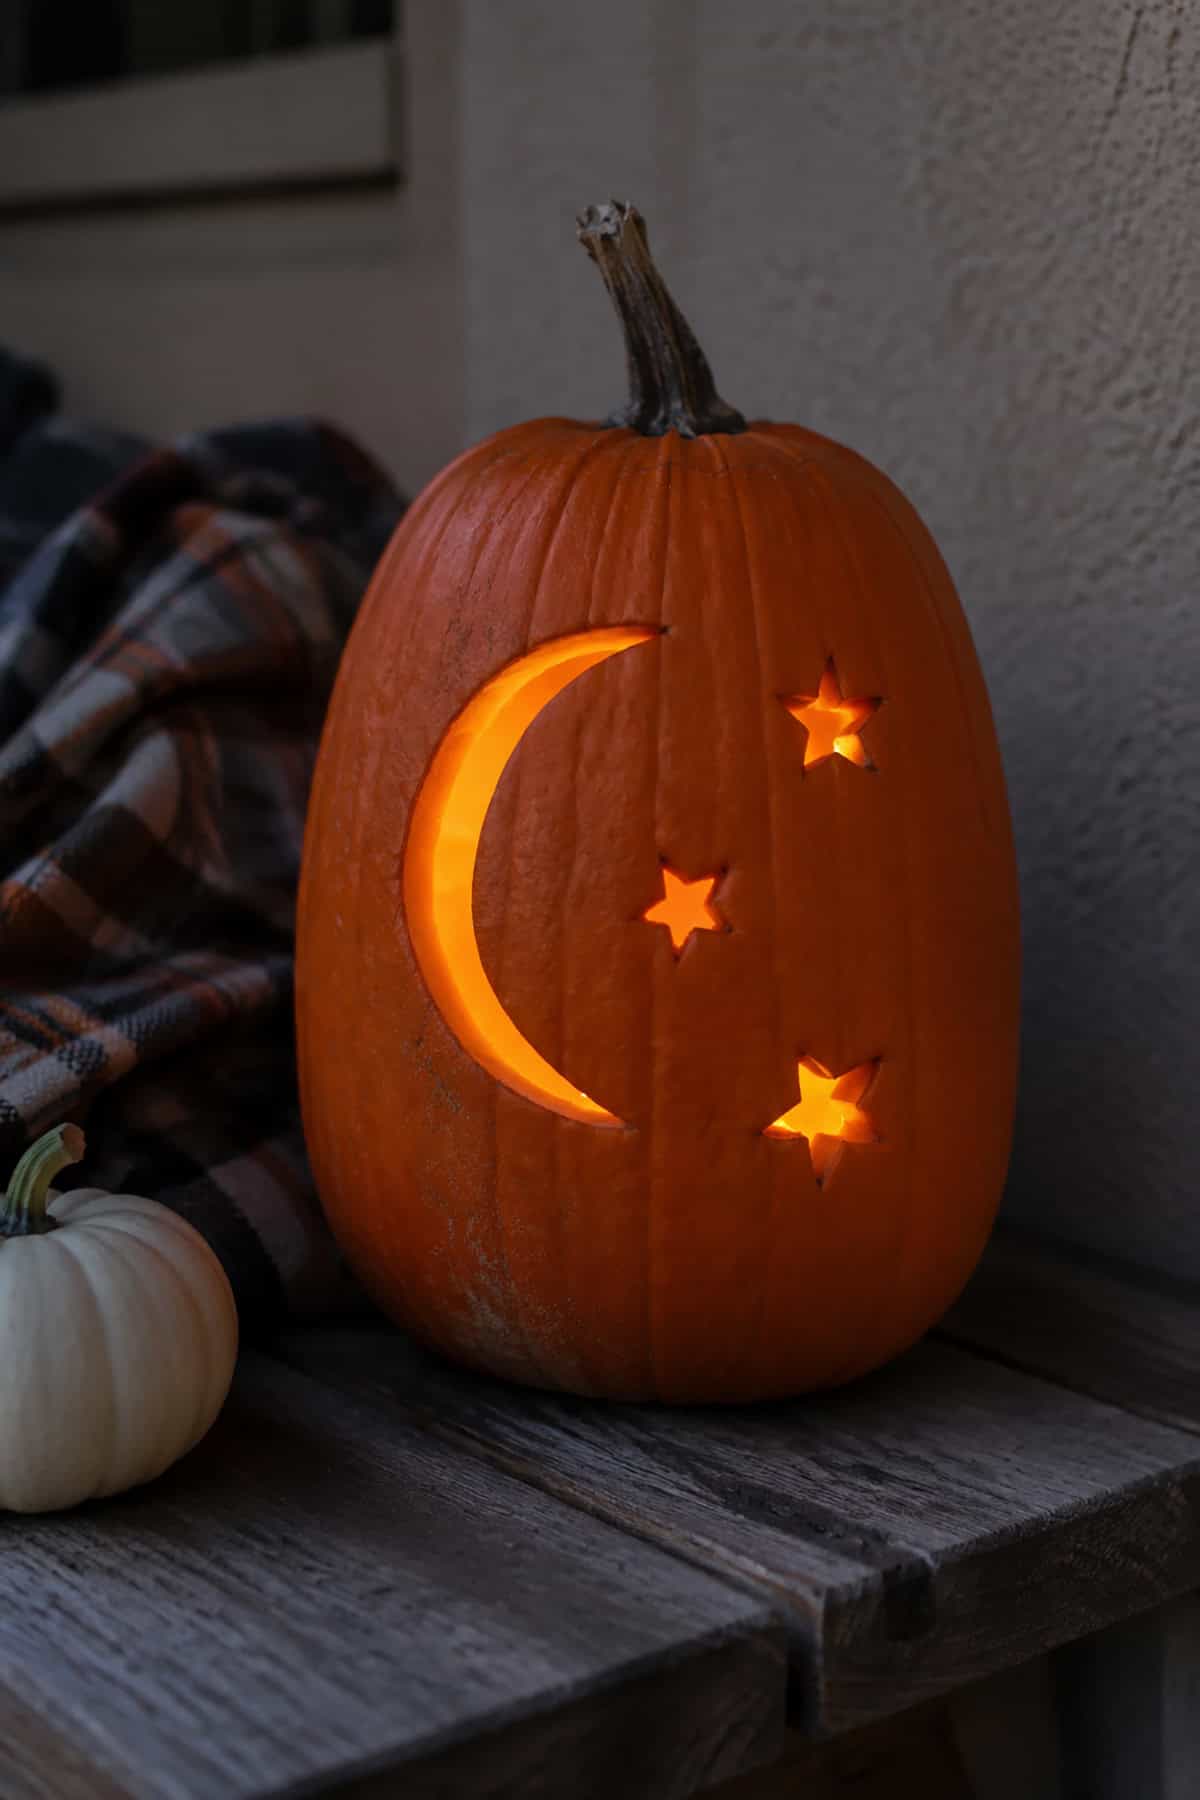
A single crescent paired with three scattered stars makes a clean design for beginners. Trace the moon as one broad curved opening so both pointed ends retain enough rind. Place the stars at different heights and vary their sizes slightly. A small craft saw helps around the inner corners. Since the pattern has no face or lettering, minor shifts in spacing barely affect the final result.
Cool Pumpkin Planter With Sunglasses
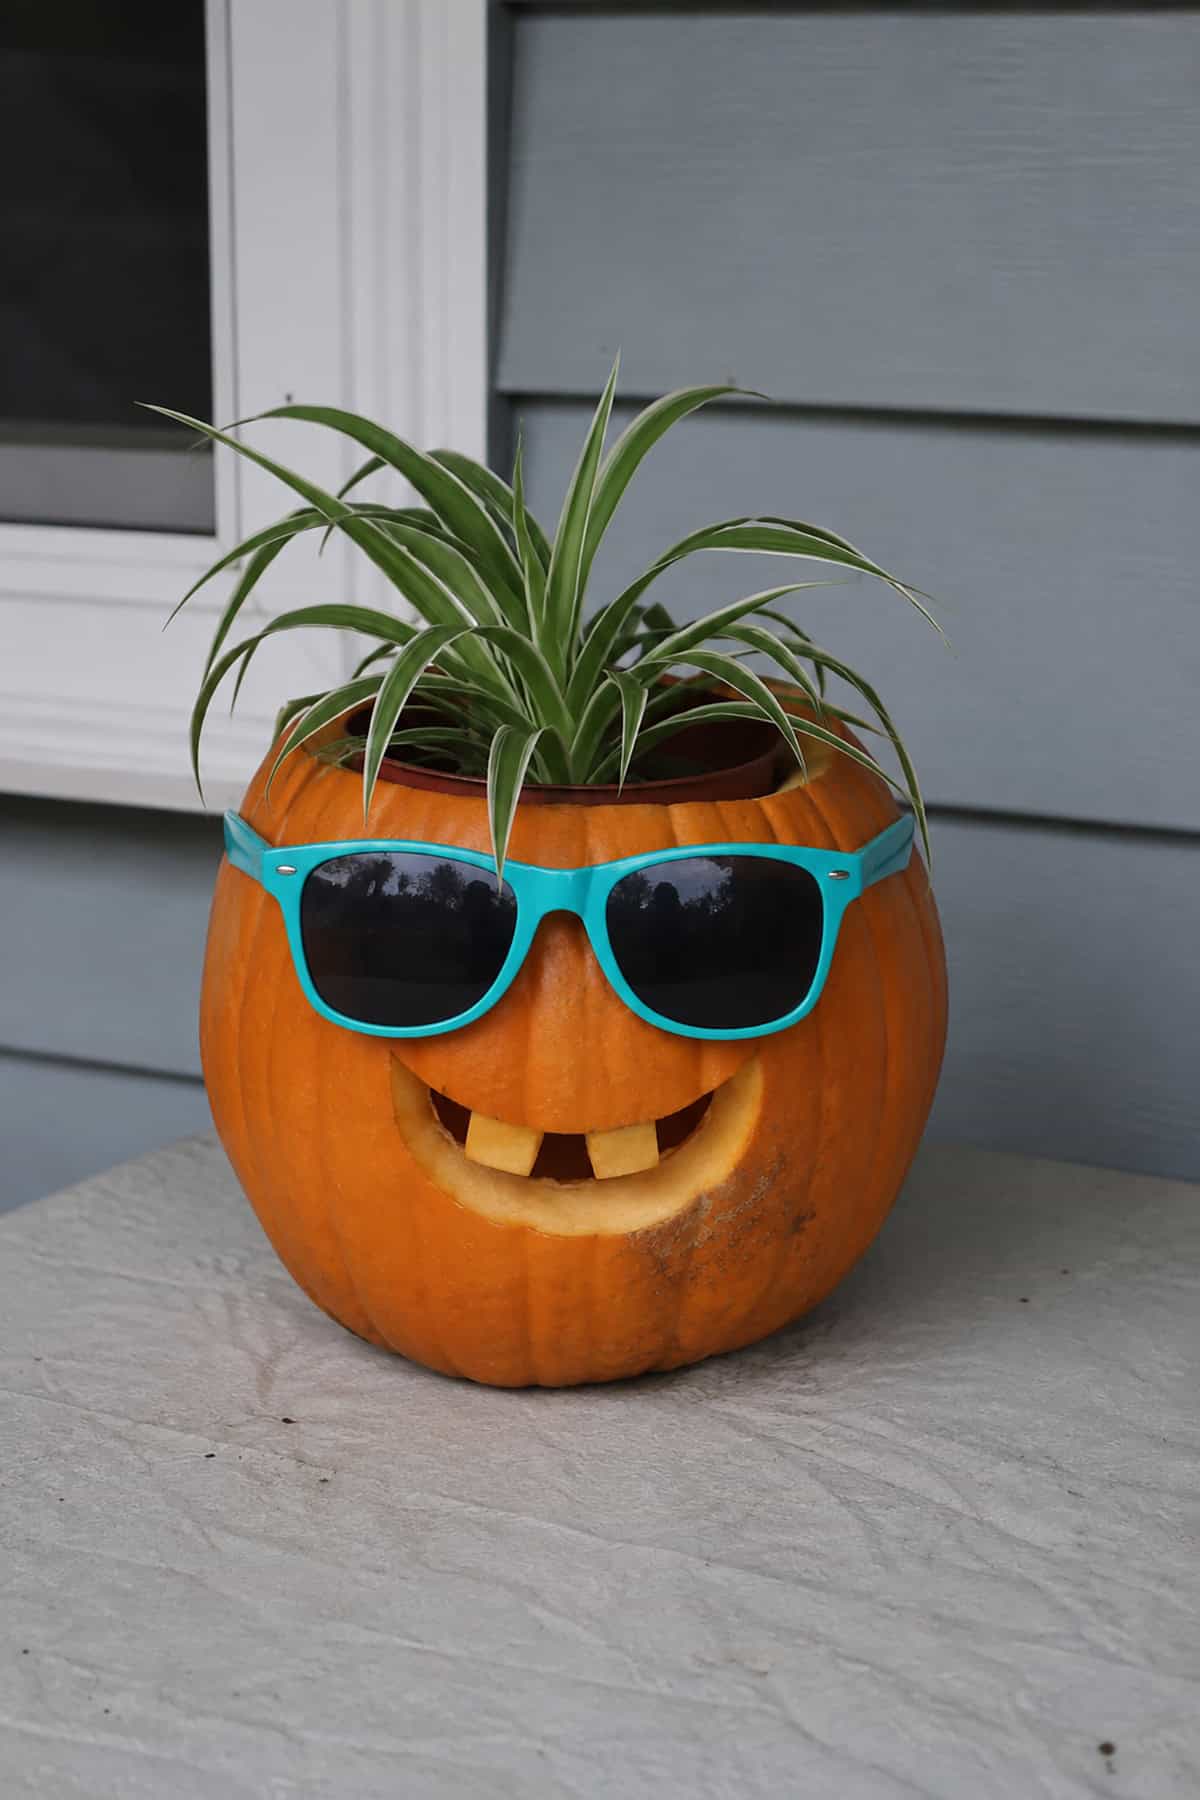
Cut the lid wide enough to hold a small potted plant inside the hollow pumpkin. On the front, add a curved smile with two square upper teeth; the sunglasses cover the eye area, so extra facial cuts become unnecessary. This shortcut reduces the project to one easy mouth. Choose a low, round pumpkin with a stable base, since the plant adds weight near the top.
Classic Grinning Jack-O’-Lantern
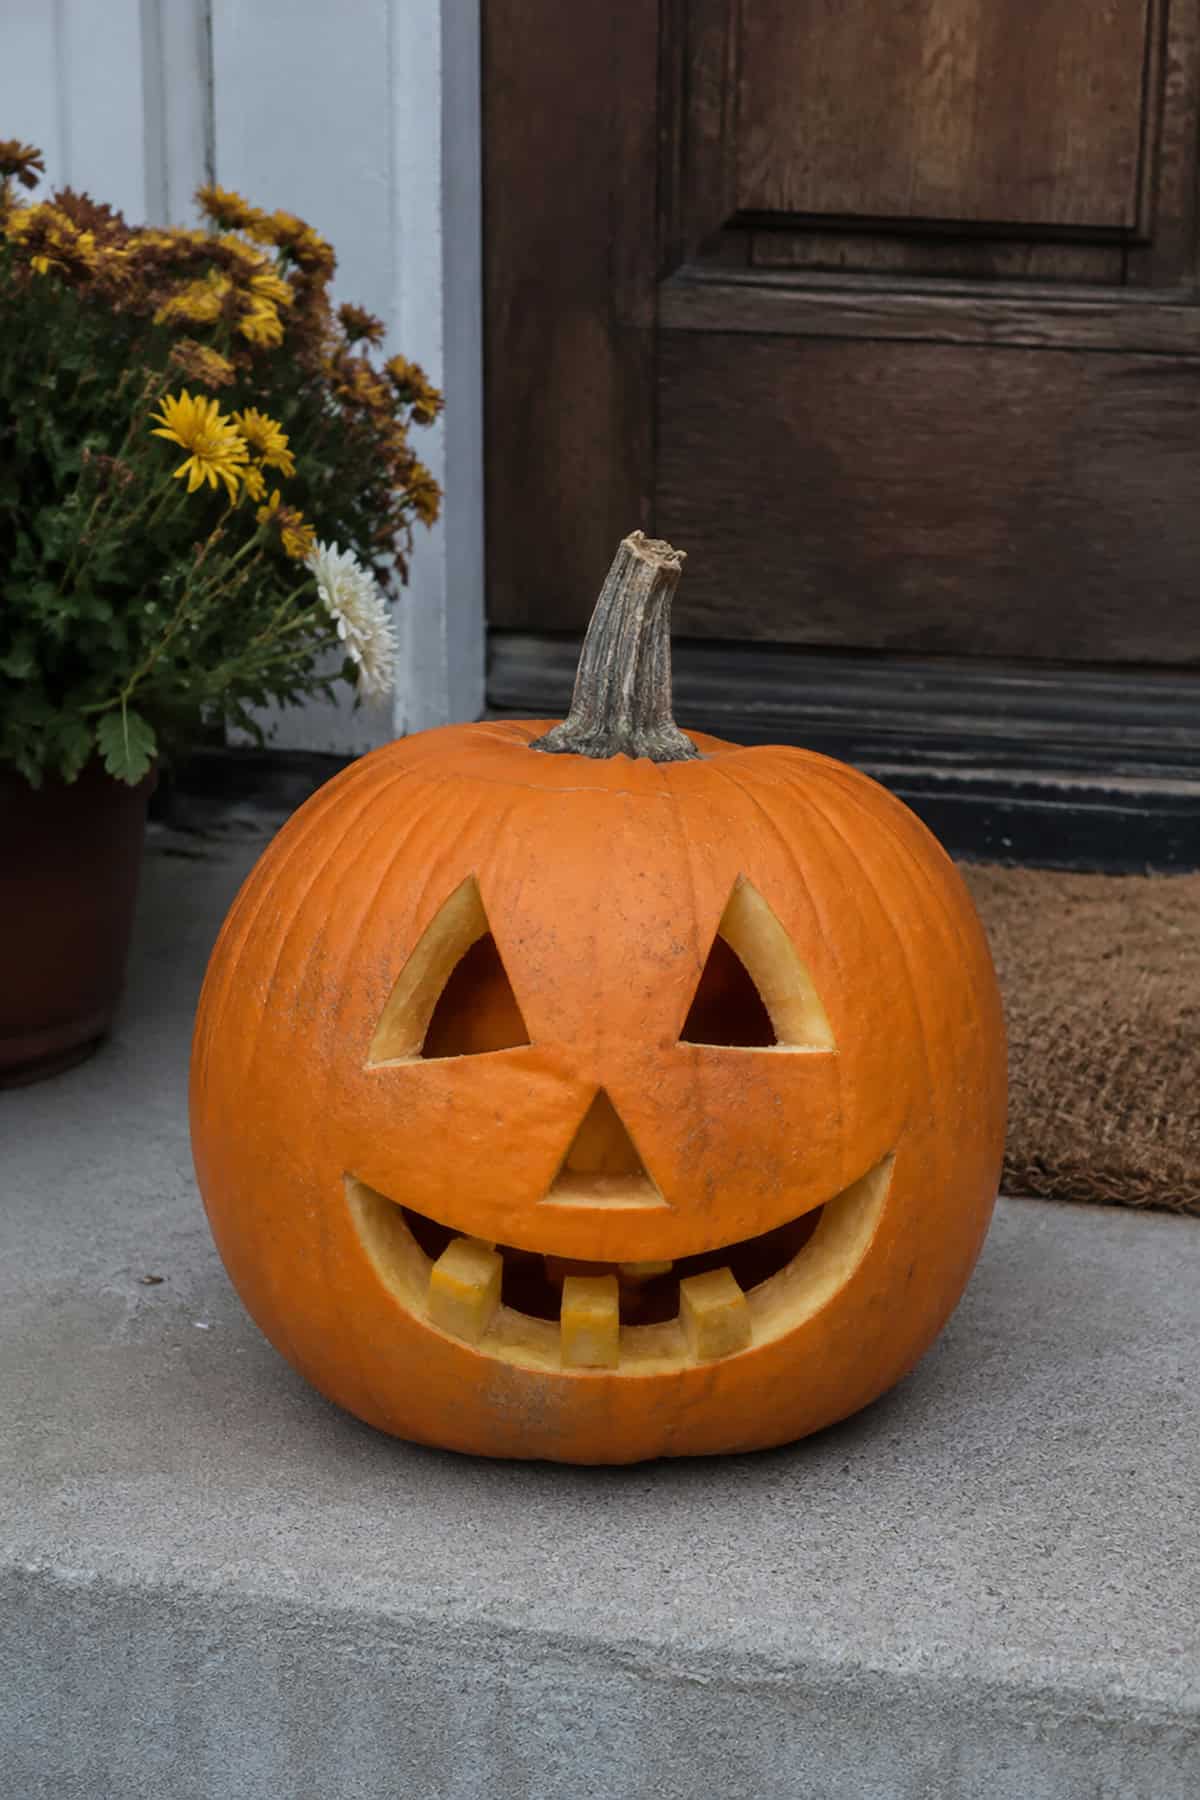
Few designs are easier to recognize than this familiar face. Two triangular eyes and a smaller triangular nose require six straight cuts altogether. Draw the mouth as a wide upward curve, then leave three square teeth attached along the lower edge. Those chunky teeth resist breakage and help beginners avoid delicate details. A round pumpkin with a broad front provides enough space for generous, clean shapes.
Carved Pumpkin Restroom Sign
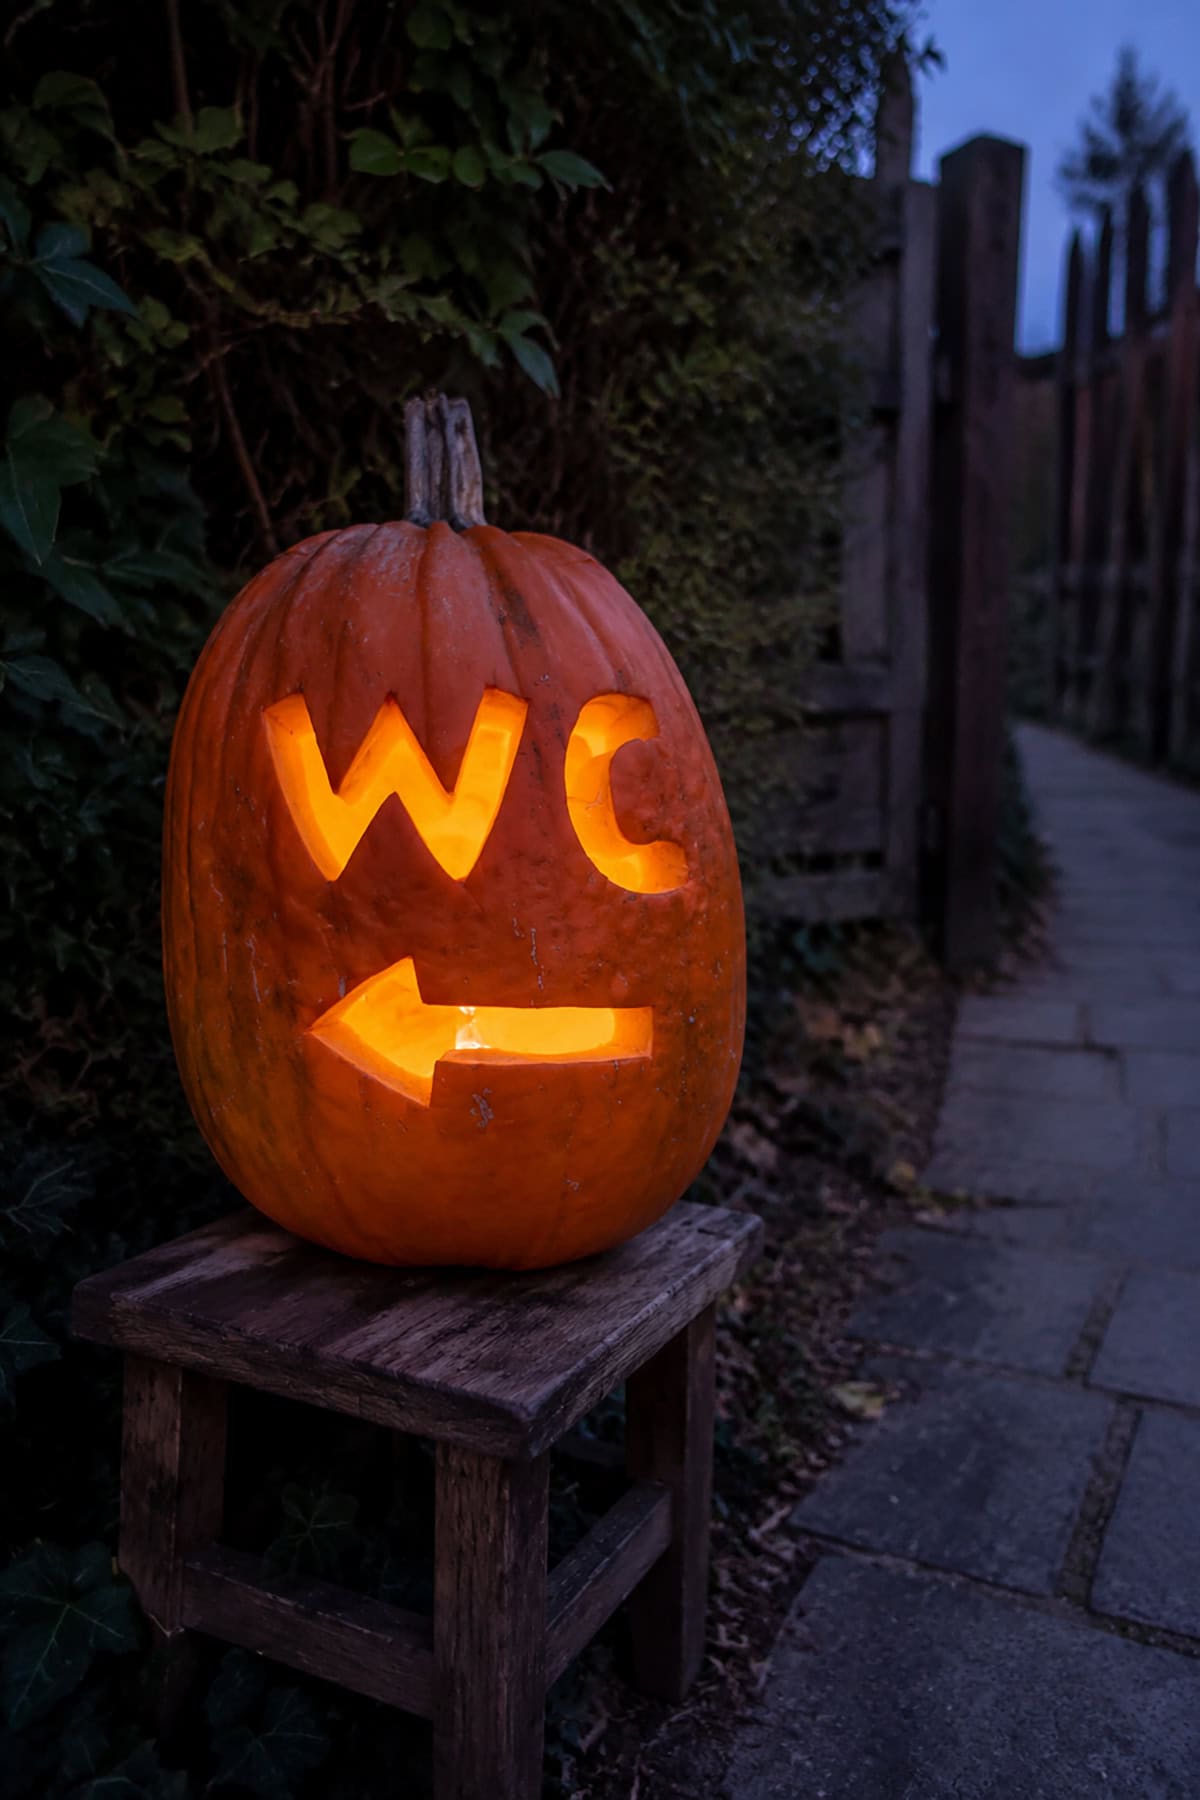
Useful Halloween décor deserves a place in the list too. Cut the letters “WC” across the upper half with thick, simple strokes, then place a large directional arrow below. Block letters remain clearer after dark than thin handwritten text. Preserve a small rind bridge inside the C only if the shape needs extra support. Point the arrow toward the restroom before you begin the cuts.
Black Cat And Crescent Moon Pumpkin
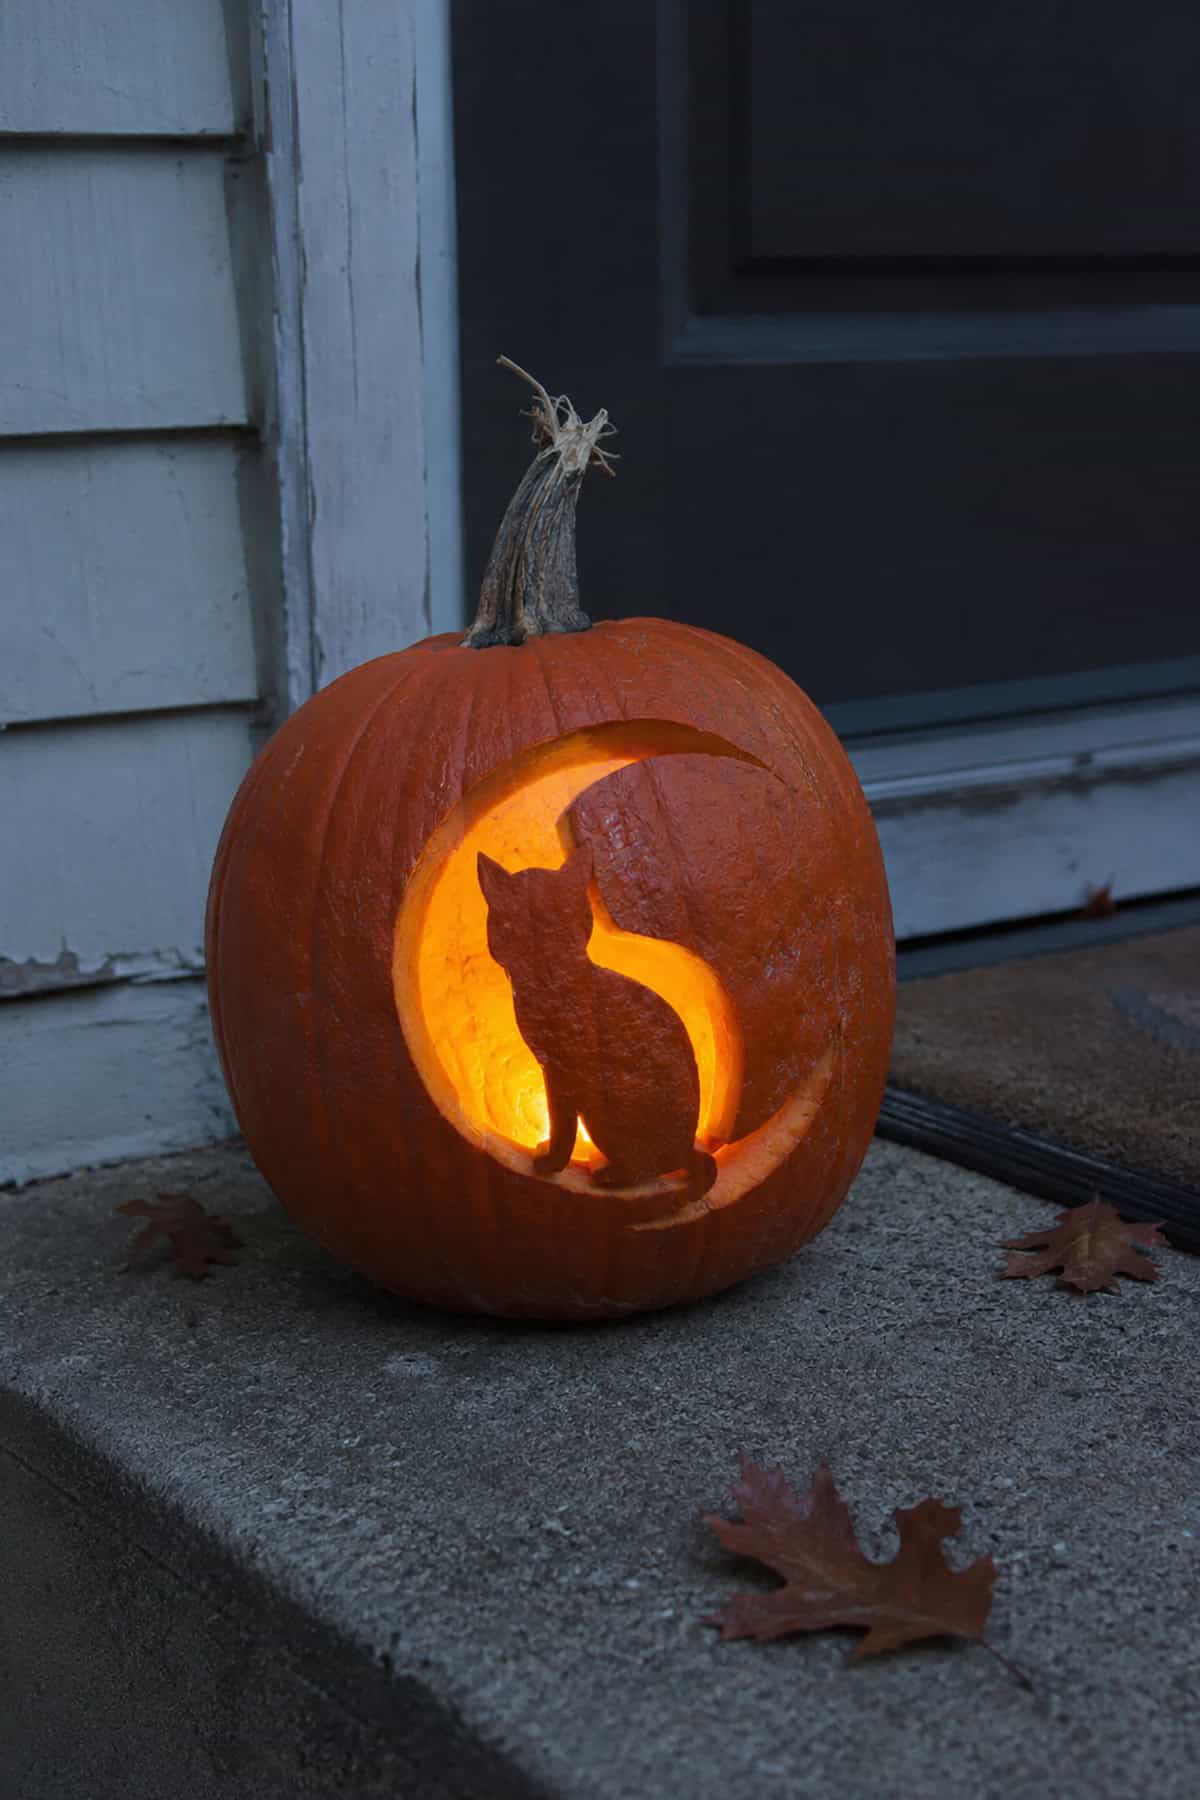
This design relies on negative space: the moon glows while the cat stays dark. Start with a large crescent, then draw a seated cat inside its curve. Preserve the cat’s pointed ears, curved back, paws, and long tail as one connected rind section. A sturdy strip beneath the paws supports the silhouette. Keep the tail thick enough to survive both carving and later handling.
Winking Pumpkin Face
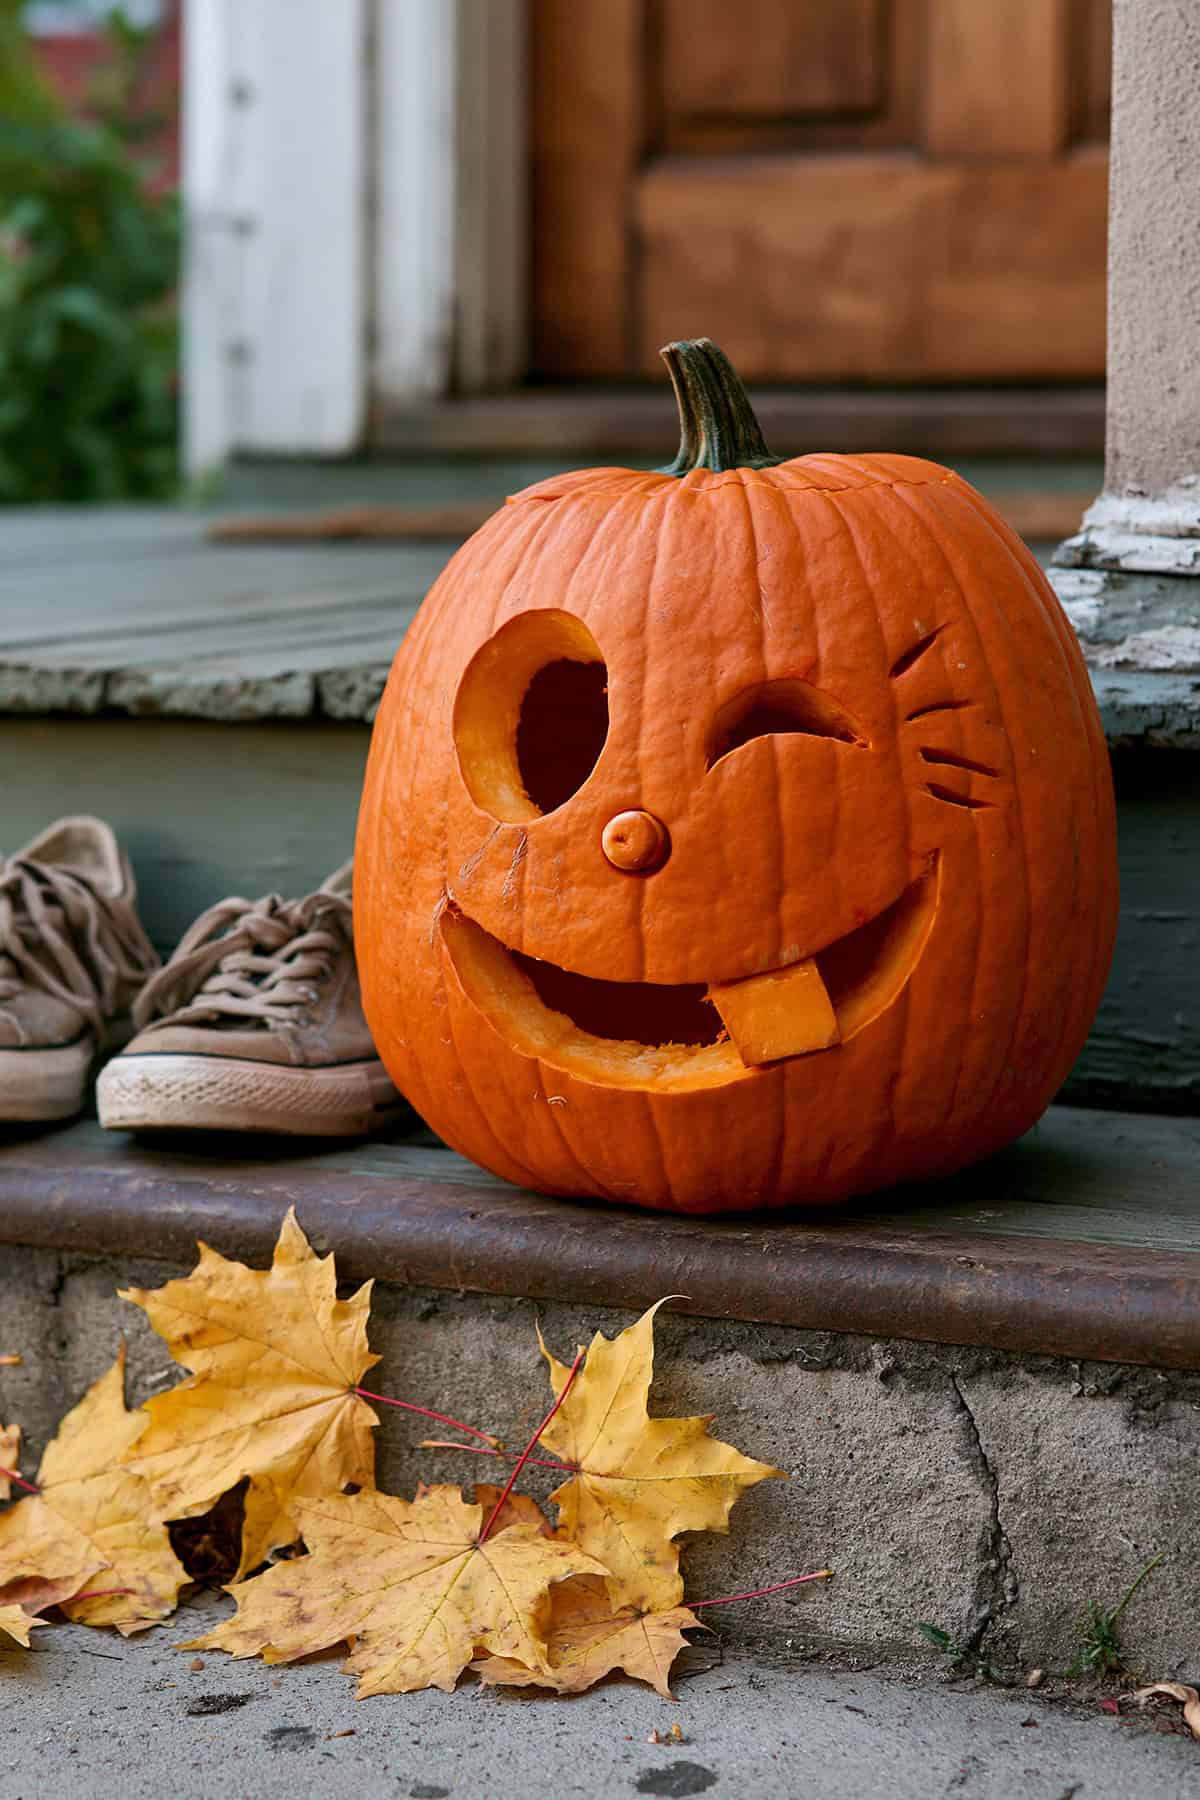
A wink adds more humor than two matching eyes ever could. Cut one large round eye, then make the other from a shallow downward curve with several short lash marks.
Use a small rind circle for the nose. Below it, carve a lopsided smile and leave one chunky tooth attached to the upper edge. The uneven features suit beginners because perfect balance would weaken the joke.
Umbrella Pumpkin
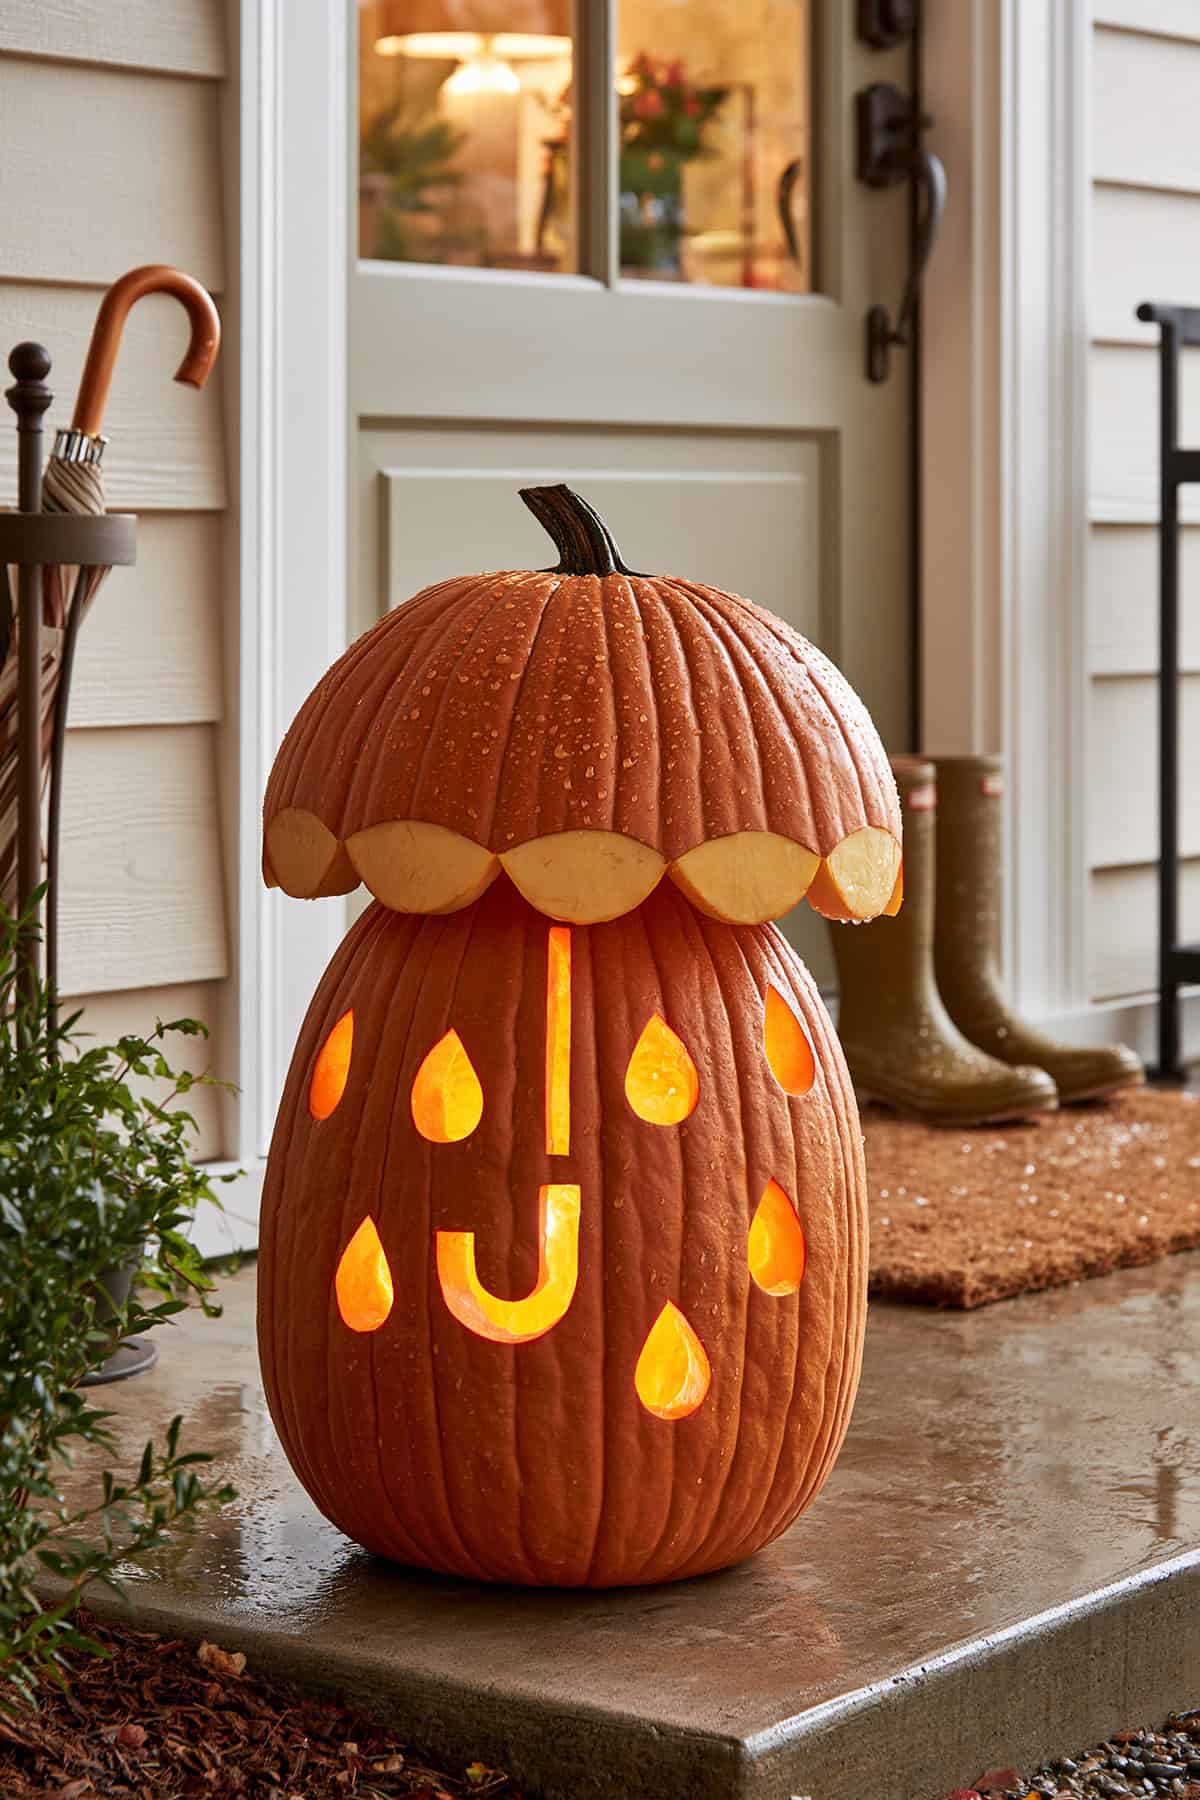
Two pumpkins build this rainy-day design. Cut the lower edge of a shallow pumpkin into broad scallops, then place it above a taller pumpkin as the umbrella canopy. Carve a long J-shaped handle down the center of the lower pumpkin. Several teardrop openings around it represent rain. Use wide drops with rounded bottoms, since those shapes release more cleanly than thin pointed ones.
Tiny Townhouse Pumpkin
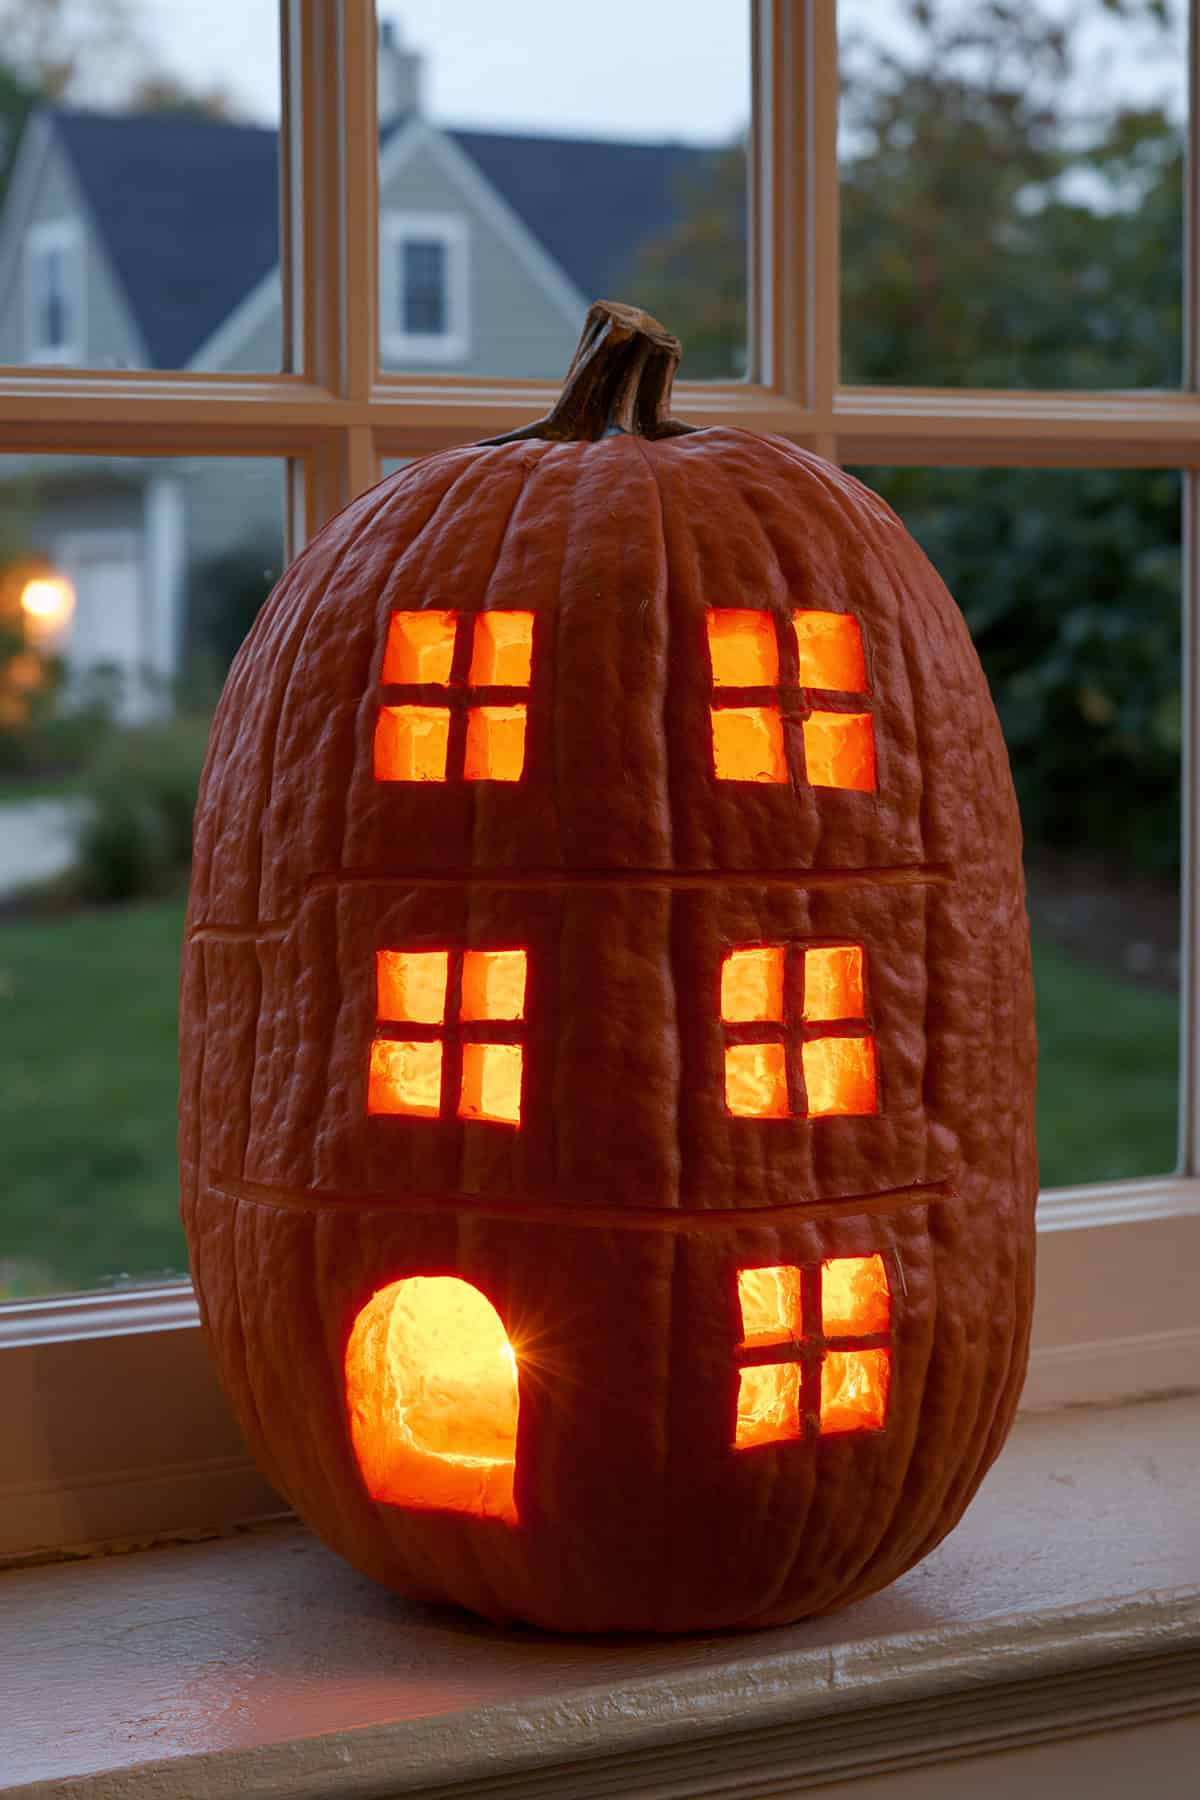
A tall pumpkin provides enough space for this three-story house. Divide the front into horizontal floors with shallow scored lines, then add pairs of square windows to each level. Preserve narrow crosses inside the windows as frames. An arched door at the bottom finishes the townhouse shape.
Careful measuring helps here, although small differences between floors make the tiny home look handmade rather than manufactured.
Spiderweb Corner Pumpkin
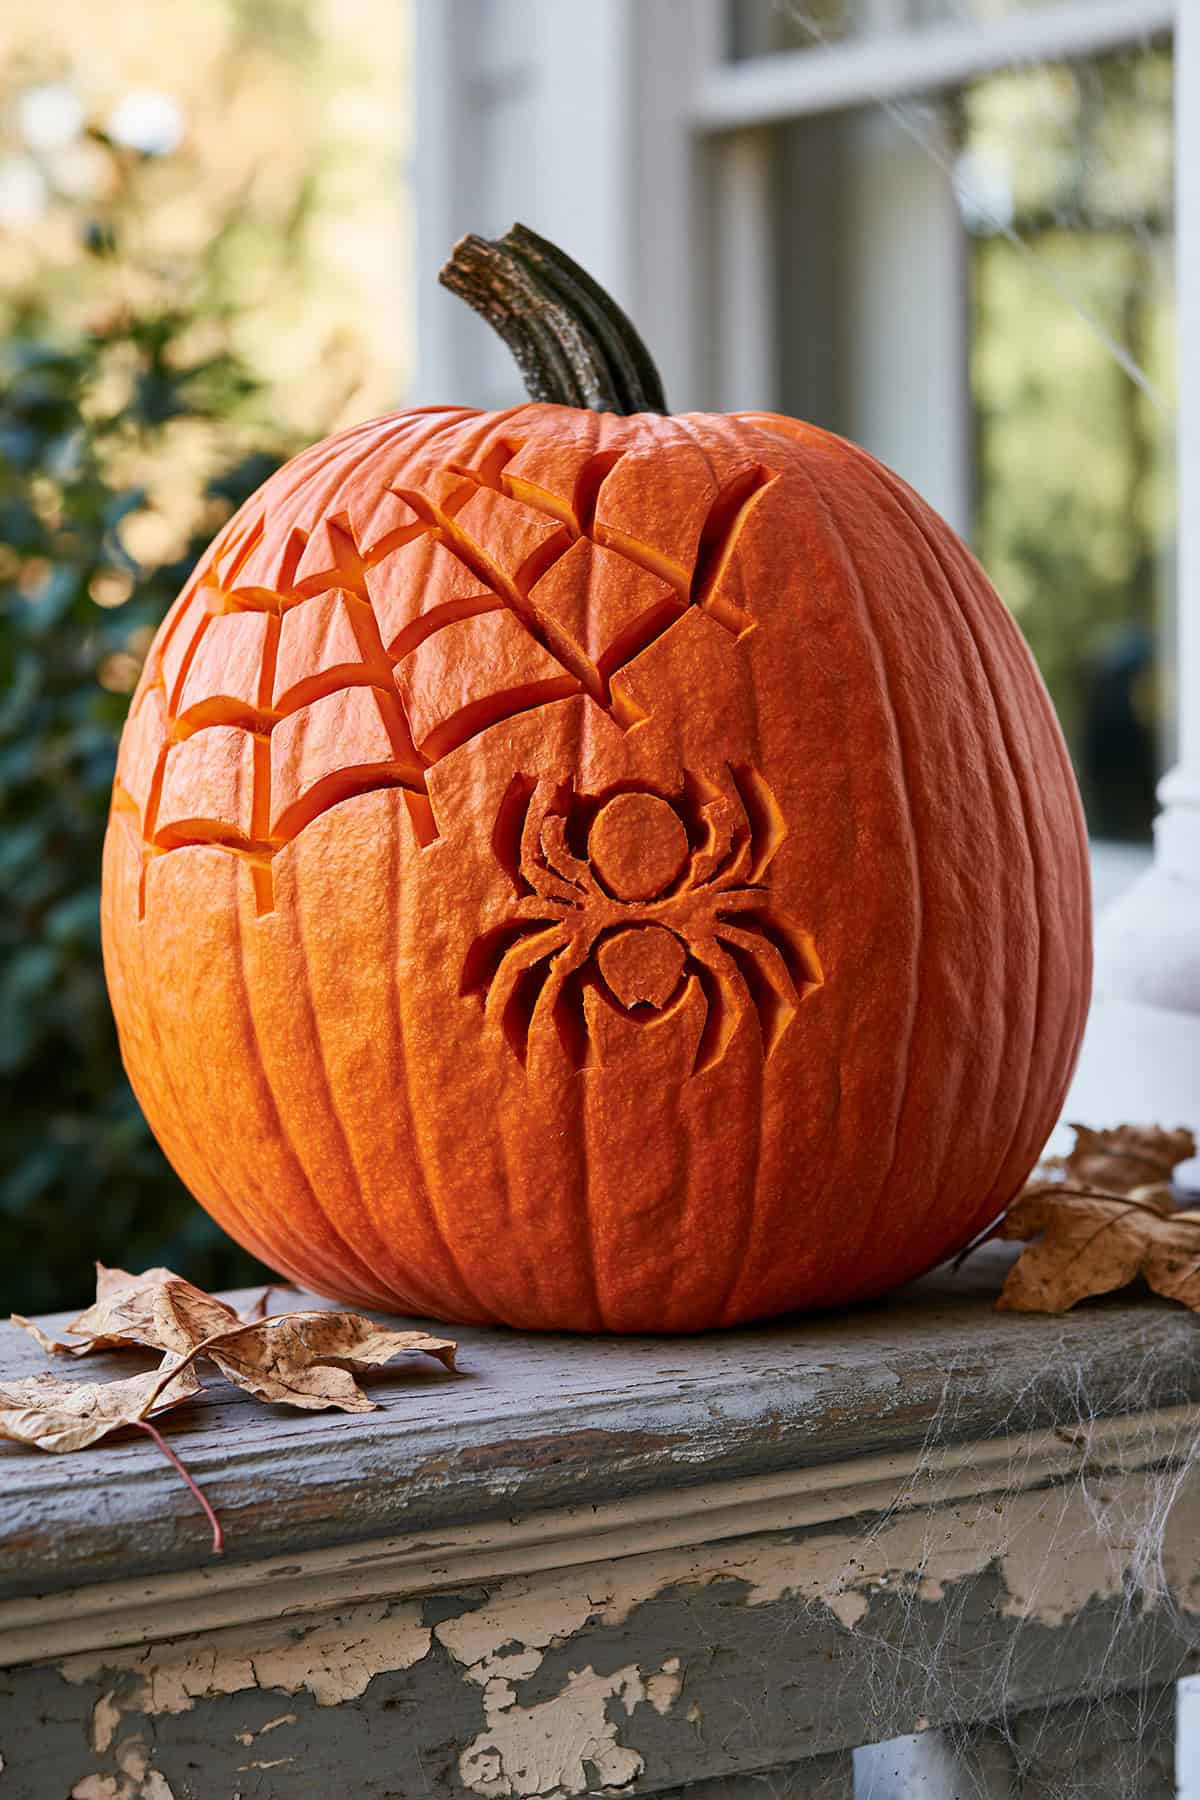
Only one side of the pumpkin needs detail for this spiderweb design. Scrape several curved lines from a shared corner point, then connect them with short arched sections. Below the web, outline a spider with two oval body parts and eight bent legs. Remove the rind around the spider while its body stays orange. Broad legs reduce the risk of breaks and remain clear from several feet away.
Snail Pumpkin
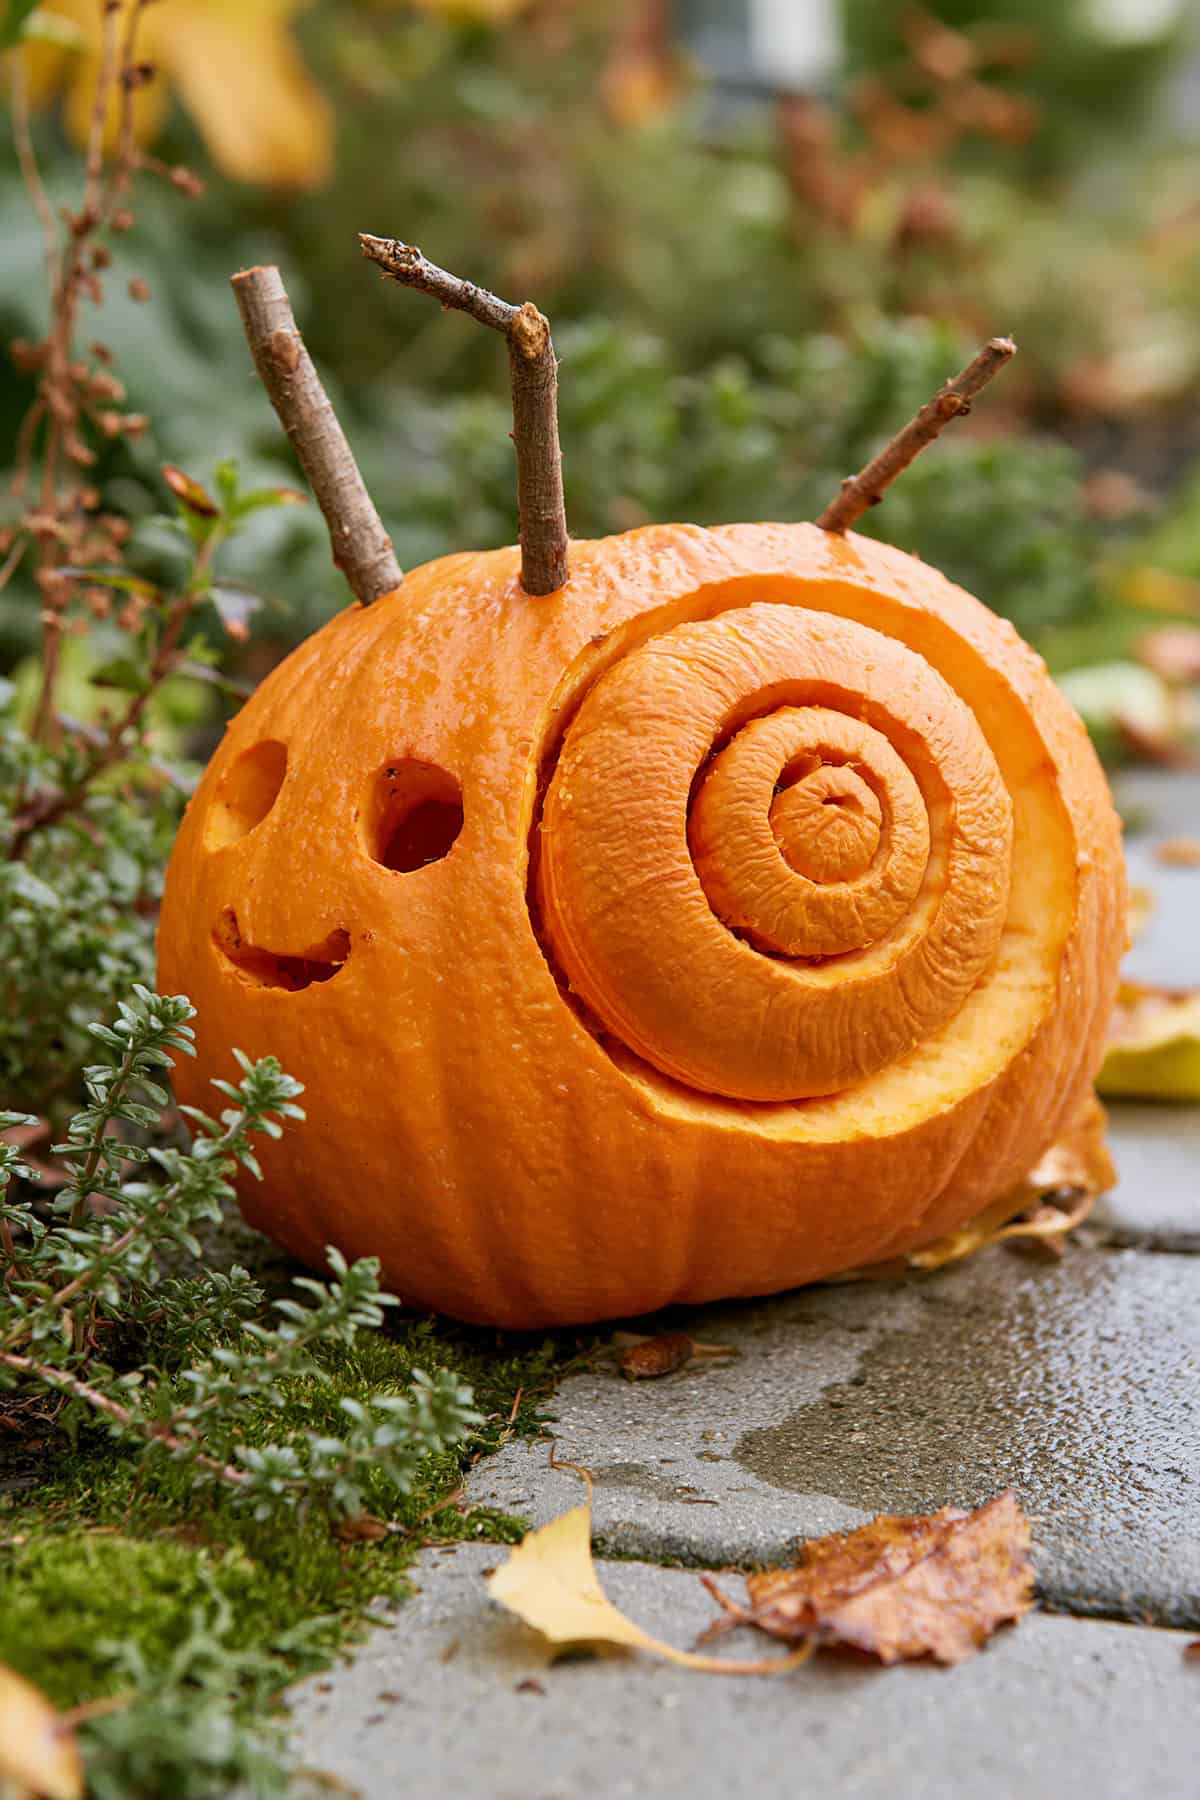
Set a round pumpkin on its side so the natural shape resembles a snail’s body. Scrape a deep spiral across one flank for the shell, with each curved band slightly wider than the last. Two circular eyes and a tiny curved mouth form the face near the front.
Short twigs inserted above the eyes serve as feelers. This design needs more scraping than cutting, which makes the hollowing step optional.
Smiling Rain Cloud Pumpkin
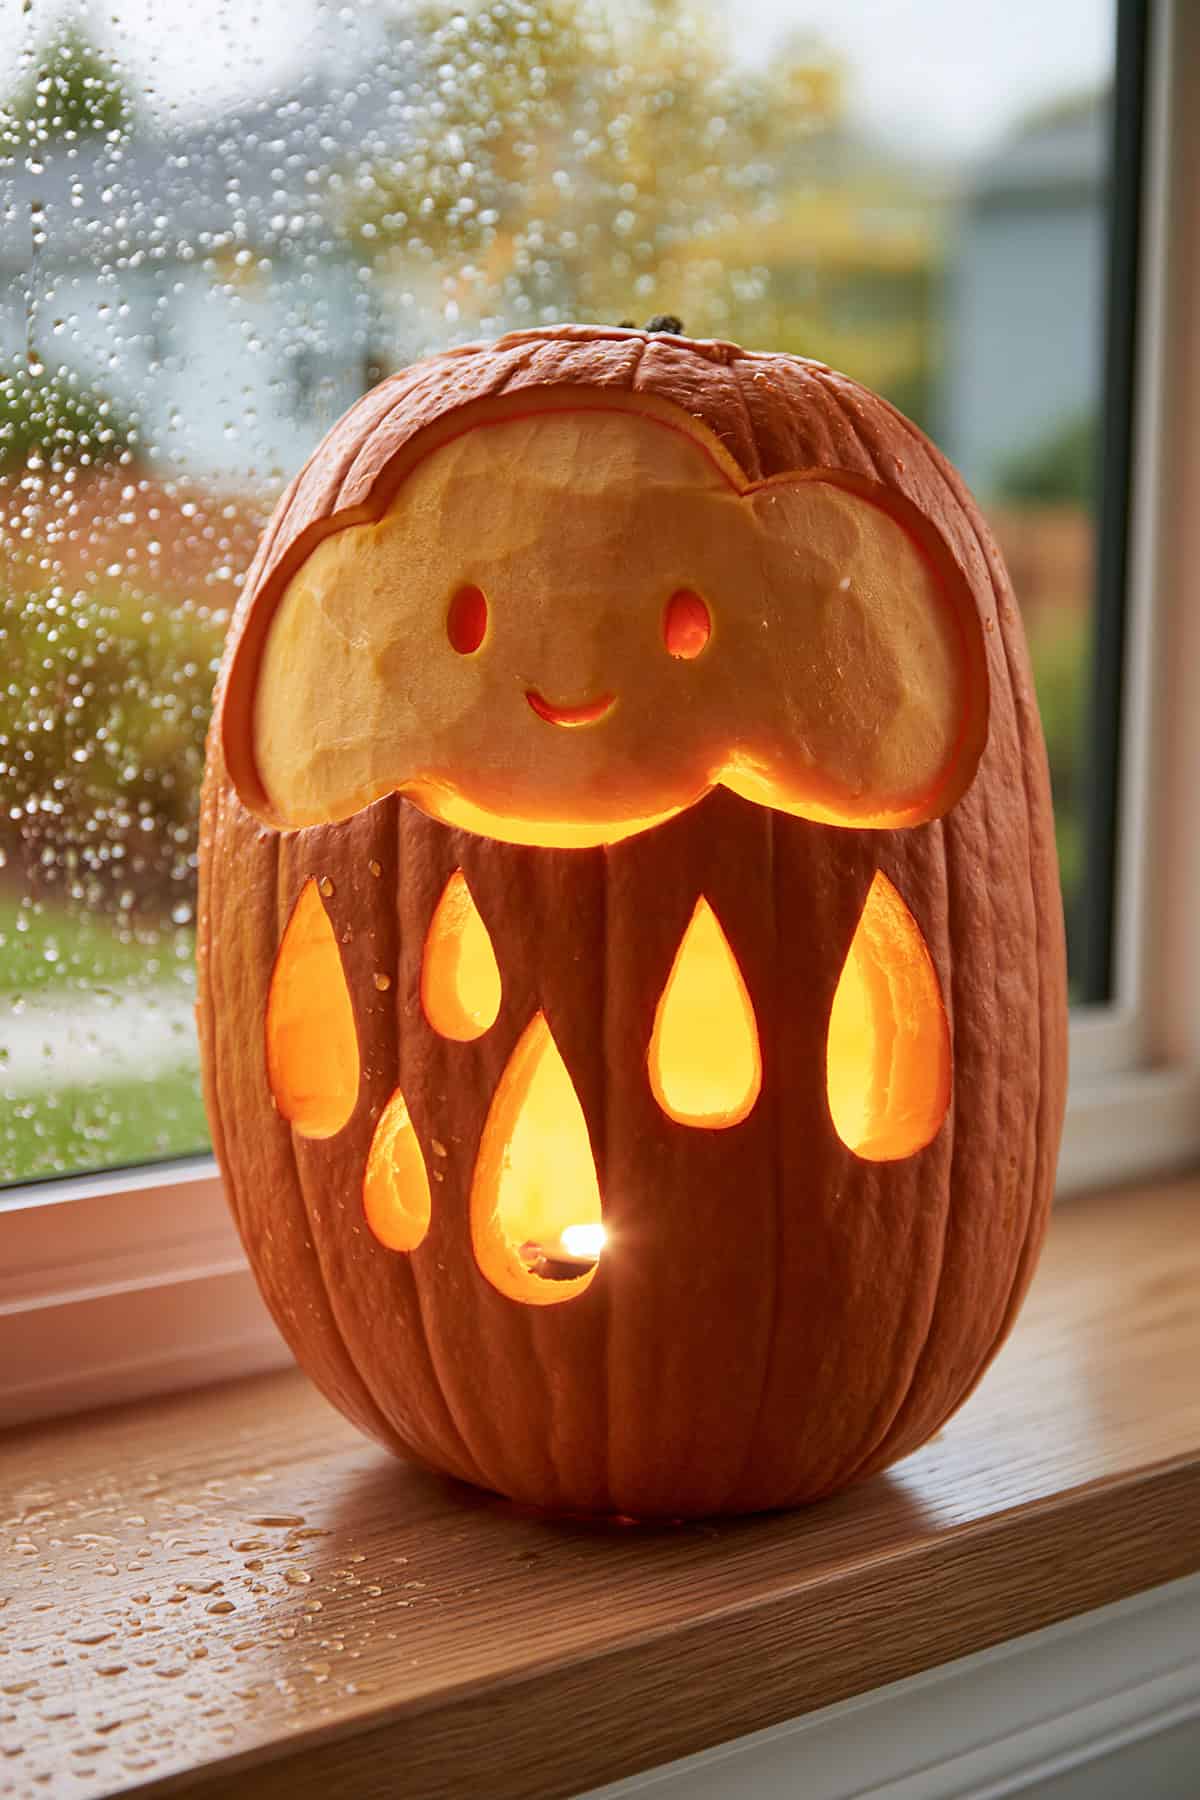
A large cloud occupies the upper half of this design, with six raindrops scattered beneath it. Scrape away the rind inside the cloud until the pale flesh appears, then cut two oval eyes and a tiny curved smile through the center.
Remove each raindrop completely for a brighter glow. Mix narrow and wide drops across the lower half so the rainfall appears loose rather than arranged in strict rows.
Sleepy Face Pumpkin
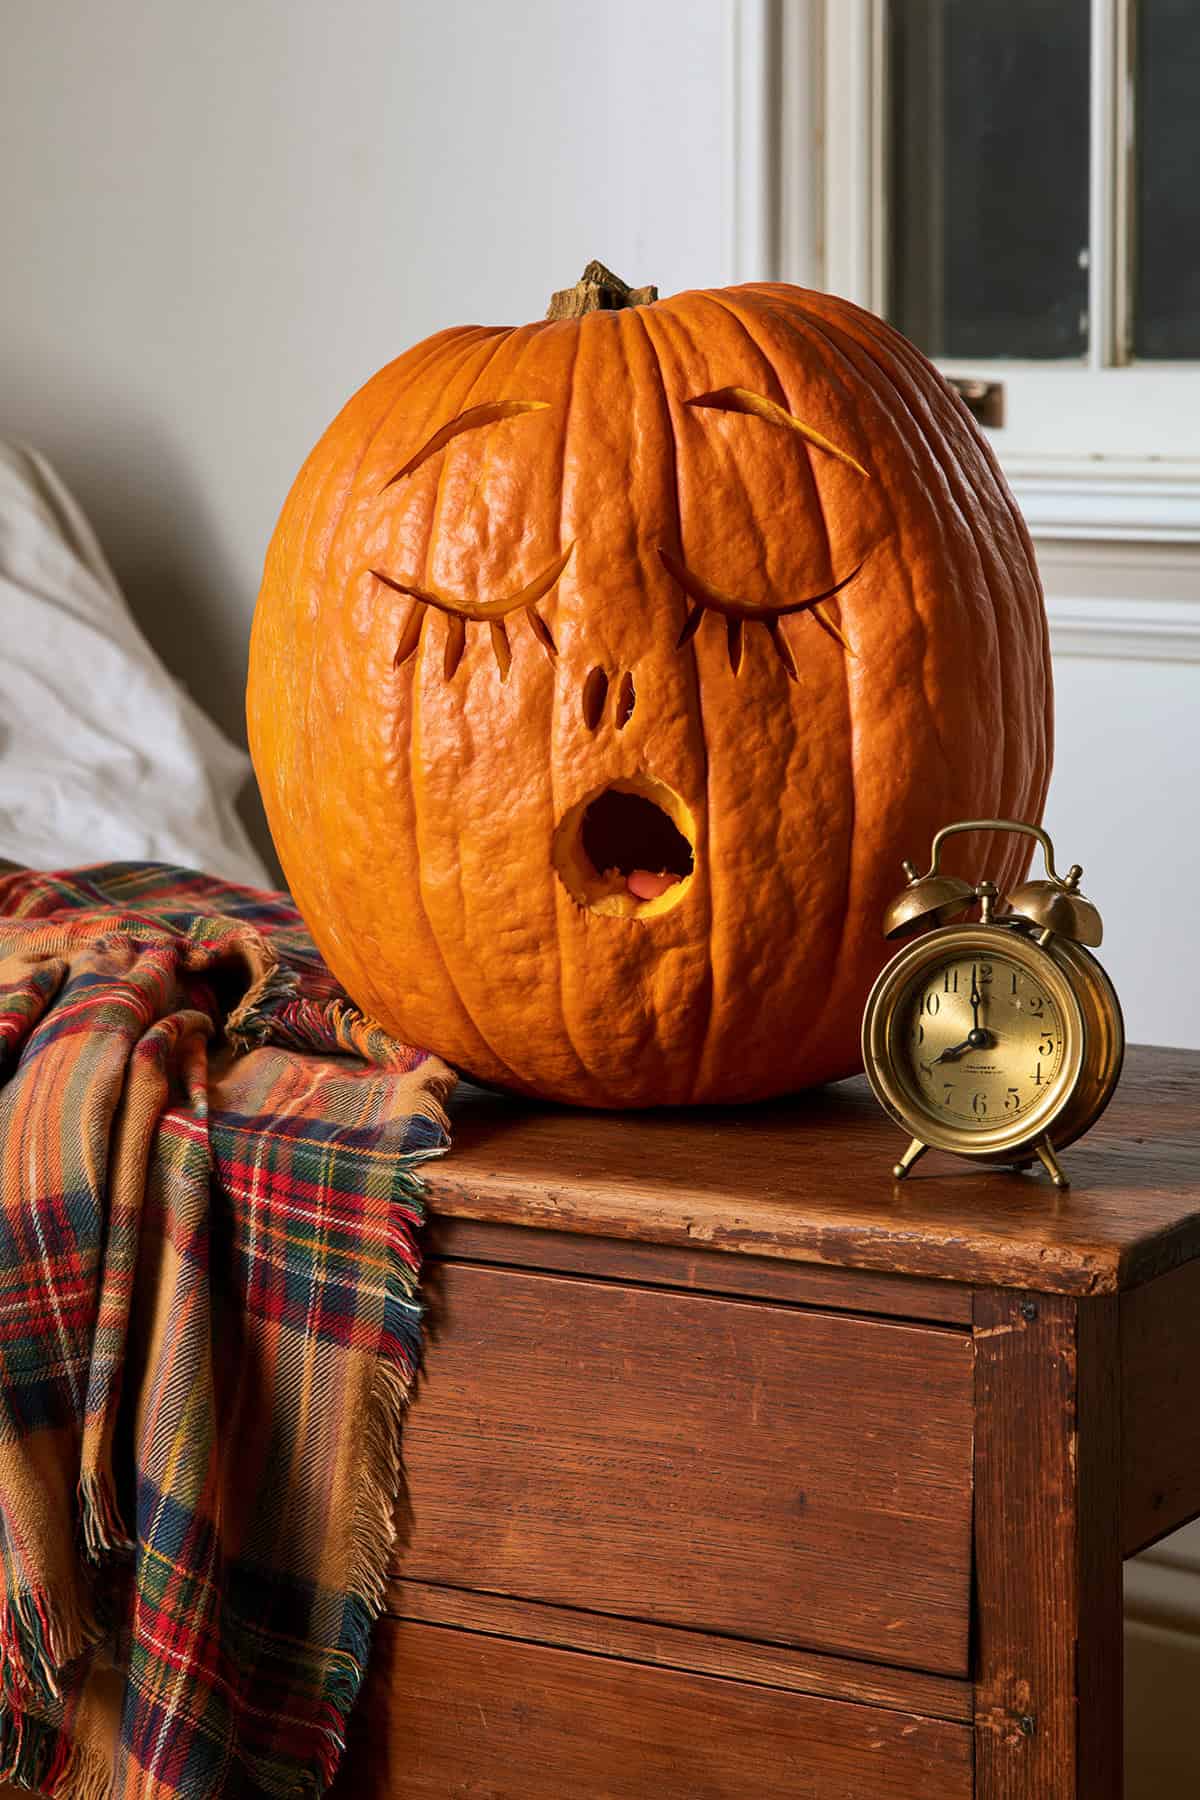
Closed eyes carry the sleepy expression. Draw two long downward curves, then add three short lashes beneath each one. A pair of tiny nostrils and one round open mouth complete the yawn.
Shallow cuts work well for the eyelids and lashes, while the mouth needs a full opening. The entire face uses only curved lines and circles, so beginners avoid sharp corners and fragile pointed sections.
Silly Mustache Pumpkin
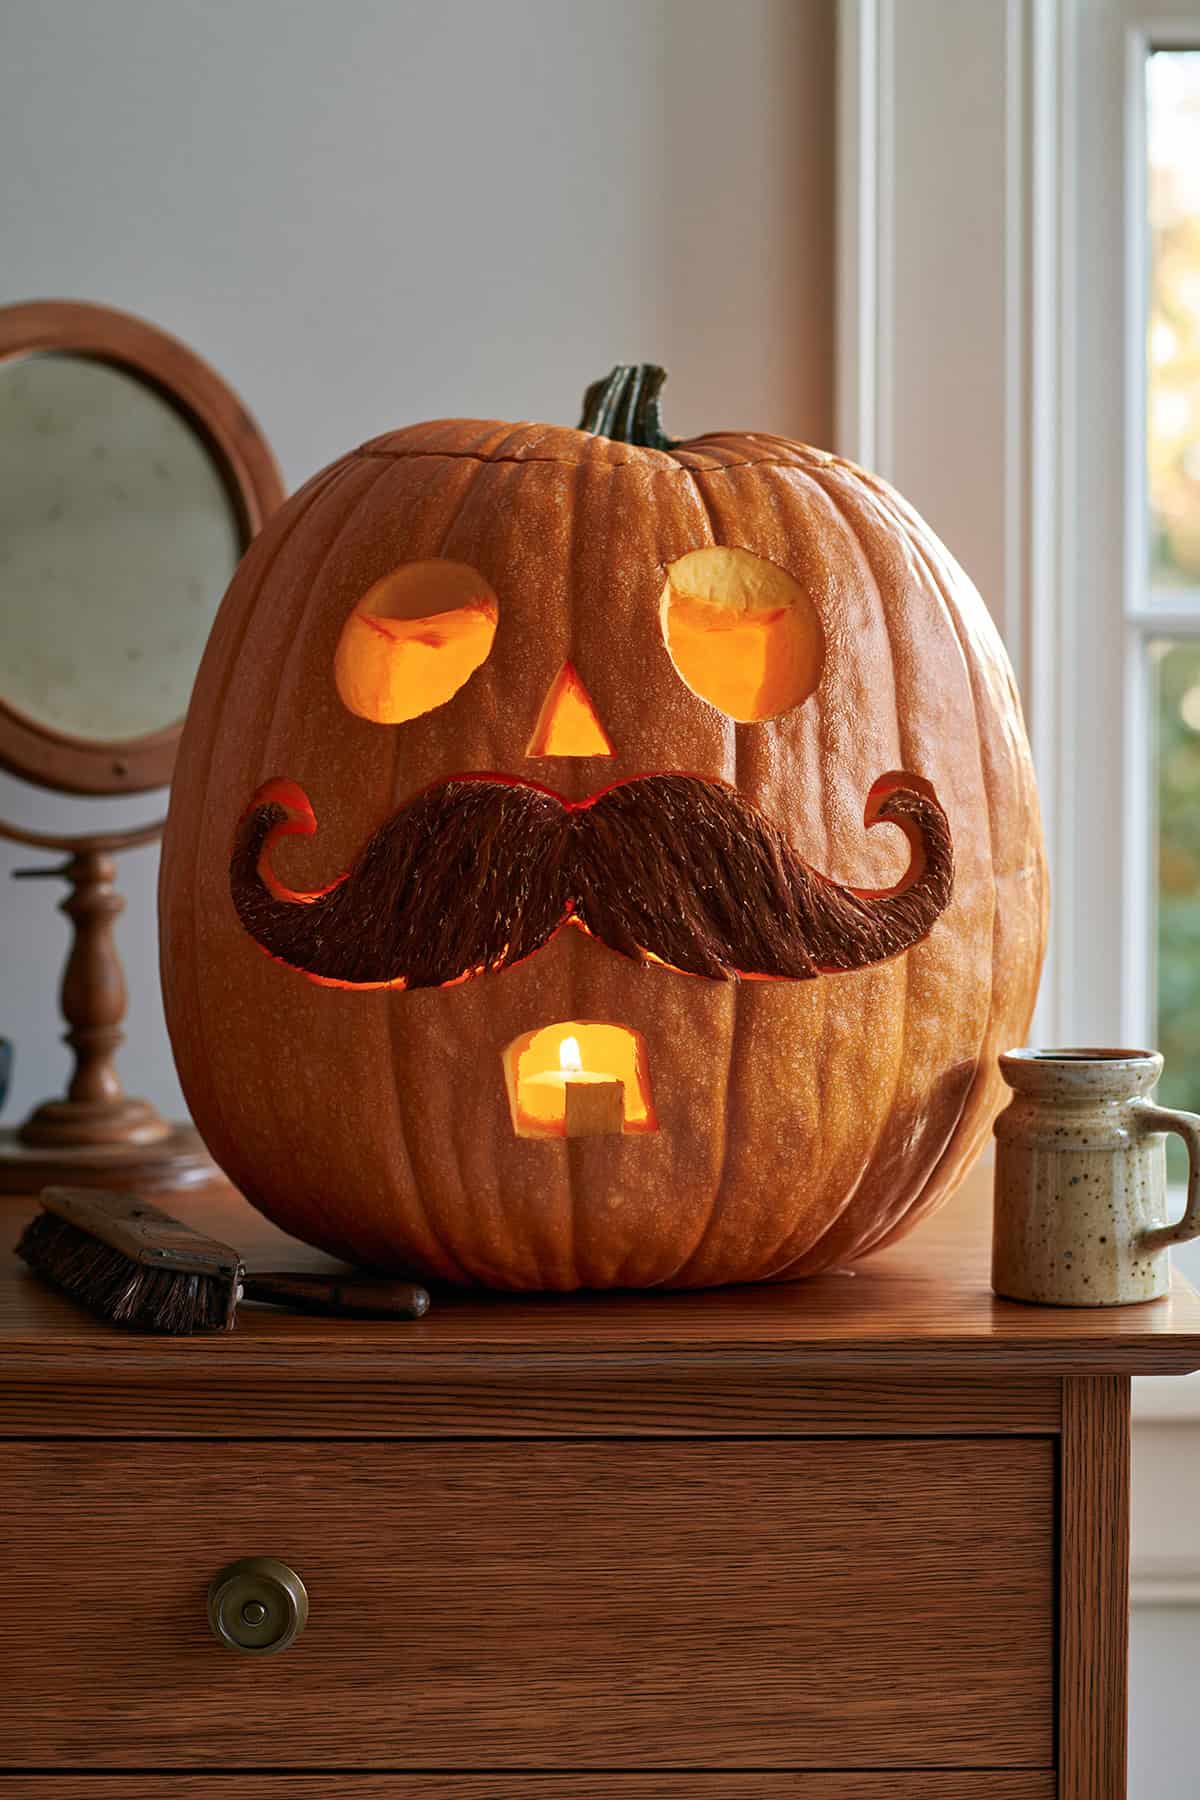
Make the mustache the largest feature on the entire pumpkin. Draw two thick lobes that meet beneath the nose, then curl both outer ends upward. Scrape away the rind inside the shape rather than cutting it free; the pale flesh preserves every curve.
Add round eyes, a triangular nose, and a small rectangular mouth below. Rough scratch marks across the mustache resemble coarse hair and add useful detail.
Penguin Pumpkin
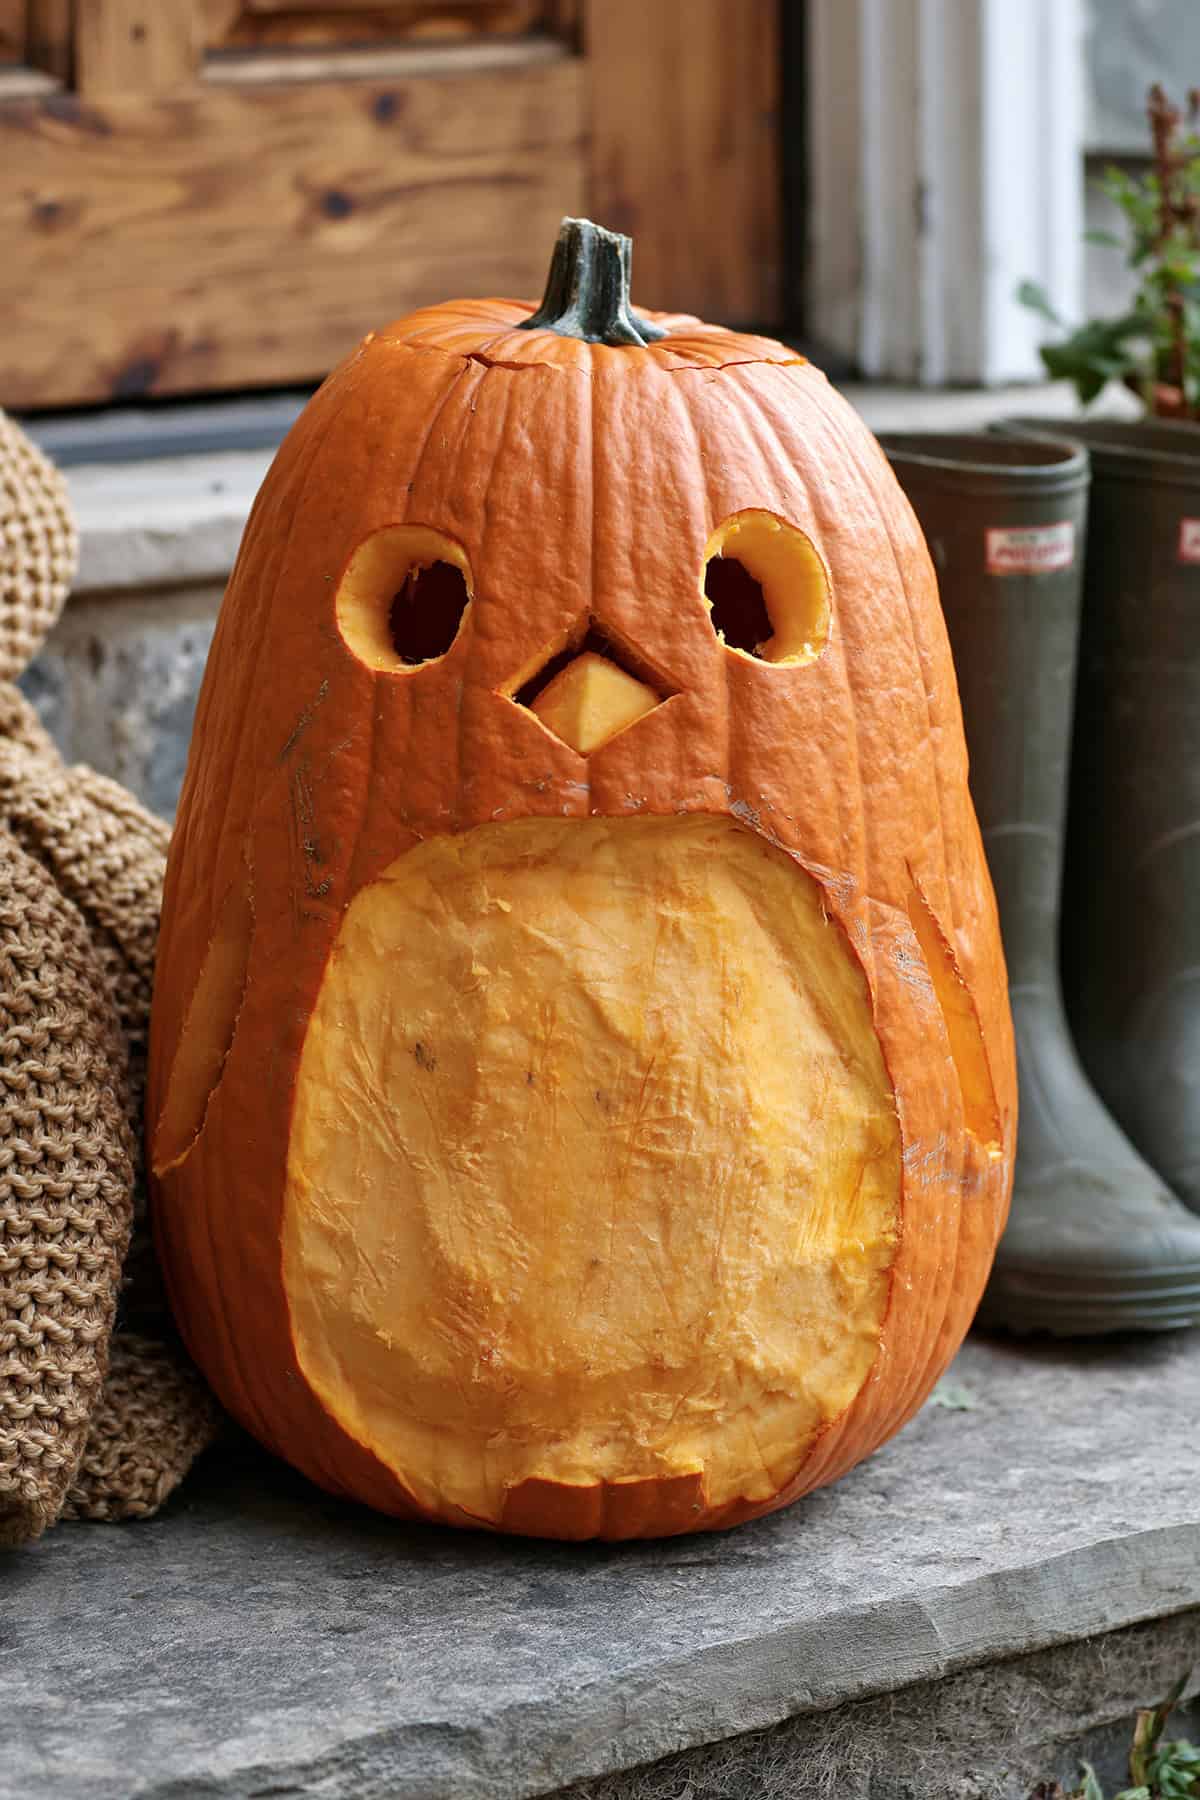
A tall pumpkin naturally matches the upright body of a penguin. Scrape one large oval across the lower front to expose a pale belly. Above it, cut two round eyes and place a diamond-shaped beak between them.
Shallow curved lines along both sides suggest folded wings. The broad belly requires patience, though its outline stays simple. Leave the pale surface slightly rough for a soft, feathered appearance.
Mushroom Cottage Pumpkin
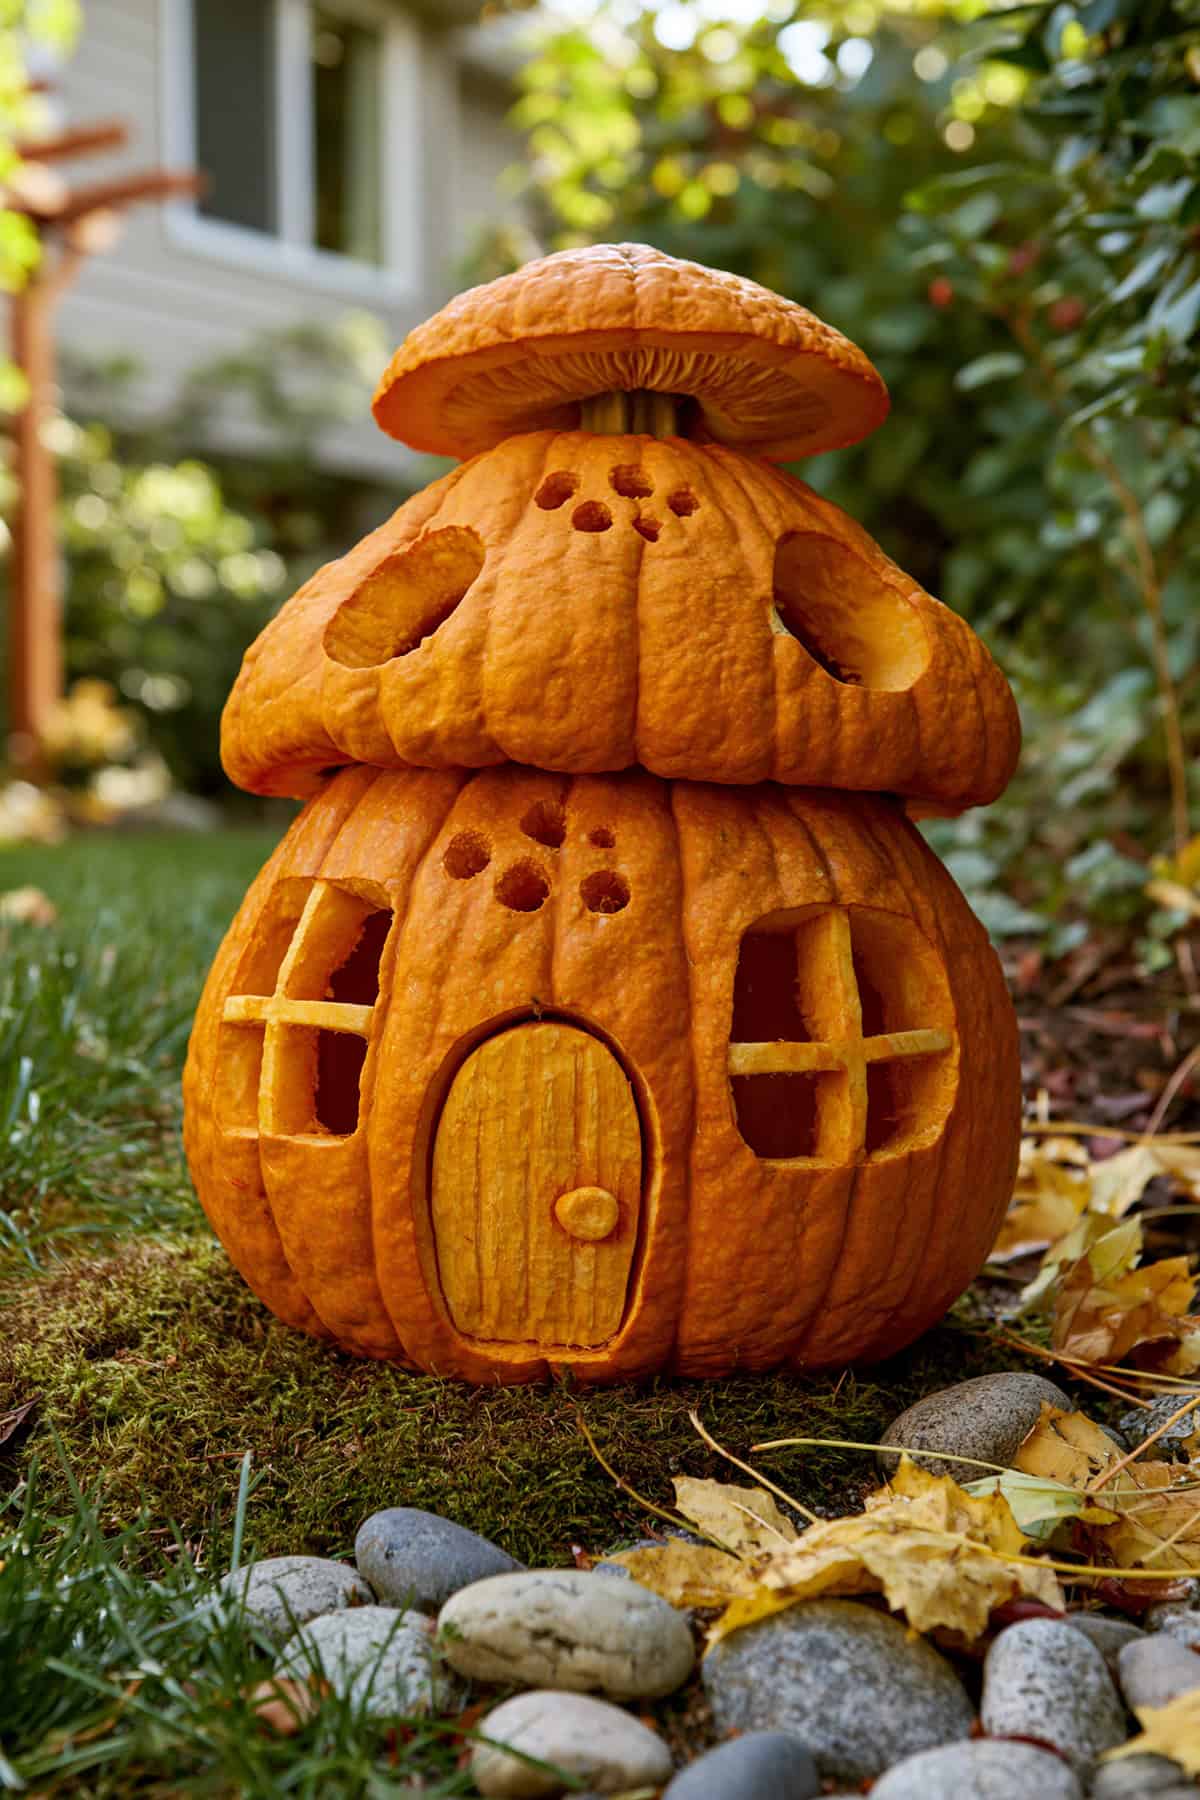
Stack two carved pumpkins to build a tiny cottage beneath a mushroom cap. The lower pumpkin needs an arched door, two cross-paned windows, and several small round openings.
Add two oval windows to the upper pumpkin, then top it with a shallow pumpkin lid that resembles a wide mushroom cap. Scraped door panels and window frames preserve detail while the open sections release warm light from inside.
Little Robot Pumpkin
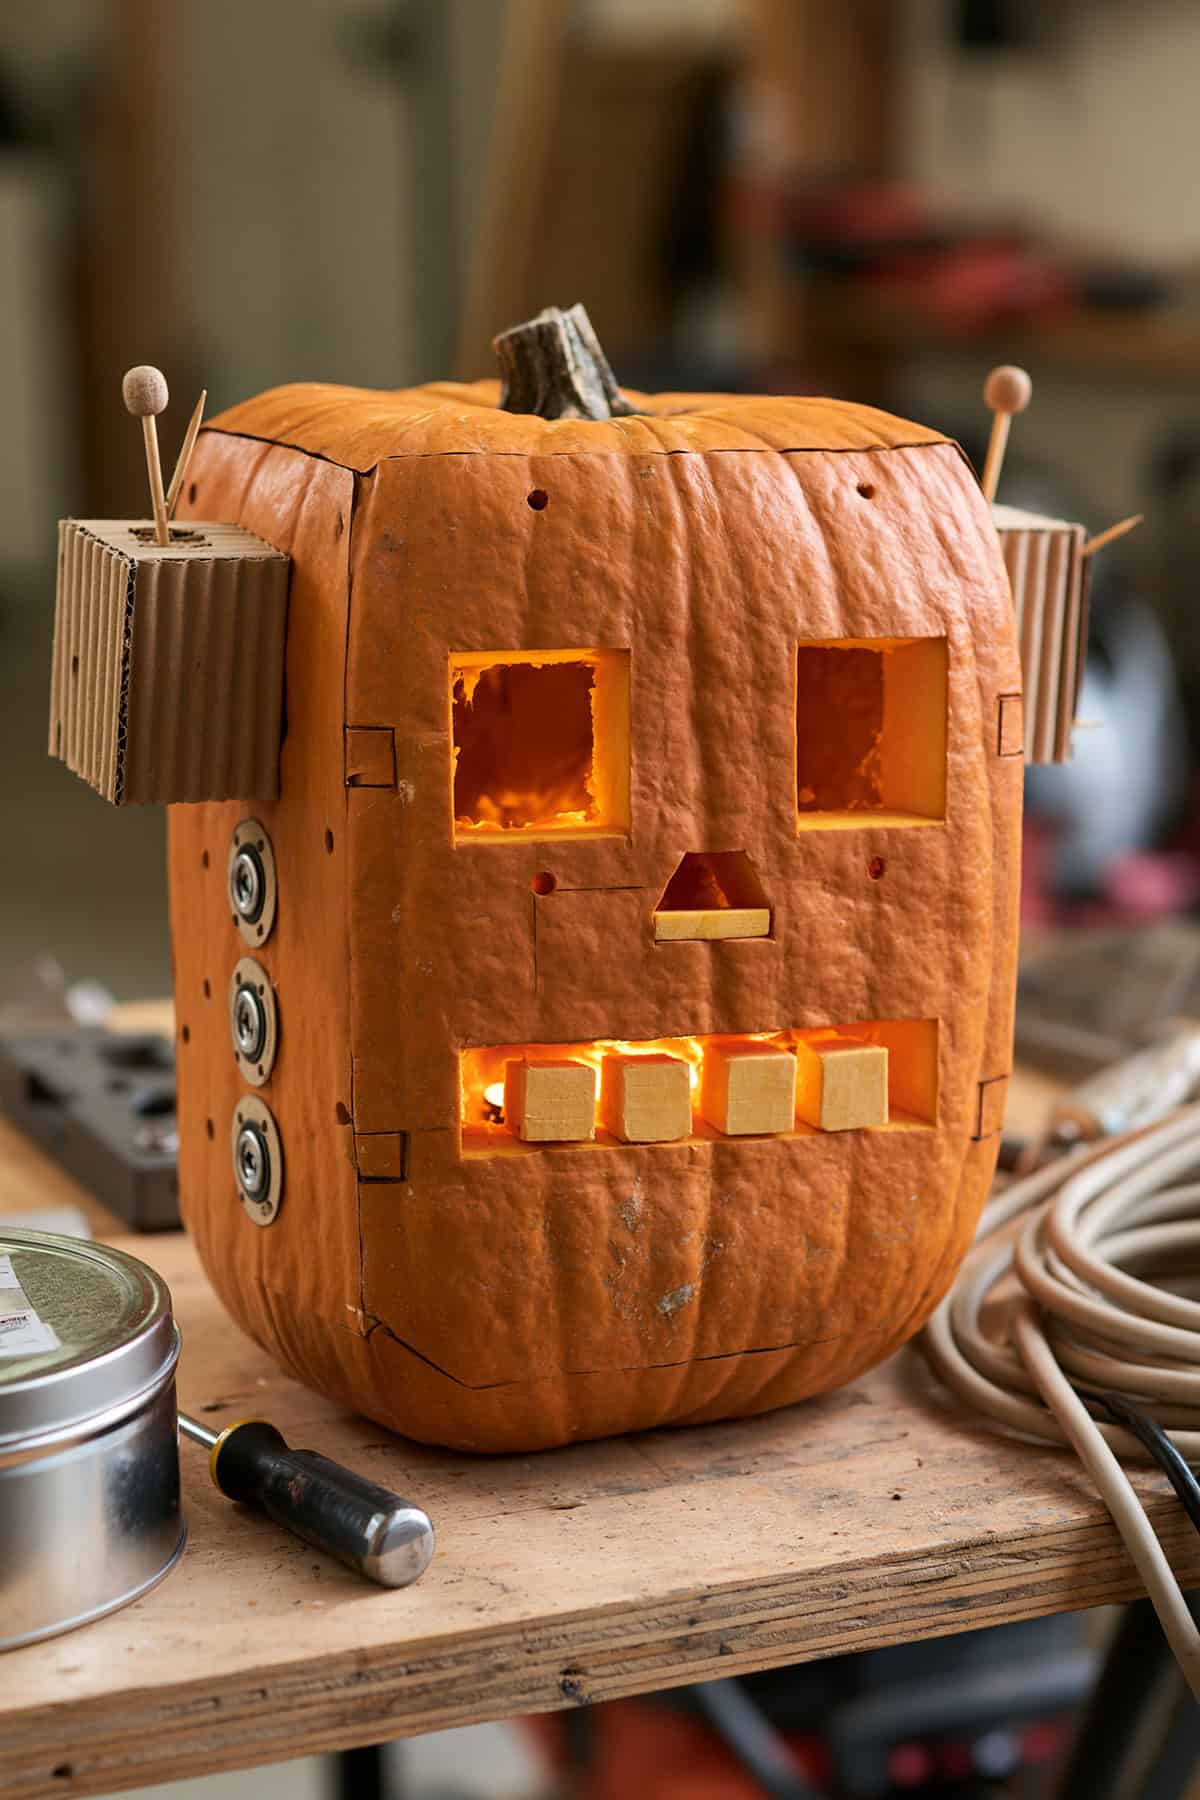
Square features quickly change a plain pumpkin into a boxy robot head. Cut two large rectangular eyes and a long horizontal mouth, then leave four square teeth inside the opening.
A small trapezoid forms the nose. Cardboard blocks attached to both sides act as mechanical ears, while thin sticks become antennas. Several tiny drilled holes across the face resemble screws, buttons, or indicator lights.
Frog Face Pumpkin
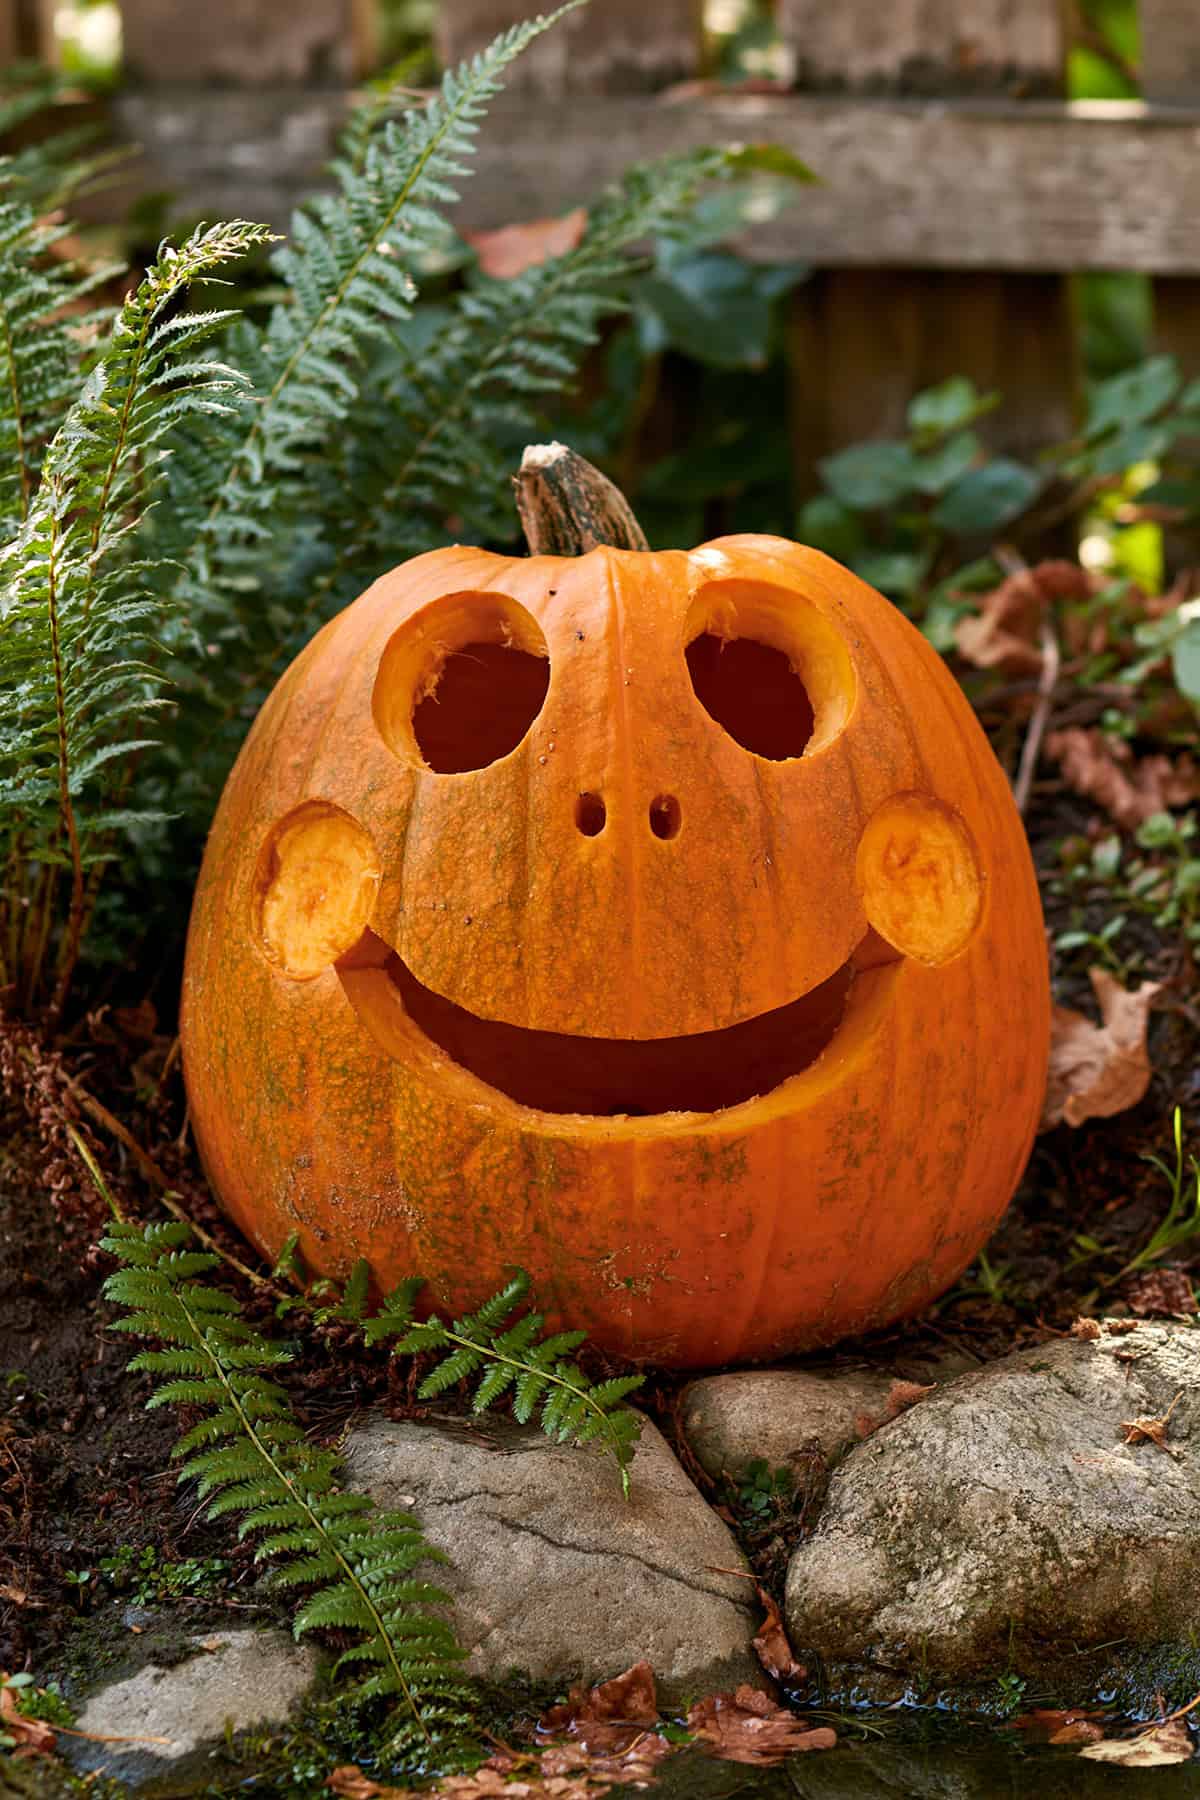
Oversized eyes near the top establish the frog shape right away. Cut two large circular openings, then add two tiny nostrils between them. A broad curved mouth should stretch almost from one side of the pumpkin to the other.
Scrape round cheek patches beside the smile instead of cutting extra holes. Choose a short, wide pumpkin; its natural proportions make the face look squat and frog-like.
Cupcake Pumpkin
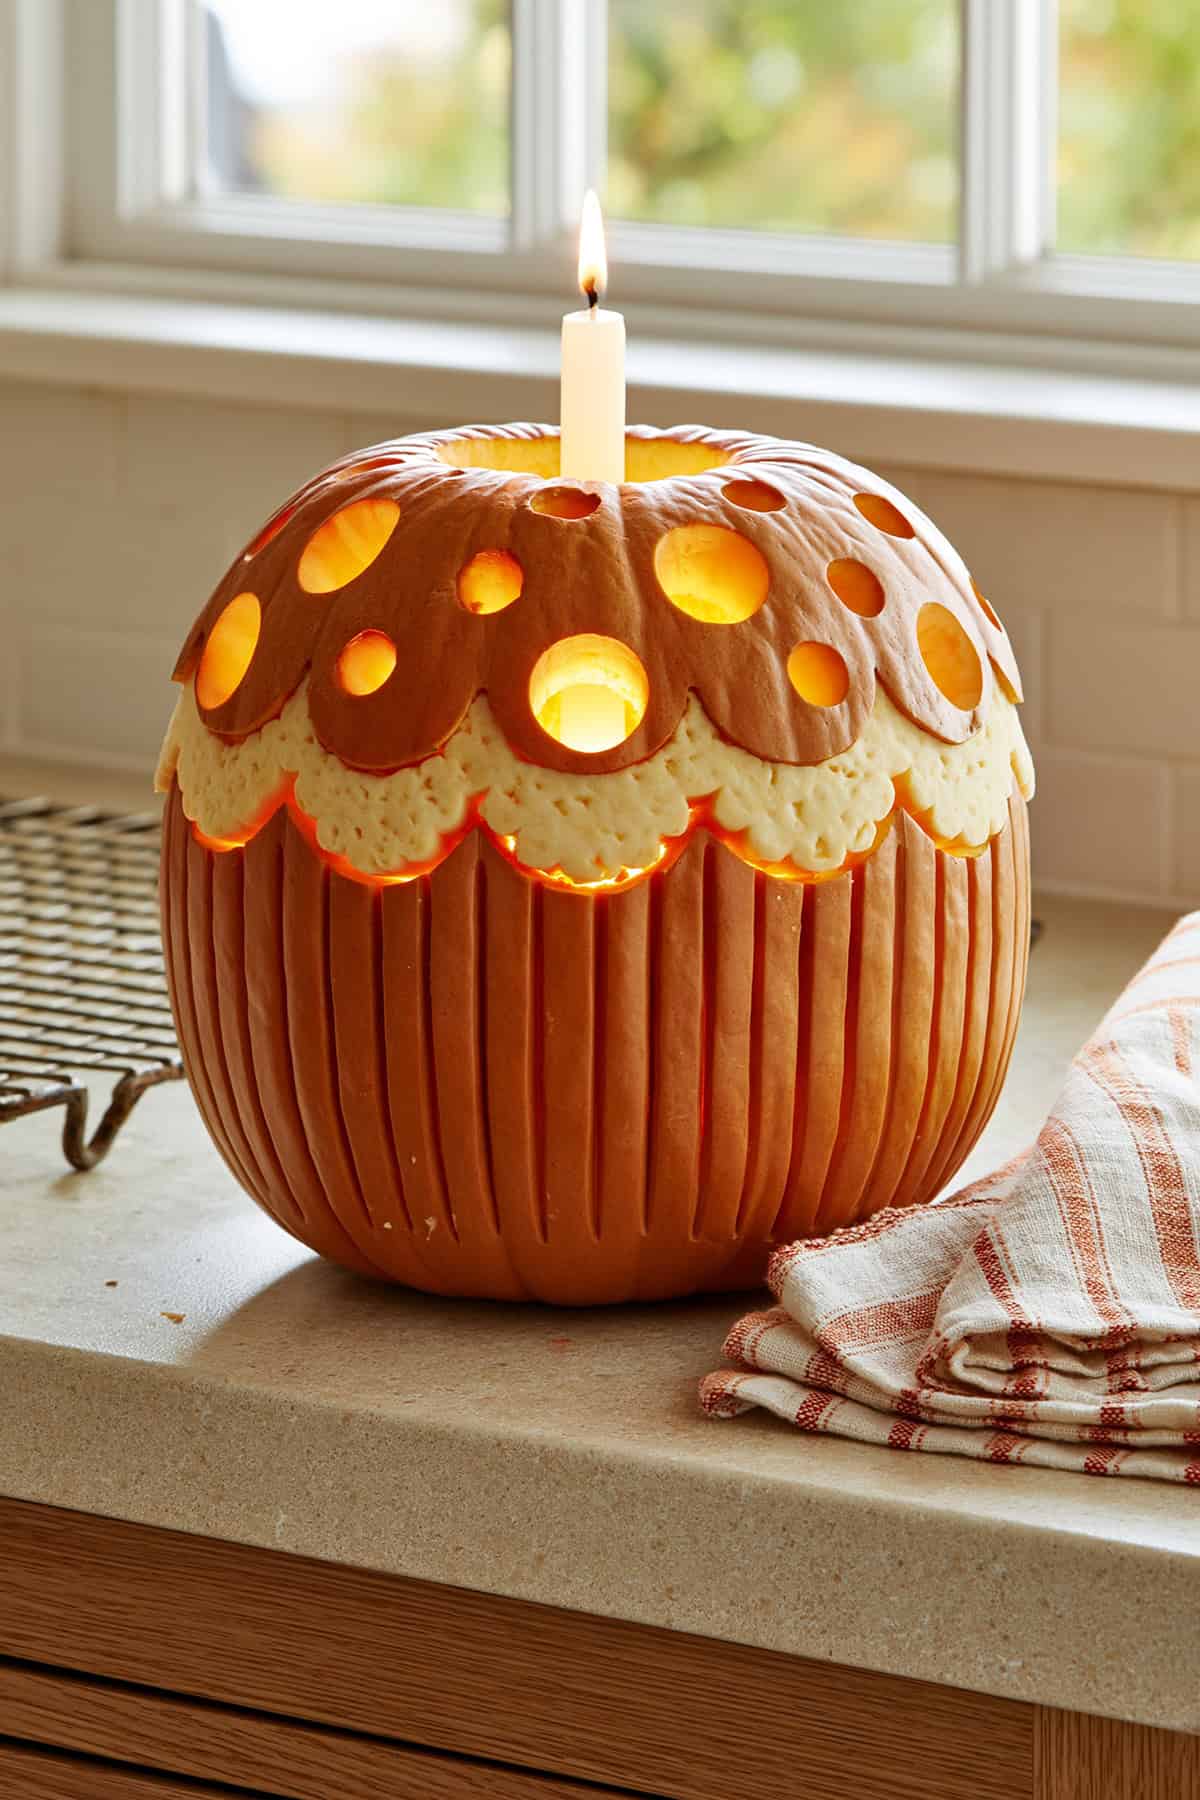
Vertical grooves already resemble the paper wrapper around a cupcake. Deepen several of those lines with shallow scrapes across the lower half. Above them, mark a wavy frosting edge and scrape away sections to reveal the pale flesh.
Drill round sprinkle holes in several sizes across the top. Remove the stem and place a short candle through the lid so it reads as the birthday candle on top.