Garlic ranks among the easiest crops to grow, yet many first-time gardeners skip key details that affect the final harvest. A little preparation before planting can save months of frustration later. Here’s what to know before putting your first cloves into the ground.
Table of Contents
- Why Grow Your Own Garlic?
- Best Garlic Varieties to Grow
- When to Plant Garlic
- Choosing and Preparing Garlic Cloves for Planting
- Preparing Your Garden Bed
- How to Plant Garlic
- Caring for Growing Garlic
- Common Garlic Pests and Diseases
- When and How to Harvest Garlic
- Curing and Storing Garlic
- Saving Garlic for Replanting
- Growing Garlic in Containers
- Troubleshooting Common Garlic Growing Problems
Why Grow Your Own Garlic?
Fresh from the garden, bulbs hit you with flavor and crunch you just don’t get from store-bought. You get to decide: maybe you go for a softneck that stores forever, or a hardneck with a flavor that stands out. Supermarket garlic often comes from far-off places and isn’t always a match for your local conditions. Growing your own means you pick what thrives where you live.
It doesn’t hog space or demand much. Full sun, loose soil, and drainage—really, if you can grow onions, garlic’s no harder. Most home plots dodge major pest or disease drama if you keep the soil in good shape.
Plus, you get access to types you’ll never see at the store. Local growers can hook you up with varieties bred for your winters, whether brutal or mild. This isn’t just about yield; it’s about flavor experiments right in your own kitchen.
You’re in charge of what goes into your soil, too. Compost, fertilizer—your call. No weird anti-sprouting treatments to worry about. That kind of control pays off with a crop you can count on.
Best Garlic Varieties to Grow
Choosing garlic isn’t just about taste—it’s storage life, climate tolerance, and how the bulbs shape up. The variety you pick can mean the difference between a good harvest and a great one.
Hardneck vs. Softneck Garlic
Some garlic sends up a stiff flower stalk (the scape)—that’s hardneck. Fewer, larger cloves per head, and flavor that can really stand out.
In places where winters bite, hardneck types are usually the go-to. They actually need a cold spell to split into fat cloves. Sure, they don’t store as long, but the taste is worth it for many.
Softnecks, on the other hand, skip the stiff stalk. More cloves—sometimes a dozen or more—and they’re the ones that tend to fill supermarket shelves because they last and ship well.
If winter’s mild where you are, softnecks usually win out. They’ll hang around in storage for half a year or more, which is pretty handy.
Top Garlic Varieties for Beginners
Up north? Try hardnecks like ‘Music’ or ‘German Extra Hardy.’ Big, easy-to-peel cloves and they don’t fuss in cold gardens.
For milder regions, ‘California Early’ or ‘California Late’ (both softnecks) are steady performers. Decent storage, reliable bulbs—good choices if you’re just getting started.
Honestly, nothing beats garlic grown from local seed. Bulbs from nearby growers tend to settle in and thrive. Skip grocery store garlic for planting unless it’s specifically labeled for that—some have been treated to stop sprouting, and that’s just a headache.
When to Plant Garlic
Getting the timing right—matching your climate and giving cloves the cold they need—sets you up for strong roots and big bulbs come summer.
Fall Planting vs. Spring Planting
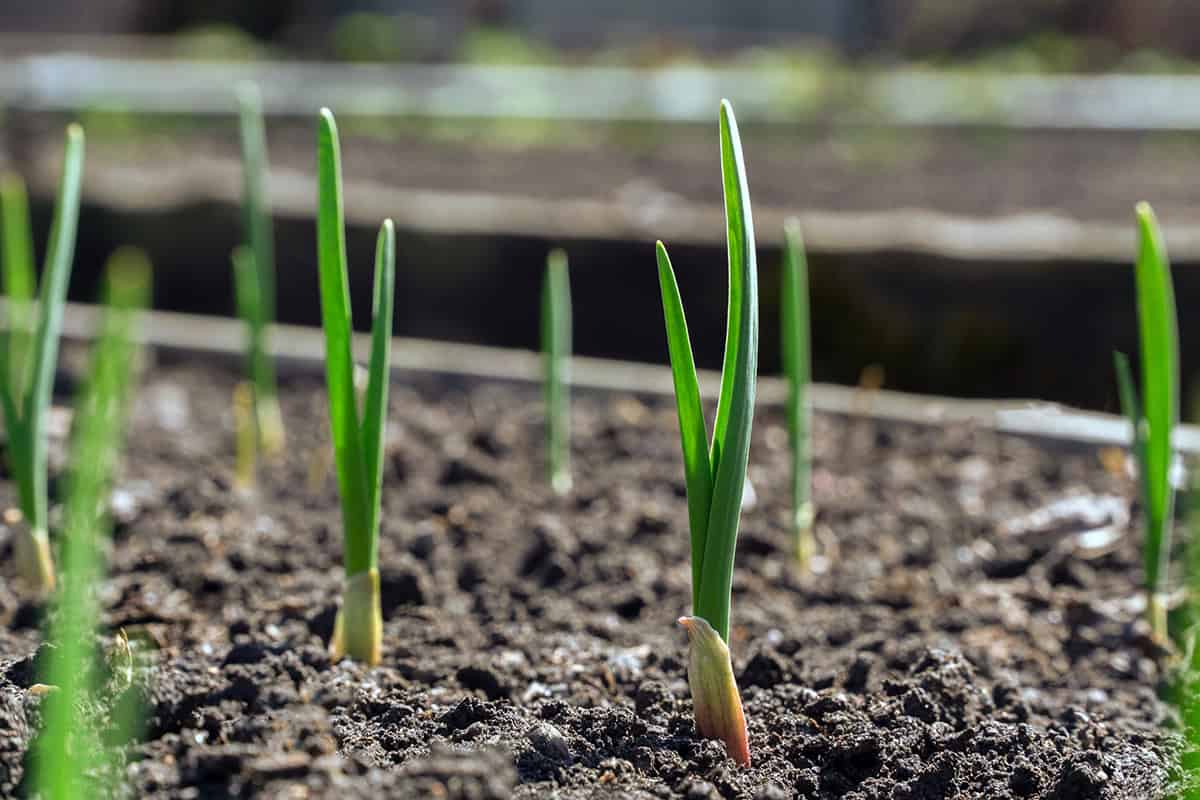
Most folks plant in fall. You want cloves in the ground from late September to November, at least a couple weeks before a hard frost. That way, roots get a head start before winter locks things down.
Cold snaps are actually good—hardneck varieties especially need them to split into full bulbs. Fall planting usually means bigger, earlier harvests.
Spring planting? It works, but honestly, results can be underwhelming. Get them in as soon as the soil’s workable. Without enough chill, bulbs can stay small or even skip splitting into cloves.
If you’re going the spring route, pick the fattest cloves and expect a later (and maybe smaller) harvest.
Best Planting Times by Climate Zone
In chillier areas, shoot for mid-October to early November—soil should still be workable, but not yet frozen solid. That window gives roots time to settle in before real winter hits.
Moderate winters? Late October through November is your sweet spot. Soil should be cooling, but not frozen, for at least a few weeks after planting.
Down south where it’s warm, you can wait until November or even December, once the heat finally backs off. In super mild spots, you might need to stick cloves in the fridge for a few weeks before planting, just to give them that cold boost.
For spring, don’t dawdle. As soon as the soil’s crumbly and not soggy, get those cloves in, about 2–3 inches deep, pointy end up. Early planting helps bulbs size up before summer heat slows them down.
Choosing and Preparing Garlic Cloves for Planting
Good garlic starts with solid seed stock and a little attention when you break up the bulbs. The bigger and healthier the clove, the better your chances for a hefty harvest.
Where to Buy Seed Garlic
Look for garlic sold as seed garlic—it’s grown for planting, not eating. Grocery store bulbs are a gamble: they’re often treated to prevent sprouting and can bring in diseases.
Local growers, garden shops, or trusted seed catalogs usually have what you need. They’ll have types that actually handle your climate, which can be a game-changer for winter survival and bulb size. Hardnecks for cold, softnecks for mild—generally speaking.
Buy whole bulbs by weight, not loose cloves. Each clove turns into a new plant, so start with the best. Look for firm, tight bulbs—skip any with soft spots, mold, or damage.
If you’re ordering online, get in early. Suppliers tend to ship late summer or early fall, right when you’ll want to plant.
Separating and Selecting Cloves
Wait until planting day to break apart bulbs. Cloves dry out fast, and you want those papery skins intact for protection.
Big, outer cloves are your ticket to big bulbs. Smaller inner cloves can be planted for green garlic, but don’t expect much size if you grow them to maturity.
Toss any cloves that feel soft, shriveled, or look off-color. Healthy ones are firm and weighty for their size. Be careful not to snap the base off—the roots grow from that flat end.
At planting, always set cloves with the point up, flat end down. That’s how you get straight, strong shoots.
Preparing Cloves Before Planting
Sort out your soil before you even think about the cloves. Garlic likes loose, crumbly ground with a pH in the 6.0–7.0 range. Compost helps with both structure and nutrients.
Unless you’re dealing with a known pest or disease, don’t bother soaking cloves. Clean seed and crop rotation usually keep problems at bay. Avoid planting where onions or other alliums grew last year—disease can hang around.
Don’t let cloves sit around after you split them—plant right away. Depth matters: 1–2 inches in mild climates, up to 2 inches in colder spots. Give them 4–6 inches of space so bulbs have room to size up.
Preparing Your Garden Bed
Loose, rich soil in a sunny spot—garlic needs both for top-notch bulbs. Getting drainage and pH right before planting pays off big time at harvest.
Soil Requirements for Garlic
Soil that holds moisture but doesn’t stay soggy is the goal. Garlic doesn’t like wet feet—compacted or swampy ground leads to undersized or weirdly shaped bulbs. Raised beds work wonders if your yard tends to stay wet.
Keep pH between 6.0 and 7.0. That’s where garlic roots can actually grab the nutrients they need. A cheap soil test will tell you where you stand.
Before planting, loosen the top 8–12 inches. Break up clumps, pull out rocks—roots and bulbs need room. You want a fine, crumbly texture for the best growth.
Steer clear of spots where puddles linger after rain. Wet soil, especially in winter, is a recipe for rot.
Site Selection and Sunlight Needs
Pick a bed that gets at least six hours of sun—more is better. Less light means wimpy bulbs and smaller harvests.
Airflow isn’t just a bonus—it helps dry out leaves and keeps diseases in check. Avoid low areas where cold air pools in winter.
Don’t plant garlic where other alliums have been in the last couple years. Crop rotation helps dodge soil-borne pests and diseases.
Weeds are a pain for garlic. Shallow roots and skinny leaves make it a poor competitor, so keep the bed as clean as you can.
Amending the Soil
Work in well-rotted compost or aged manure a few weeks before planting. This boosts nutrients and keeps soil loose for easy root growth.
Skip the fresh manure—it can bring in weeds, burn young plants, and even carry diseases you don’t want.
If your soil test says you’re low on nutrients, add a balanced fertilizer and mix it in where roots will reach. Don’t overdo nitrogen in fall; too much leafy growth just gets hammered by winter.
Prep the bed close to planting time. That freshly loosened surface helps cloves settle in at the right depth and makes for easy planting.
How to Plant Garlic
Depth, spacing, orientation, and a good mulch layer—get these right, and you’re well on your way to a solid garlic crop.
Planting Depth and Spacing
Break bulbs into cloves just before planting. Keep those skins on, pick the biggest, firmest ones for your main crop.
Generally, plant cloves 2–3 inches deep. In harsher climates, go 3–4 inches to shield them from freeze-thaw cycles. Measure from the soil surface to the top of the clove.
Within rows, 3–4 inches apart works. Between rows, give yourself 6–10 inches—makes weeding and watering easier, and lets air move. Cramming cloves too close shrinks bulbs; more space, more air, less disease.
After planting, press the soil down gently to close air gaps. Water well so roots can get going before winter sets in.
Planting Orientation
Every clove has a flat base and a pointy tip. Flat side goes down, tip up—roots come from the bottom, shoots from the top.
Upside-down planting makes shoots twist and bulbs stay small. Set each one upright, don’t force it, and don’t leave tips poking out. Straight placement means even growth and bulbs that actually look like garlic at harvest.
Mulching After Planting
Once you’ve watered, cover the bed with 2–4 inches of mulch—clean straw, shredded leaves, whatever’s weed-free and handy.
Mulch keeps soil temps steadier over winter and holds moisture in spring. It’s also your best bet against weeds. In super cold spots, wait until the ground chills but isn’t frozen before you mulch heavy.
When spring rolls around, check under the mulch. If it’s soggy, pull it back a bit. Leave a thin layer to keep weeds down and roots cool as things heat up.
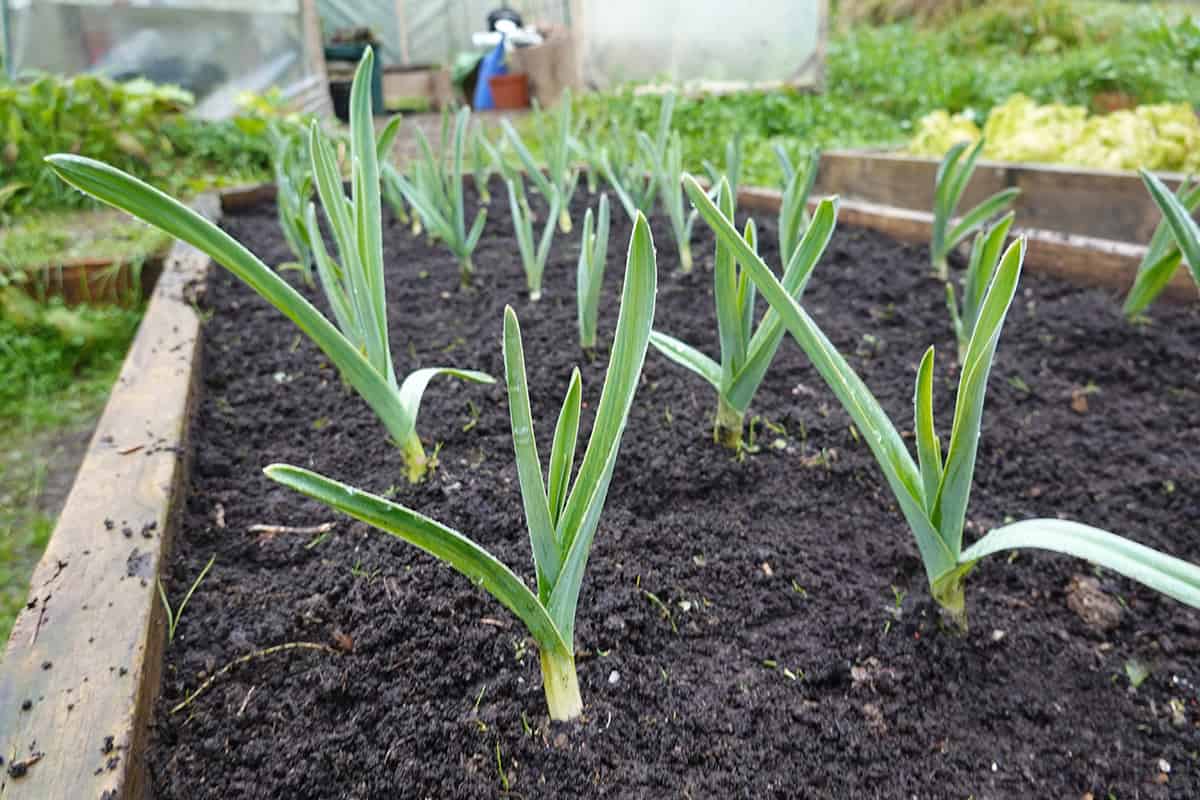
Caring for Growing Garlic
Big, healthy bulbs come from steady moisture, decent feeding, weed-free beds, and a little attention to scape removal. Dial in those four, and you’re halfway to a solid harvest.
Watering Requirements
From the first fall roots to the last spring bulbs, garlic likes its soil evenly moist. About an inch of water each week—rain or hose—usually does it.
Let water soak in deep, at least six inches down. If you just sprinkle the surface, roots stay shallow and bulbs never really bulk up. Let the top inch dry out a bit between waterings, but don’t let the bed go bone-dry.
Once the lower leaves start browning in early summer, ease off the water. A dry spell in the final weeks helps the outer wrappers toughen up and keeps bulbs from rotting. If you can, skip the overhead sprinkler—wet leaves just invite fungus.
Fertilizing Garlic
Fertile, crumbly soil with enough nitrogen sets garlic up for success. Before planting, work in compost and use a balanced fertilizer if your soil test says so.
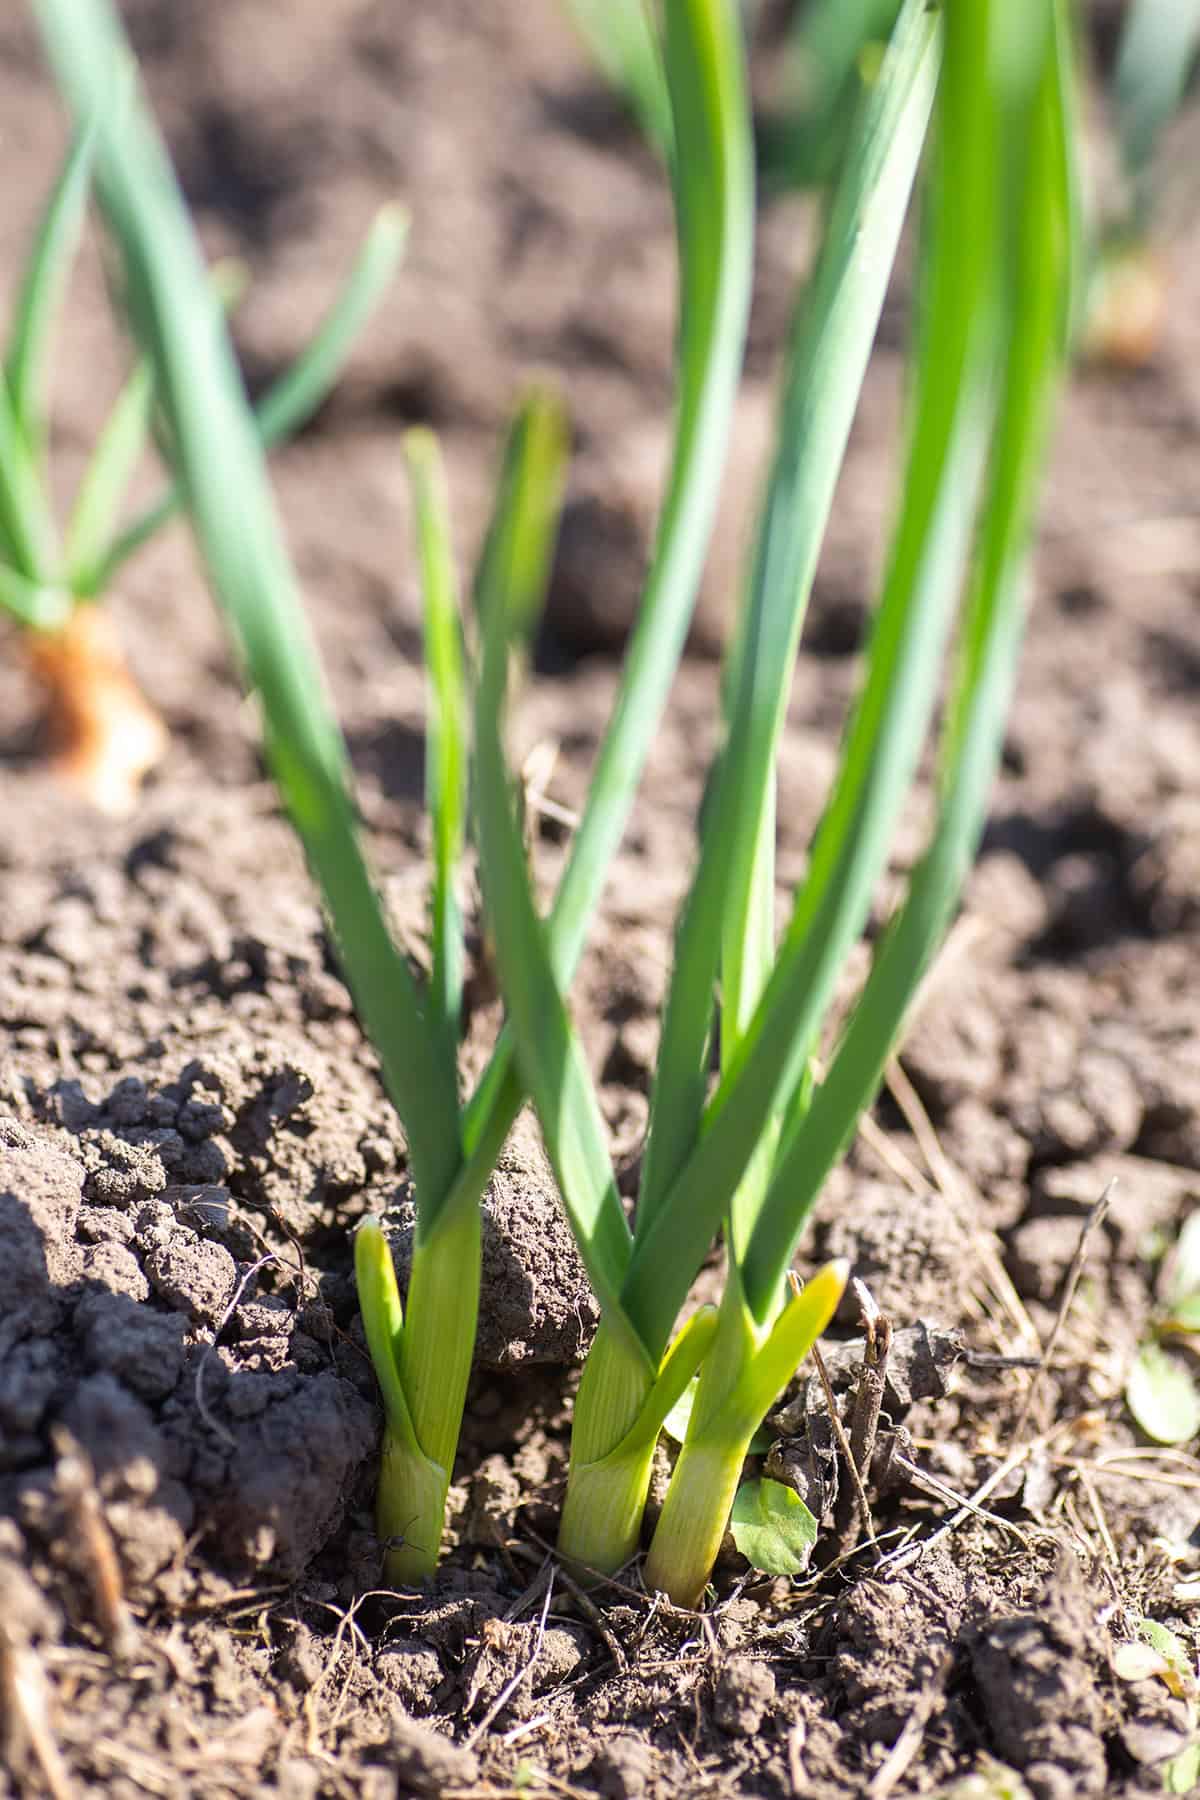
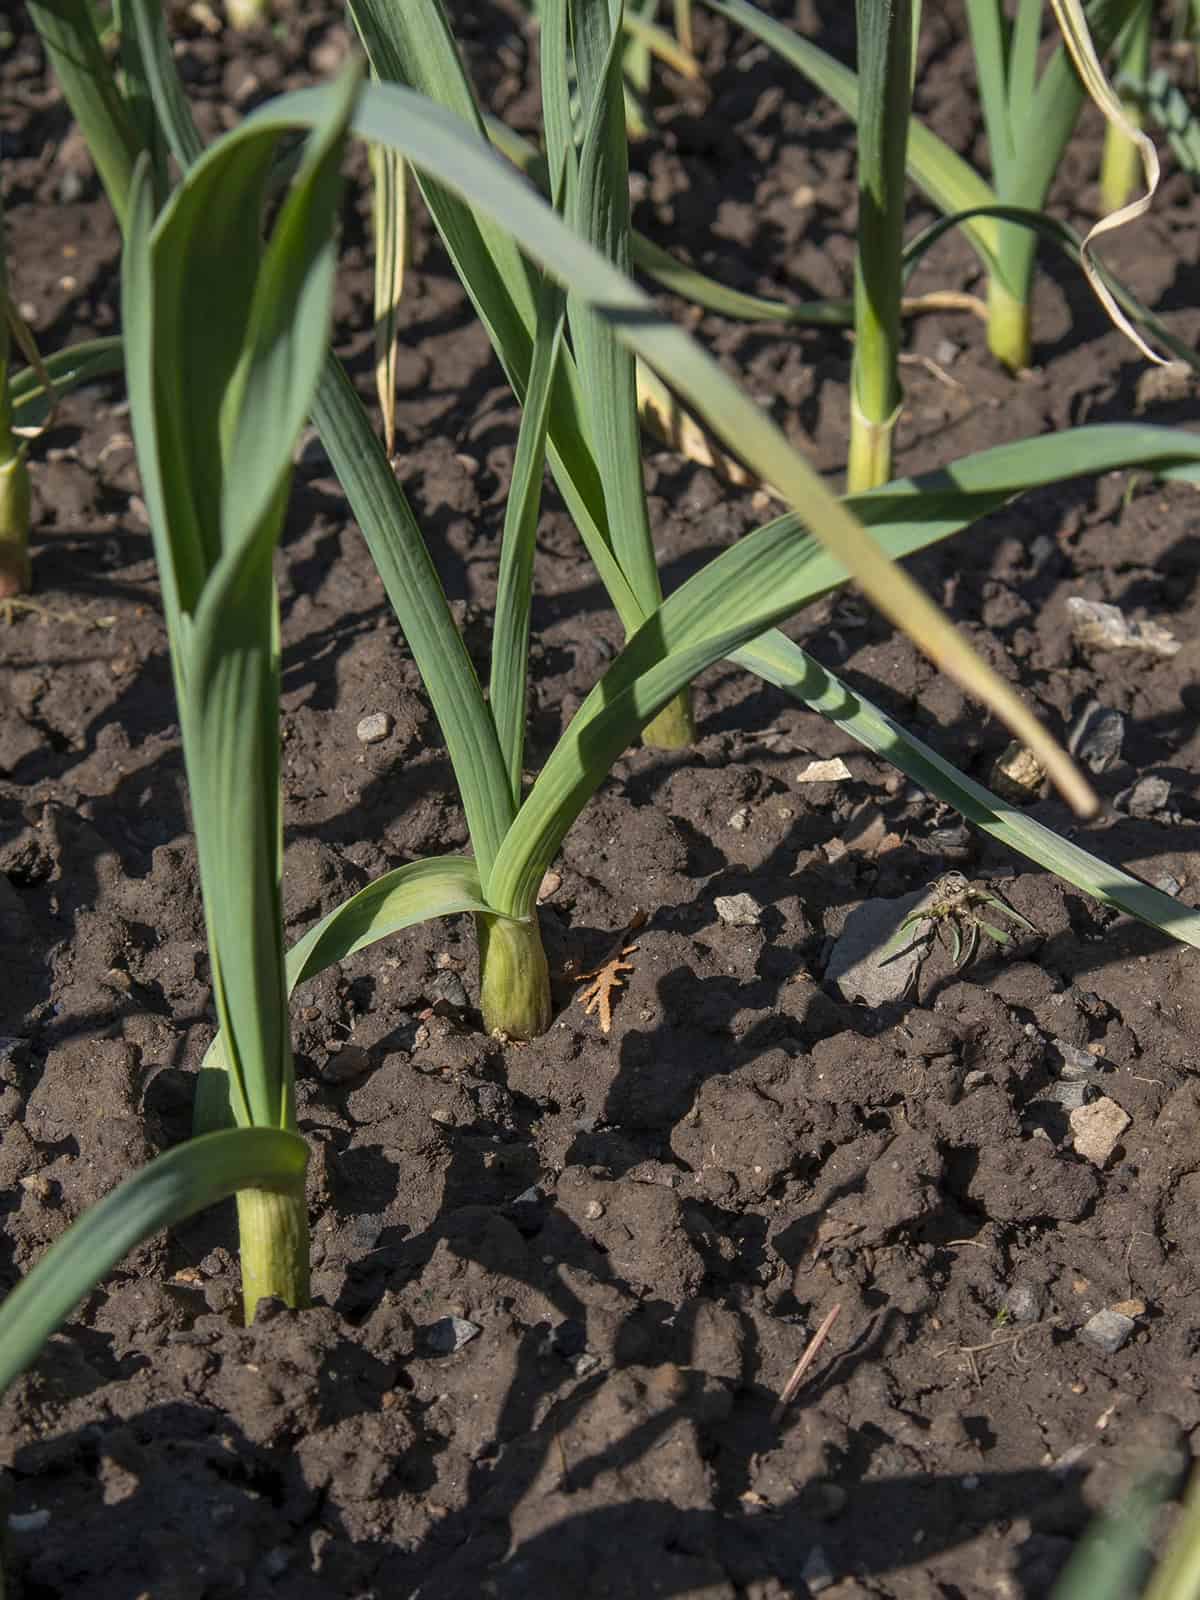
Come early spring, as soon as green shoots poke up, give the rows a little side-dress of nitrogen. Scatter it a few inches off the stems and water it in. Lush leaves now mean better bulbs later.
Ease up on nitrogen once bulbs start swelling. Feeding too late just slows them down and messes with storage. Healthy garlic stands upright and green until it’s ready to die back on its own.
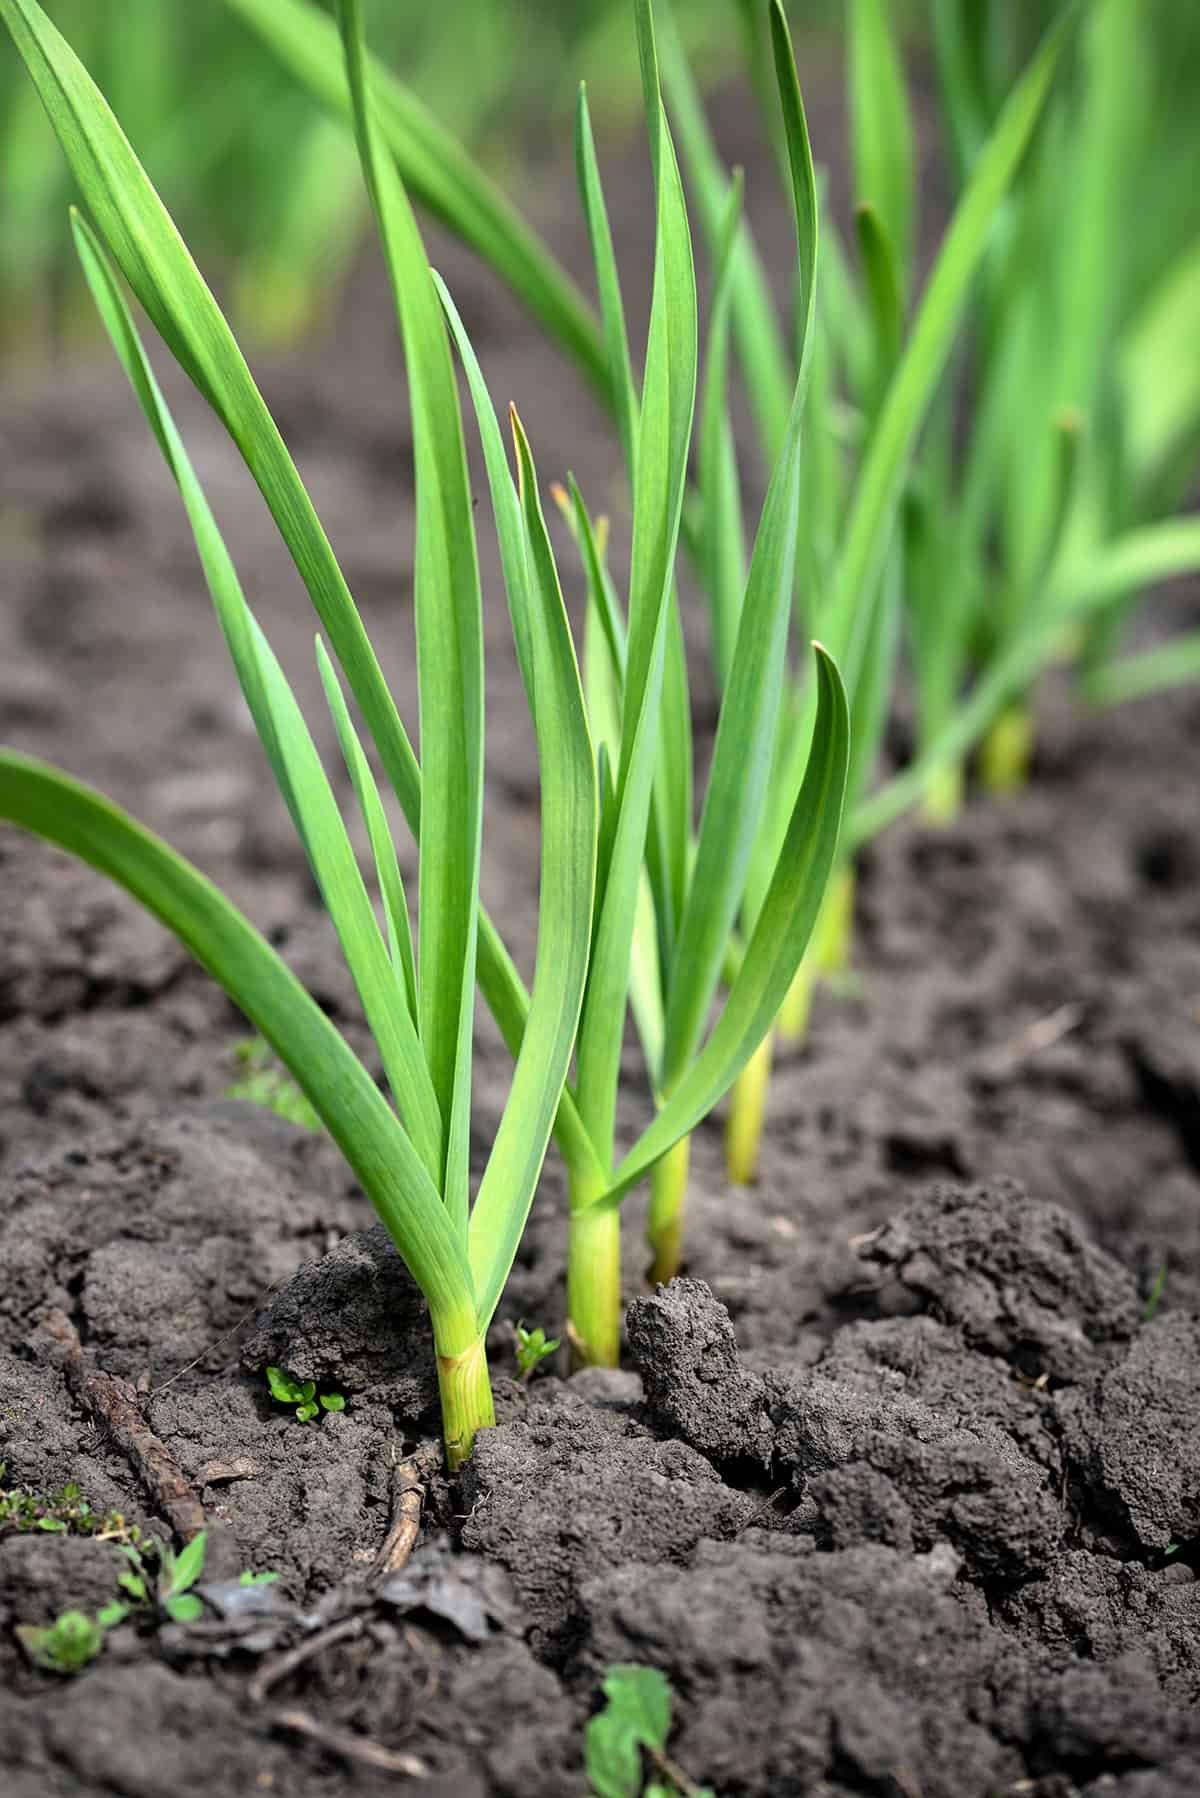
Weed Control
Weeds love to outcompete garlic, which just doesn’t have the root system to fight back. It’s worth keeping the bed clean right from the start.
Hand-pull weeds and go easy near the bulbs—deep digging does more harm than good. A couple inches of straw mulch cuts down on light and keeps weeds in check.
Spring’s when weeds get sneaky, so check often and pull them before they seed. The less competition, the better your garlic will do.
Removing Garlic Scapes
Late spring brings out those curly scapes on hardneck garlic—sort of a bonus crop. They twist, then straighten as they grow.
Snip scapes off once they’ve done a full curl but before they stiffen up. Clean scissors, quick cut near the top leaf. This lets the plant focus on making bigger bulbs.
Softneck types don’t need this step—they rarely send up real scapes. If you harvest scapes, toss them in the fridge; they’ll keep for weeks and taste great in a stir-fry.
Common Garlic Pests and Diseases
Garlic dodges a lot of bugs, but a handful of pests and diseases can still mess with your harvest. Spotting problems early and keeping things clean goes a long way.
Identifying Common Problems
Yellow tips, pale streaks, mottled leaves—these show up fast if viruses get in. Striping and stunted plants often mean trouble, and you’ll usually see it on new growth.
Bulb mites do their damage underground, mostly out of sight. Slow growth and limp plants might be your first clue. Pull up a bulb and you might find soft tissue or rot at the base.
Fungi aren’t shy about making a mess: white rot leaves yellowed tops and a fuzzy white growth with black dots near the base; Fusarium browns the bulb’s bottom and kills roots.
Nematodes twist and swell cloves, sometimes ruining the whole bulb. If things get bad, you’ll see misshapen, mushy heads you can’t use.
Prevention and Treatment
Always start with certified, disease-free seed garlic. Grocery store bulbs are a gamble unless you know they’re clean.
Stick with well-drained soil and keep the pH around 6.0 to 7.0. Too much water just invites rot. Rotate your alliums—don’t plant garlic in the same spot every year.
If you spot sick plants, yank them and toss them in the trash, not the compost. Scrub tools between uses to keep pests and spores from spreading.
Weeds make things worse by choking airflow and raising disease risk. Good spacing, healthy soil, and sharp sanitation habits keep most garlic problems at bay.
When and How to Harvest Garlic
Timing the harvest is everything—too early and the bulbs are tiny, too late and the wrappers split. Let the leaves guide you, loosen the soil gently, and treat bulbs with care.
Signs Your Garlic Is Ready
Forget the calendar—leaf color tells the real story. Most garlic’s ready by early or midsummer, but the exact date shifts with weather and variety.
Check those bottom leaves: when three to five have browned and dried while tops stay green, you’re in the zone. Wait too long and wrappers crack open.
On hardneck types, if you’ve already cut scapes, bulbs will be bigger. As harvest nears, the last leaves start to yellow and lose their snap.
If you’re not sure, dig up a test plant. Bulbs should fill the skins tightly, wrappers should be intact—not loose or splitting.
Harvesting Technique
Pick a dry day, when soil breaks apart easily. Muddy bulbs just rot faster in storage.
Slide a garden fork in a few inches from the stem and gently lift. Go deep to avoid slicing through the bulbs.
Hold the stem close to the base and ease the plant out. Don’t bang bulbs around or pull too hard—leave roots and tops attached for now.
Brush off loose dirt, skip the rinse, and move bulbs to a shady, airy spot for drying.
Digging vs. Pulling
Firm soil rarely lets garlic go without a fight. Pulling alone can snap stems and leave bulbs buried.
Hardneck types especially can be stubborn and sit deep. Even softnecks, in tight or heavy beds, risk broken necks if you yank them.
Digging keeps the wrappers whole, which is key for curing and storage. Torn skins mean trouble down the line.
If your soil is super loose and sandy, you might try pulling—test one first. If it resists, grab the fork and take your time.
Curing and Storing Garlic
Getting curing right locks in flavor and keeps rot at bay. Good storage keeps bulbs usable for months—sometimes longer.
How to Cure Garlic Properly
Start curing right after harvest. Don’t wash bulbs—just shake off dirt and keep roots and leaves attached.
A dry, breezy, shaded spot is perfect: a shed, garage, or porch (as long as humidity isn’t crazy high). Sun can actually cook the cloves, so avoid it.
Spread bulbs in a single layer or tie in small bundles to hang. Leave space for air to move around each plant. Ventilation is your friend here.
Usually, 10 to 14 days does the trick. You’ll know it’s done when skins feel papery, necks tighten, and the stem center is hard. At that point, snip roots and cut stems to about an inch.
Best Storage Methods
Only stash away firm, healthy bulbs. Any that feel soft, show mold, or have torn skins go straight to the kitchen for quick use.
Store garlic somewhere cool, dry, and dark, with air moving around. Temps between 60 and 70°F work well at home. Mesh bags, baskets, or crates all let bulbs breathe.
Skip plastic and anything airtight—trapped moisture spells rot. Don’t refrigerate if you want them to last; cold triggers sprouting once bulbs warm up again.
Never leave raw garlic in oil at room temp. It’s risky—botulism and other nasties thrive. If you prep garlic in oil, refrigerate it and use it up soon.
How Long Does Garlic Last?
How long garlic keeps depends a lot on type and storage. Softnecks usually hang in there for six to eight months if you get conditions right.
Hardnecks tend to last four to six months, sometimes less if it’s warm or humid. Check bulbs every few weeks and toss any that get soft or start sprouting.
At room temps (68–86°F), well-cured bulbs might last a month or two. Cooler, drier spots stretch that out. Curing and steady storage make the biggest difference for shelf life.
Saving Garlic for Replanting
Pick out your seed garlic right after curing and sorting. Go for the biggest, firmest heads with tight skins and zero soft spots. Healthy bulbs mean better plants next season; small or damaged ones just disappoint.
Keep seed stock away from your eating stash. Store it cool, dry, and dark with plenty of air movement. Mesh bags or open crates are perfect. Heat, damp, and light all cut quality fast.
Don’t break bulbs apart until right before planting in fall. Whole bulbs fend off disease and hold moisture better than loose cloves. If you spot any sign of mold or pests, toss those bulbs. Careful selection each year pays off in the long run.
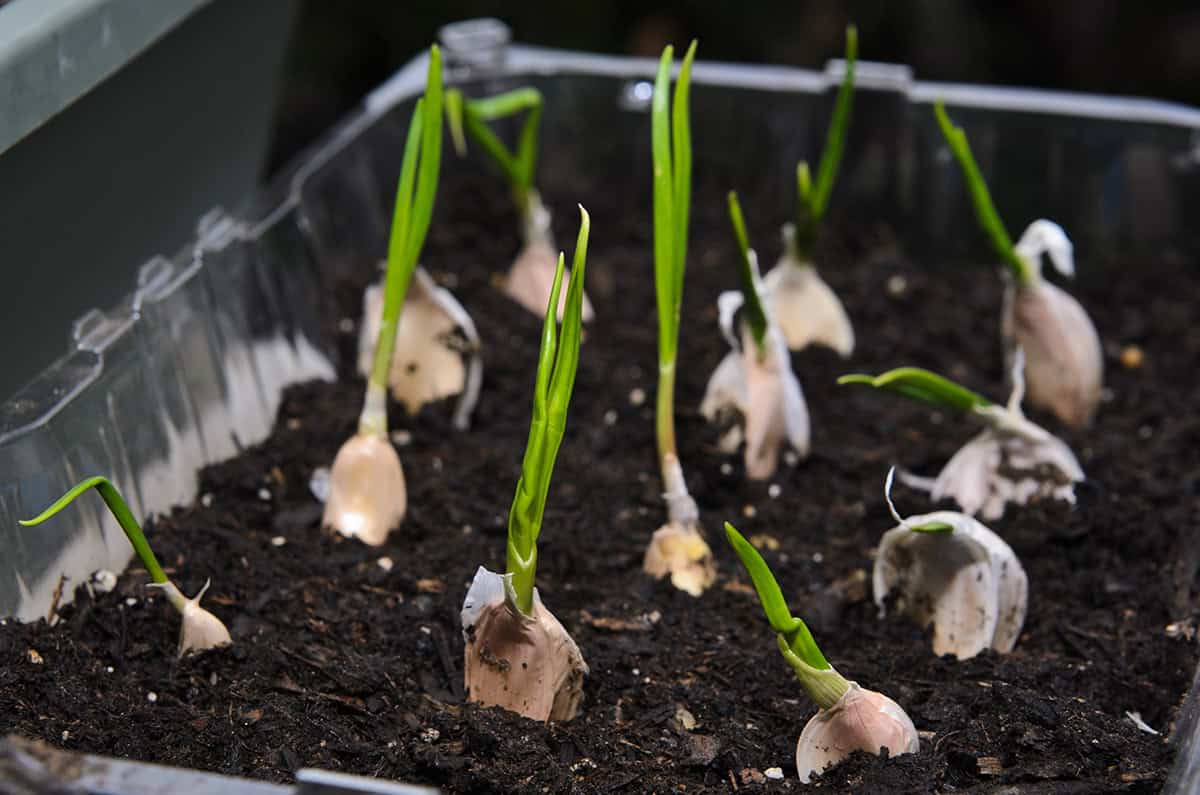
Growing Garlic in Containers

Decent bulbs can come from a pot if you get the setup right. Look for containers at least 8 inches deep with drainage holes. The wider, the better for spacing and yield.
Fill with loose, well-draining potting mix that’s rich in organic matter. Garlic hates heavy, sticky soil—it just won’t size up right.
Give the pot a sunny spot for most of the day. Plant cloves pointed side up, flat side down, covered with about 2 inches of soil and spaced 4 inches apart.
Water well after planting to settle everything, then just keep the soil evenly moist. Never let pots sit in water. As leaves yellow near harvest, back off on watering.
Cold winters? Move containers somewhere sheltered or wrap them up—roots in pots freeze faster than in the ground. Harvest when most leaves dry and brown.
Troubleshooting Common Garlic Growing Problems
Garlic’s pretty low-maintenance, but when things go sideways, it’s usually down to soil, nutrients, timing, or pests.
Small Bulbs
Tiny heads often point to crowded beds or lousy soil. Garlic needs loose, fertile ground to really stretch out. Hard, packed dirt stunts roots and keeps bulbs small.
Double-check your spacing—3 to 4 inches between cloves, rows wide enough for air. Cramming them in just leads to competition and puny bulbs.
Nitrogen helps, but only at the right time. Early spring, when leaves are growing fast, is best. If plants look pale or stall out, a light side-dress before bulbs swell can help.
Let weeds get ahead and you’ll see smaller bulbs, too. Young garlic just can’t fight for resources—keep it weed-free early on.
Yellowing Leaves
Yellow leaves? Could be stress, low nutrients, or bugs. First, check soil moisture—garlic likes it steady but hates soggy roots. Poor drainage brings disease and weak plants.
Take a close look at the bulb base. Scars or a mushy, loose base might mean bulb mites. These pests usually start with yellow tips and slow decline.
Not enough nitrogen shows up as pale, uniform color on older leaves. A little boost in early spring can help, but skip heavy feeding once bulbs form.
Some yellowing’s normal as harvest nears—lower leaves drying out is just part of the process.
Garlic Not Forming Bulbs
Ever dig up garlic only to find a clump of leaves and no real bulb? Timing is almost always at fault. Those cloves need a solid stretch of cold—skip that, and you’ll just get skinny stalks. Warm soil in late planting? Forget about decent heads.
Best bet: tuck them in during fall, a week or two after your area’s first hard frost. That way, they get a head start on root growth before winter hits, and the chill they secretly crave.
Sunlight’s another make-or-break factor. If your patch is shaded, expect lackluster tops and, honestly, barely-there bulbs. Garlic’s a sun worshipper—give it anything less and it sulks.
And whatever you do, don’t get snip-happy with the leaves. Green growth is the engine for bulb development. Chop too soon and you’re pretty much guaranteeing disappointment at harvest.