
Stone, wood, brick, soil, concrete—moss will grab hold of just about any surface if you give it the right mix of shade, moisture, and a grippy texture. Getting moss to grow pretty much anywhere comes down to keeping things damp, cutting out direct sun, and pressing healthy moss tightly onto a rough, clean spot so it can latch on and start spreading. Once you tweak those basics, moss becomes surprisingly easy to manage.
This guide lays out what moss actually wants to survive, where to find healthy patches, and three solid ways to stick it down. You’ll see how to prep different materials so moss can get a foothold, how long you’ll wait for results, and how to sidestep headaches like drying out or lousy adhesion.
Where grass fizzles out—compacted soil, poor fertility, damp shade—moss jumps in. If you’re after a low-effort groundcover or a lush, green touch on stone, you can make it happen with a little planning.
Table of Contents
What Moss Needs To Grow
Light, water, texture, and a bit of acidity—get these in the right range, and you’ll see moss take off on wood, stone, soil, or concrete.
Shade Or Indirect Light
Harsh sunlight just fries moss. Most types do best under trees, tucked beside buildings, or clinging to the north side of a wall—places with filtered or indirect light.
Bright but indirect light for part of the day is ideal. That dappled effect you get under tree branches? Perfect. Even deep shade works for many woodland species, especially if the air stays humid.
Too much sun? Expect faded, brittle moss. If you’re stuck with a bright spot, crank up the watering and keep an eye on it. In hot climates, even a little morning sun can be rough on some varieties.
Pick moss that fits your site—some tolerate a bit of sun, but none want to bake all afternoon.
Constant Moisture
Water is the real engine here. Moss isn’t like most plants; it soaks up moisture right through its leaves.
Keep things consistently damp, especially for the first few weeks. A daily mist (sometimes two, if it’s dry) usually does the trick. The surface should feel moist, never soggy.
Cool, humid air is a plus. Moss naturally pops up in forests, near streams, or anywhere dampness lingers. Bad drainage? Moss doesn’t mind.
Don’t let it dry out while it’s getting established. Once it’s anchored, it can handle short dry spells, but steady moisture is what gives you that thick, green look.
Rough Or Porous Surfaces
Texture is a big deal. Slick, sealed surfaces make it tough for moss to stick and spread.
Go for materials that grab water and offer some grip. Unsealed concrete, brick, stone, old wood, and packed soil are all solid choices. These hold onto particles and moisture, both of which help moss settle in.
If it feels too smooth, rough it up with sandpaper or a wire brush. Clear away dirt, loose bits, and any old plant stuff before you start. A clean, gritty base makes a huge difference.
Press moss down hard. The closer the contact, the better it’ll anchor and the less likely the edges will dry out.
Mildly Acidic Conditions
pH matters more than you’d think. Most mosses lean toward acidic—usually below 5.5 pH.
Lawns like it neutral, but moss thrives when things get a bit sour. In acidic soil, moss outcompetes grass easily.
If you’re swapping turf for moss, check your soil. If it’s too sweet, add a little sulfur and retest after a few weeks. Don’t go overboard.
It’ll survive on neutral ground, but a touch of acidity really helps. When pH, water, light, and texture line up, moss does its thing with barely any fuss.
Where To Get Moss
Either scoop it up from spots where it already grows, or buy it from a nursery. Which way you go depends on how much you need and how patient you are.
Harvesting Moss From Your Yard
Check those damp, shady corners of your yard. Moss loves places where grass gives up—compacted earth, soggy spots, or up against north-facing walls.
Slide a flat shovel under the patch, lifting it with the thin soil layer attached. Keeping the base intact helps it take hold when you move it.
Don’t strip one area bare. Pick little bits from different places so you don’t wreck the original patch. Mist your harvest and keep it cool until you’re ready to set it down somewhere new.
Match the new spot to the old one—shade for shade, damp for damp. Moss from a dry patch won’t love being dumped in a swampy corner, and vice versa.
Buying Live Moss Or Moss Sheets
No moss in your yard? Local garden centers and specialty nurseries usually stock live moss, often sold in thin sheets like sod. These give you instant coverage—no waiting for weeks.
Pick a type that fits your site. Most projects work best with shade-lovers, especially under trees or between stones. Ask how it was grown and where, just to be sure it’ll handle your weather.
Keep it moist before you lay it down. Press it firmly onto prepped soil or a solid surface, then water it gently until it latches on.
How To Grow Moss On Anything (3 Proven Methods)
Stick it down, paint it on, or just set the stage and let moss show up on its own. It all comes back to shade, moisture, and a surface it can grab.
Method 1: Pressing Live Moss Onto Surfaces
Healthy, local moss is your best bet—especially if it’s already growing in similar conditions. Matching shade, moisture, and soil makes the transition smoother. Most like acidity (pH 5.0–5.5), but some handle neutral or even a bit alkaline.
Clear off dirt, weeds, and debris. For stone, brick, or concrete, rough it up with sandpaper. If you’re working with soil, pull up the grass and rake it flat and firm.
Lay moss pieces edge-to-edge like sod, pressing them down hard. Mist and press again to squash out air pockets.
Keep things damp for a few weeks—don’t let it dry out. Once it’s attached, you can ease up on the watering, but don’t let it bake.
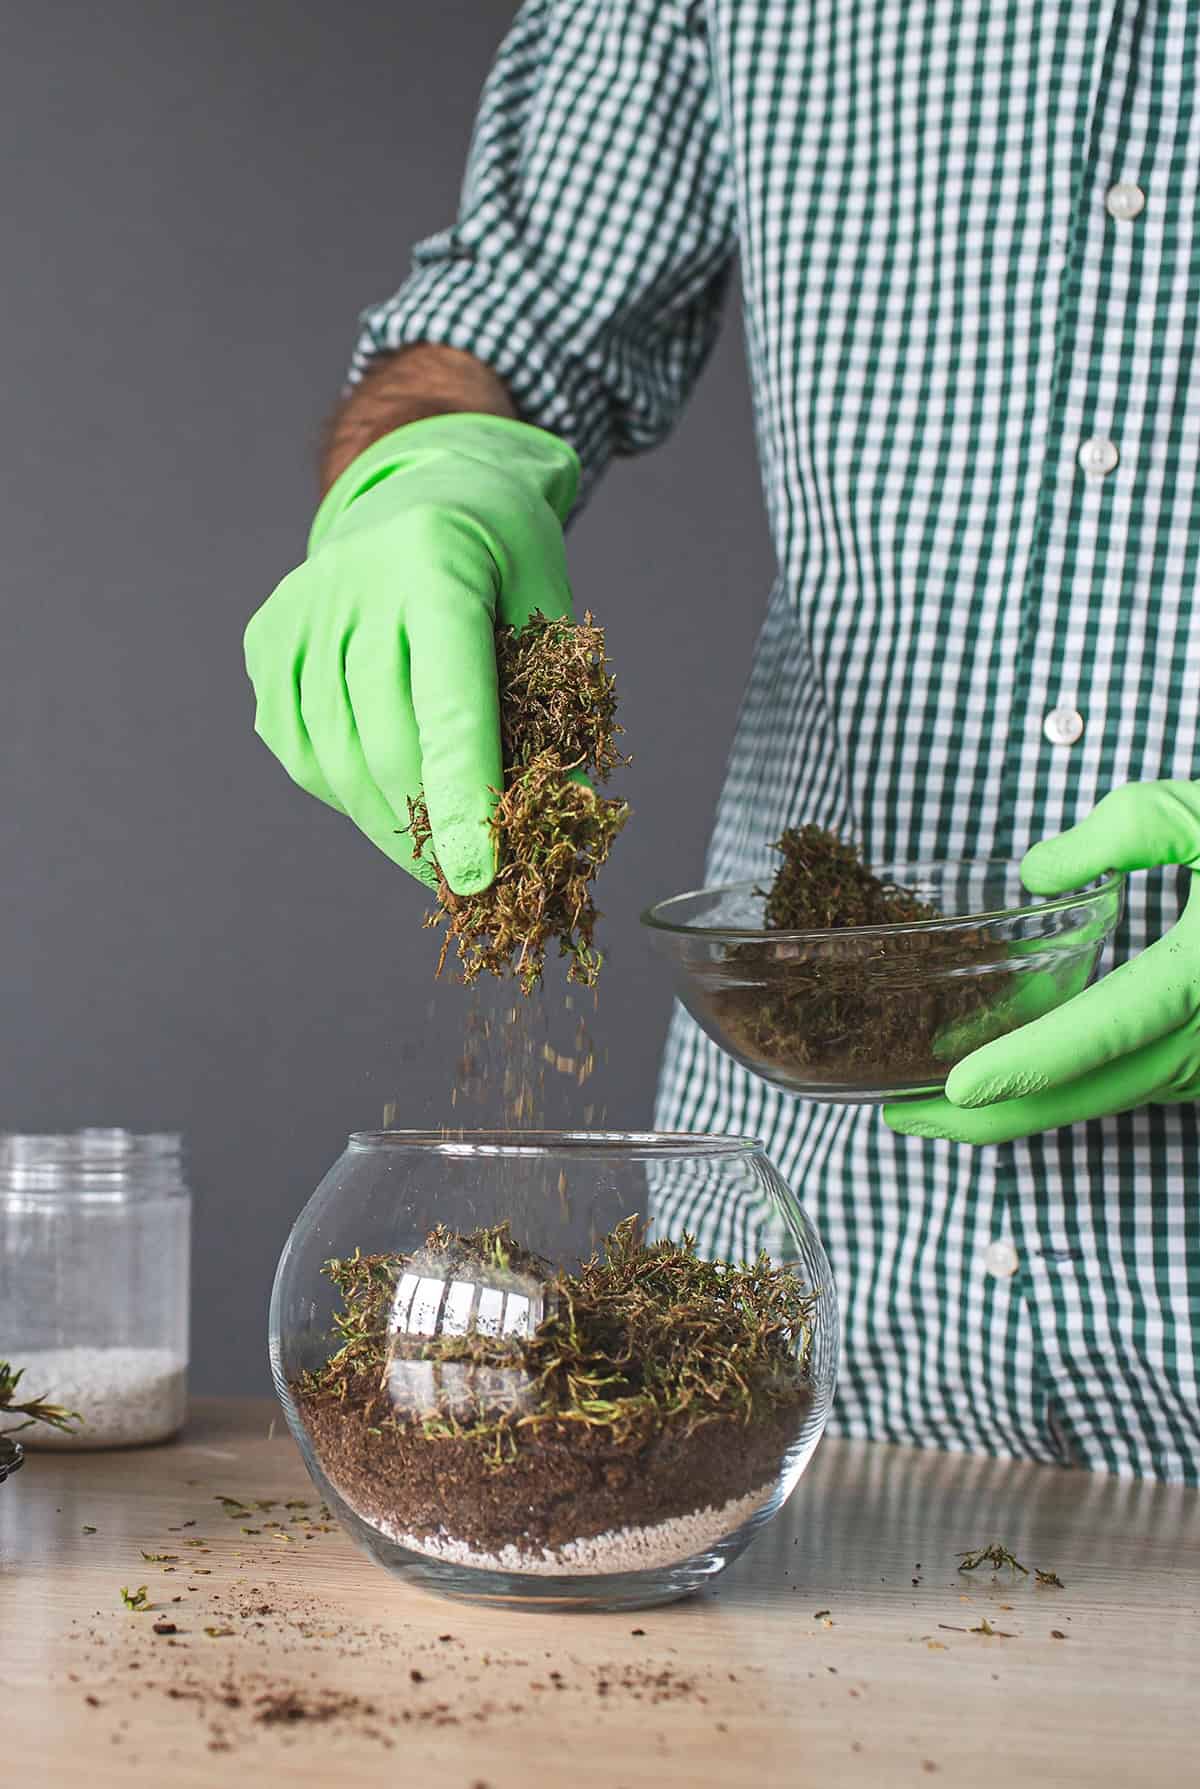
Method 2: The Moss Slurry (Buttermilk Or Yogurt Method)
Porous surfaces like stone, brick, or rough wood are where this method shines—especially if moss sheets won’t stay put. Rinse soil off fresh moss before blending.
Blend moss bits with plain yogurt or buttermilk until you get a thick, spreadable paste. If it’s too stiff, add a splash of water. Some folks swear by this, others not so much, but it’s worth a shot.
Brush the paste onto your target area in a thin layer, working it into cracks. Stick with shady, damp spots.
Mist daily to keep it moist. Usually, you’ll see a faint green haze before it thickens up. Results can be hit or miss, so patience and consistent moisture help.
Method 3: Encouraging Natural Moss Colonization
Sometimes, the best move is to just let moss do its thing, especially if it’s already nearby. Focus on dialing in the right conditions—shade, packed soil, and steady moisture.
Clear out grass, weeds, and leaves. Rake the soil smooth, then press it down. Moss thrives where grass can’t get a foothold.
Check and adjust pH if you want to nudge things along. Many shade species like it below 5.5.
Water lightly during dry spells and avoid trampling the area. Over time, spores drift in and moss creeps across the surface, especially if you’re close to trees or buildings.
How To Prepare Any Surface For Moss
Clean, textured, and damp surfaces are what you want. Moss won’t anchor to oily, dusty, or slick spots—prep matters more than you’d think.
Cleaning Dirt And Oils
Start by scrubbing away soil, grease, and debris. Moss doesn’t root like other plants; it just needs tight contact with whatever it’s growing on.
Use a stiff brush and water for stone, brick, metal, or concrete. For greasy patches, a dab of mild dish soap, then rinse thoroughly. Any soap left behind can slow things down, so rinse well.
On wood, strip off flaking paint or old sealers. Moss hates glossy or sealed surfaces. For plastic or metal, a wipe with rubbing alcohol after washing helps cut any leftover oils.
If you spot dust or loose bits after it dries, go over it again. That solid, clean base is what gives moss a fighting chance.
Roughening Smooth Materials
Slick surfaces are a pain for moss. If you’re working with concrete, glazed pots, glass, or polished stone, you’ll need to rough things up.
Coarse sandpaper works for pots and small pieces—just enough to feel gritty. For bigger stuff like walls, a wire or masonry brush does the job.
No need for deep gouges—just shallow scratches to boost surface area. Diluted vinegar can add a bit of grit to concrete, but wash it off well.
Untreated, rough wood is best. Moss will grow on a lot of things, but if it’s too smooth, you’ll wait forever for it to stick.
Pre-Soaking The Surface
Dry surfaces suck the life out of new moss. Give the area a good soak with clean water until it’s evenly damp. Porous stuff like brick or concrete might need a second round.
On hot or windy days, mist again right before you lay down moss. Shade and steady moisture are key—most mosses want low light and humidity, even the sun-tolerant types at first.
After placement, press the moss firmly into the damp surface. Keeping it moist and in close contact those first weeks is what gets you that first hint of green before it fills in.
How To Grow Moss On Different Surfaces
With the right species and a little control over shade, moisture, and texture, moss will latch onto almost anything. Fertilizer and deep soil? Not really necessary.
Rocks And Stone
Stone is a natural fit—holds moisture, stays stable. Pick rocks in partial to full shade. Sun-baked, south-facing stone dries out too fast, especially in hot places.
Scrub off dirt, grit, and algae with a stiff brush and water. Lay moss sheets on the damp stone, making sure they touch everywhere.
Mist daily for the first two or three weeks. Moss has no real roots, so it needs that moisture to settle in. Once it grips, you can let rainfall do most of the work.
Acidic conditions help—avoid lime nearby, since runoff can mess with pH.
Wood And Driftwood
Old, untreated wood is a great canvas for moss. Steer clear of pressure-treated boards; the chemicals slow things down. Driftwood, logs, and old posts in shade work best.
Soak the wood before adding moss. Push small patches into cracks and rough spots—fibers help grip. Smooth boards need more moisture and tighter contact.
Wood dries fast, so check it often and keep it damp for the first few weeks. If it’s catching too much sun or wind, move it to deeper shade until the moss settles in.
As wood breaks down, moss tends to wander into new areas. You can nudge it along by pressing fragments into any bare patches that show up.
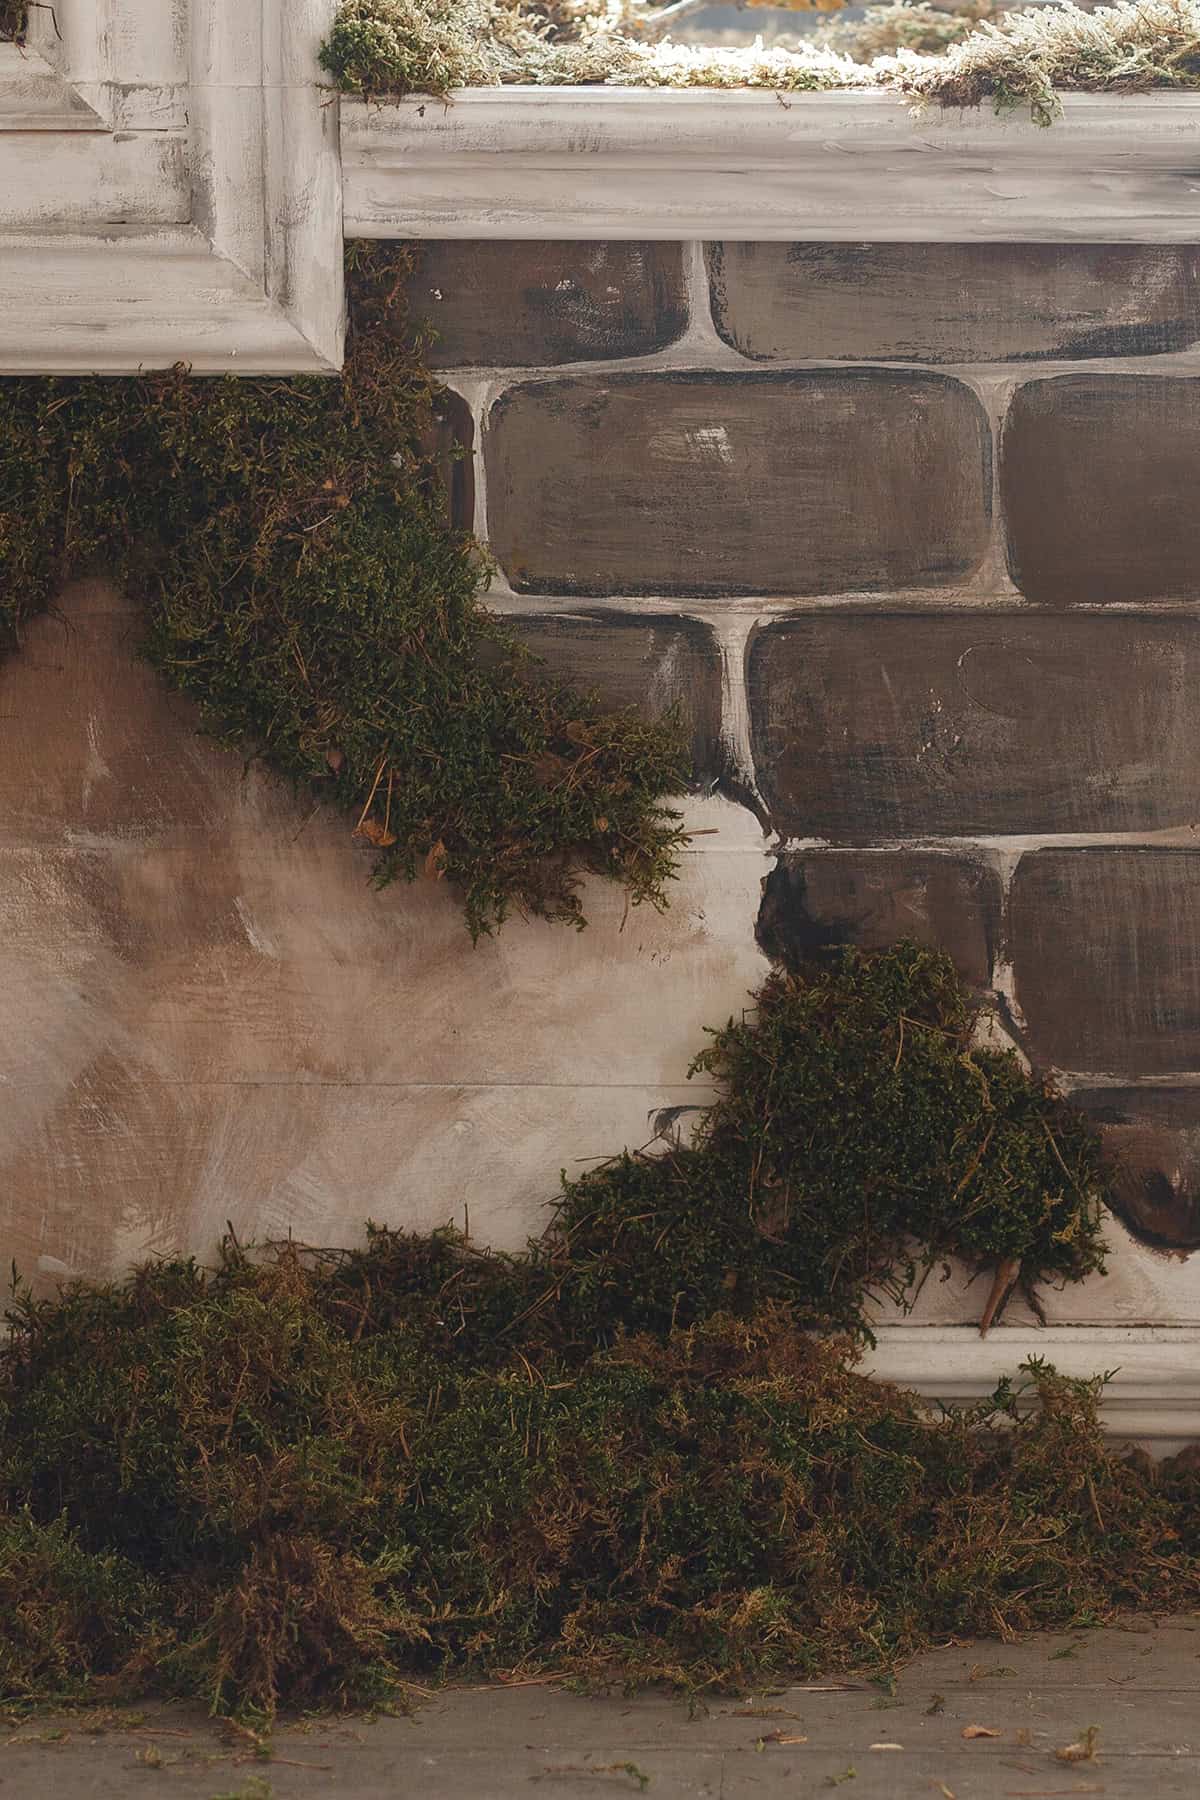
Brick And Concrete
Shade and low-traffic corners give moss on brick or concrete its best shot. Porous, unsealed surfaces invite the green to settle in, but constant scuffing or direct sun? Not so much. Any dust or salty crust needs rinsing off—skip the soapy stuff that lingers and messes with attachment. Push moss into the mortar lines and those little pockets where water lingers after rain.
Dry spells call for a daily or twice-daily mist, especially when summer heat bakes the surface. Sometimes a bit of shade cloth is the only thing keeping the concrete from getting too hot for moss to handle. If you notice the surface staying stubbornly alkaline, don’t expect much action; mosses lean toward the acidic side. Keep lime away and let rain and time do their work.
Garden Statues And Ornaments
Old stone or concrete figures in the garden can look like they’ve always belonged—if you get the moisture and shade right. Metal and plastic? They just don’t hold moss unless you’re in a rainforest, and even then, it’s a stretch. Clean off grime and flaking paint with water and a stiff brush, then leave the ornament somewhere cool and humid before getting started.
Those deep creases, edges, or textured spots grab onto moss best. Smoother curves take a bit more patience and pressure, plus regular misting to keep things going. After storms, you’ll want to peek and reattach any bits that came loose. Over time, the harsh outlines soften, giving statues that weathered, lived-in look—no damage, just character.
Tree Bark
Catch a tree in a shaded, damp spot, and moss will often settle in naturally. Forcing it on sun-baked or thirsty trunks? That’s just asking for disappointment. Matching moss species to your local conditions helps, but even then, rough bark with nooks and crevices is key. Smooth bark rarely gives enough grip.
Light misting during dry patches is usually enough, but don’t go overboard—soaking the trunk can do more harm than good. Moss isn’t a parasite, but soggy bark and poor airflow can stress the tree. If you see moss popping up on its own, best to let it spread naturally; those self-sown bits seem to stick around longer than anything you transplant.
Soil And Garden Ground
Shady, compacted spots where grass just won’t take often become moss havens. If you want a mossy patch, start by pulling up weeds and smoothing out the area. Press the surface down so it’s firm—loose soil dries out and the moss won’t stay put.
Lay moss sheets close together and push them down well. Water gently, making sure everything’s damp but not washed away. Keep things moist for a few weeks; moss needs time to knit itself to the earth. If you notice puddles hanging around, fix the drainage—moss likes damp, not swampy. Once it’s settled, keep foot traffic low so the mat stays thick and even.
How To Keep Moss Alive After Planting
Getting moss to stick around? It’s all about nailing the right balance of moisture, light, and humidity—especially at the start. Those first weeks are make-or-break; slack off, and it’s gone before you know it.
Watering And Misting Schedule
Right after planting, moss craves steady dampness. Light watering once or twice daily for the first couple weeks keeps it from drying out, but don’t drown it. Gentle spray only; anything stronger just blows the pieces away. Use your fingers to check—if it feels dry, up the misting. Once you see it settle in, cut back to a couple times a week, unless rain steps in. If it starts looking pale or crispy, more water usually perks it up.
Protecting Moss From Sun And Heat
Afternoon sun is brutal on moss. Tuck it behind a fence, tree, or wall where the light’s softer. Filtered shade is the sweet spot for most types. On stone or concrete, surfaces can get hot fast—touch it midday, and if it’s too warm for your hand, it’s probably too much for moss. Temporary shade cloth or moving potted pieces can make all the difference. In drier places, avoid those sun-baked exposures; morning light is gentler, and deep shade keeps the moss lush.
Keeping Humidity High
Moss drinks straight from the air and surface, not through roots. Dry breezes or indoor heating zap it in hours. Indoors, a humidifier nearby, or even a bathroom with good light, helps a ton. A tray of water close by bumps up the moisture, but don’t trap moss in a sealed box—it still needs to breathe.
Outside, crowding moss with other plants creates a pocket of humidity that sticks around longer than in open spaces. Sheltered nooks win out over exposed lawns every time. Keeping the air moist is half the battle for steady, healthy growth.
How Long Moss Takes To Grow
Expect a slow start—moss doesn’t rush. A few weeks in, you might spot it clinging on, but real coverage is a months-long thing. Dampness and shade speed things up, while dry spells or too much sun can stall progress for ages.
Transplanting mature moss patches gets you a head start compared to sowing spores, which can take all season just to show a hint of green. Building up to a thick, soft carpet? That’s a year or two, sometimes longer if the climate’s dry or the surface is too smooth.
Rough, natural surfaces—think old stone or bare earth—help moss anchor faster. Slick or sealed materials drag out the process. Choosing the right moss for your spot matters more than you’d think. If you keep things steady and damp, you’ll see that green mat thicken up, but honestly, patience is the real secret here.
Common Problems When Growing Moss
Moss is picky. If the light, moisture, or surface aren’t just right, you’ll run into trouble. Most issues can be fixed, but it’s rarely a set-and-forget deal.
Moss Turns Brown
Brown spots usually mean it’s thirsty. With no roots, moss pulls all its water from the surface, so even a short dry spell can leave it faded or brittle. Rethink your watering—light, regular misting works better than the occasional soak. If it’s getting scorched by the sun, move it or throw up some shade. Watch out for alkaline soil, too; moss prefers things on the acidic side, and any lime runoff can throw it off balance.
Moss Will Not Stick
If moss keeps sliding off, the surface is probably too smooth or sealed. It needs something to grab—roughen up slick spots with sandpaper or a wire brush before planting. Press it down firmly on a damp, textured base and keep it moist for weeks. Wind and rain can peel up new patches, so a bit of netting or burlap helps keep things in place until it’s anchored. Skip rich soil underneath; too much fertility just encourages weeds that muscle the moss out.
Moss Dries Out Or Dies
Dry spells spell trouble—moss just can’t handle long periods without moisture. Even the tough varieties, the ones that shrug off a day or two of dryness, start looking rough if the air gets too parched. Indoors, heaters and AC units don’t do moss any favors; they suck the humidity right out of a room.
Try boosting the moisture in the air around your moss. Some folks swear by humidity trays, while others tuck their moss into a terrarium and let the glass do the work. Just keep an eye on the substrate—it should feel damp, not soggy or swampy.
Too much water outside, though, flips the problem. Moss can handle a good rain, but if puddles linger for days, decay creeps in. If you notice water hanging around after storms, it’s probably time to rethink your yard’s drainage.
Deep shade changes the game. You’ll often see moss thriving where grass just gives up—think packed soil under trees or those dim corners of the yard. But in harsh, direct sun? Moss tends to fade fast unless you’re out there misting it like a hobby. It’s a delicate balance, honestly.